一、C/C++ 基本知识
- 防卫式声明
|
|
- 相比于#pragma once,上面的更好。
-
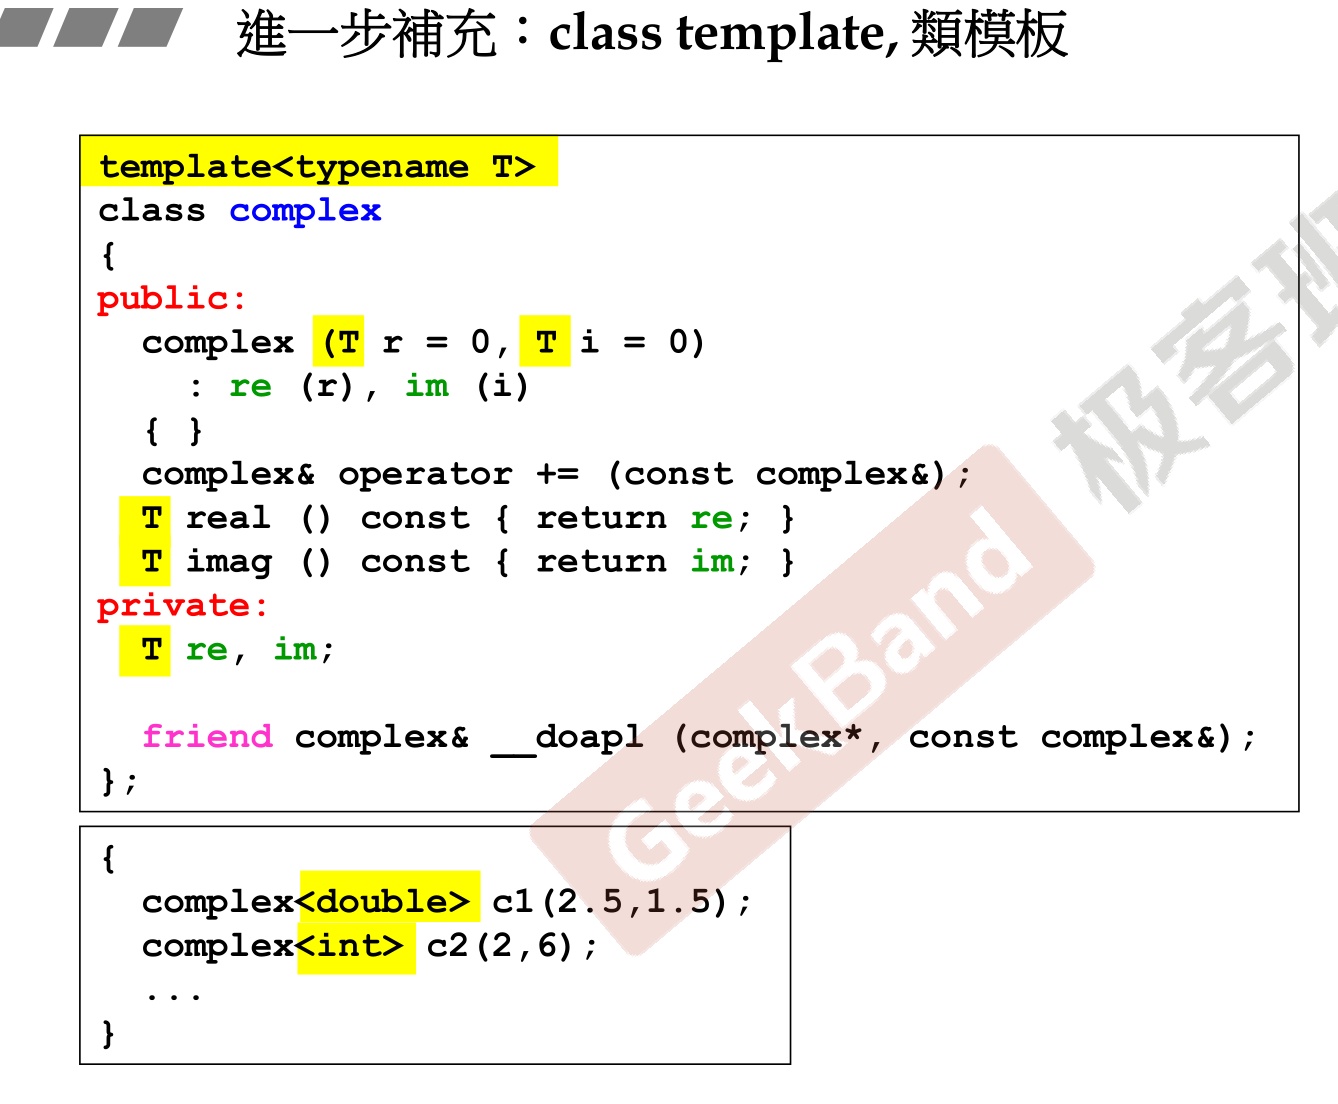
class template:防止写死,将来使用才规定。
-
C++类的两个部分,带指针的类和不带指针的类。
-
inline内联函数:在class body内定义完成,成为inline候选人,最后结果由编译器决定。
-
数据用private,函数用public,保证封装性。
-
构造函数
-
1 2 3complex(double x=0,double y=0):re(x),im(y){ } -
没有返回值
-
默认实参
-
初始列(尽量写在初始列里面)
-
不带指针的类,多半不用写析构函数
-
构造函数可以重载
-
构造函数放在private区,不多,但是一种有名的设计模式 Singleton,作用是只创建一个对象。
-
-
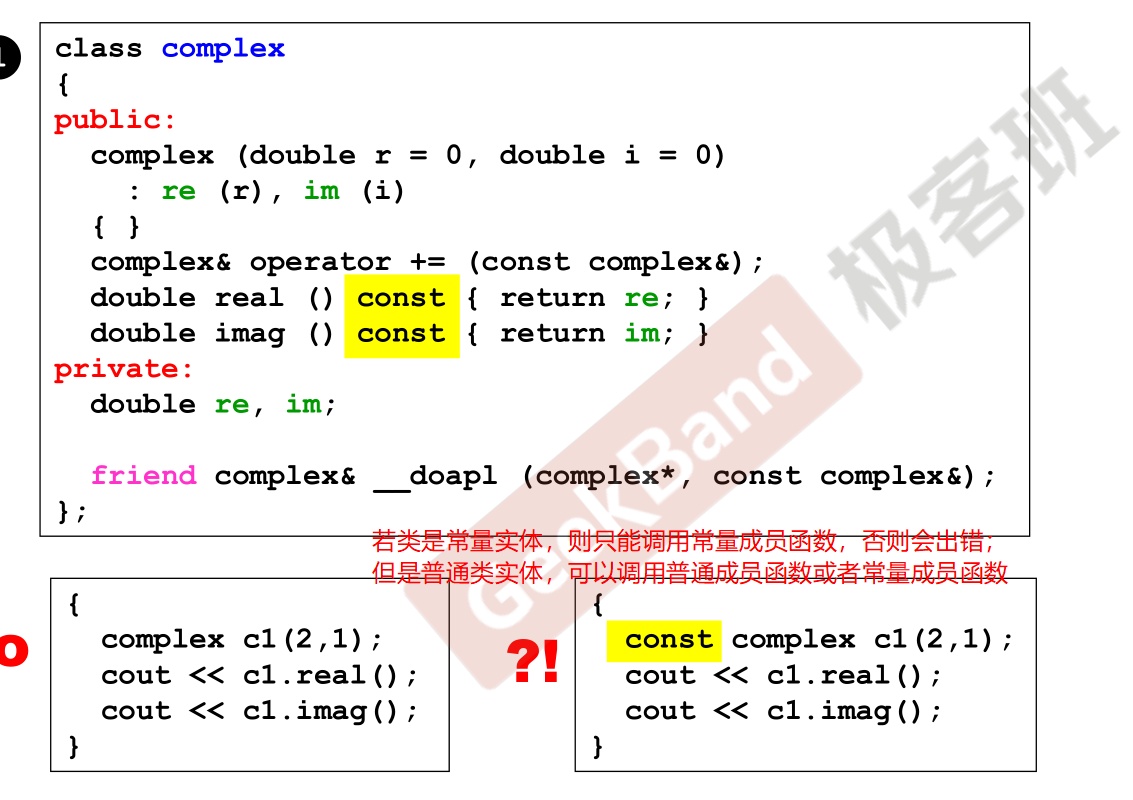
const常量成员函数
-
只读数据
-
不改变数据
-
1 2 3double real() const{ return re; }
-
-
参数传递
- 值传递
- 引用传递
- 指针传递
-
返回值传递
- 值返回
- 引用返回
- 指针返回
二、C语言的万能指针 void *
-
C语言中,
*类型就是指针类型。比如int *p,double *q,虽然是不一样的指针,但是大小却一样sizeof(p) == sizeof(q),其实很容易理解,因为他们都是同一种类型*类型的。C语言是强类型的语言。对类型的区分十分严格。对于一个指针而言,如果我们在前面规定了它的类型。那就相当于决定了它的“跳跃力”。“跳跃力”含义是指针+1时的跳跃字节数。int跳了4个字节,但是double跳了8个字节。基于这样的理解,我要对void *的定义是:void * 是一个跳跃力未定的指针
-
void*的作用是我们可以自己控制在需要的时候将它实现为需要的类型。这样的好处是:编程时候节约代码,实现泛型编程。 -
void *是一种指针类型,常用在函数参数、函数返回值中需要兼容不同指针类型的地方。我们可以将别的类型的指针无需强制类型转换的赋值给void *类型。也可以将void *强制类型转换成任何别的指针类型,至于强转的类型是否合理,就需要我们程序员自己控制了。 -
如下所示,冒泡排序的泛型编程
-
1 2 3 4 5 6 7 8 9 10 11 12 13 14 15 16 17 18 19 20 21 22 23 24 25 26 27 28 29 30 31 32 33 34 35 36 37 38 39 40 41 42 43 44 45 46 47 48 49 50 51 52 53 54 55 56 57#include <stdio.h> #include <string.h> static void Swap(char *vp1, char *vp2, int width) { char tmp; if ( vp1 != vp2 ) { while ( width-- ) { tmp = *vp1; *vp1++ = *vp2; *vp2++ = tmp; } } } void BubbleSort(void *base, int n, int elem_size, int (*compare)( void *, void * )) { int i, last, end = n - 1; char *elem_addr1, *elem_addr2; while (end > 0) { last = 0; for (i = 0; i < end; i++) { elem_addr1 = (char *)base + i * elem_size; elem_addr2 = (char *)base + (i + 1) * elem_size; if (compare( elem_addr1, elem_addr2 ) > 0) { Swap(elem_addr1, elem_addr2, elem_size); last = i; } } end = last; } } int compare_int(void *elem1, void *elem2) { return (*(int *)elem1 - *(int *)elem2); } int compare_double(void *elem1, void *elem2) { return (*(double *)elem1 > *(double *)elem2) ? 1 : 0; } int main(int argc, char *argv[]) { int num_int[8] = {8,7,6,5,4,3,2,1}; double num_double[8] = {8.8,7.7,6.6,5.5,4.4,3.3,2.2,1.1}; int i; BubbleSort(num_int, 8, sizeof(int), compare_int); for (i = 0; i < 8; i++) { printf("%d ", num_int[i]); } printf("\n"); BubbleSort(num_double, 8, sizeof(double), compare_double); for (i = 0; i < 8; i++) { printf("%.1f ", num_double[i]); } printf("\n"); return 0; }
三、C语言的字符数组的末尾\0问题
-
1.
char str[10] = “Hello”;此时我们只给str数组前5个元素赋值,剩余5个元素系统将会自动赋值为’\0’,当赋值个数会小于数组长度时系统都会自动添加’\0’.
-
2.
char str[5] = {‘h’,‘e’,‘l’,‘l’,‘o’};此时str的长度刚好==字符串长度,此时系统将不会自动添加’\0’,如果数组长度大于字符串长度则会自动添加’\0’. -
3.
char str[] = {‘H’,‘e’,‘l’,‘l’,‘o’};用此方法定义并初始化一个数组系统不会自动添加’\0’. -
4.
char str[] = "hello";系统会自动在后面添加‘\0’(对比一下3) -
注意:
char str[5]="hello"是错误的写法。应该定义长度为6. -
对于
sizeof操作符而言,会把最后的\0包含进去。但是strlen函数会遇到\0停止计数,同时最后减1. -
特例,
strlen输出错误结果。 -
1 2 3 4 5 6 7 8 9 10 11 12 13 14 15 16 17 18#include <bits/stdc++.h> using namespace std; using ll = long long; int main() { //一维数组 char str2[3] = {'a', 's', 'd'}; int cc = sizeof(str2); int dd = strlen(str2); cout << "sizeof = " << cc << endl; cout << "strlen = " << dd << endl; return 0; } /*输出 sizeof = 3 strlen = 4 */ -
从结果可以看出,字符满数组的话,
strlen的结果是错误的,因为没有给结束标志\0。长度是错的。 -
1 2 3 4 5 6 7 8char a[]="hello"; char b[]={'h','e','l','l','o'}; /* strlen(a),strlen(b)的值分别是多少? 前面分析过,strlen是求字符串的长度,字符串有个默认的结束符/0,这个结束符是在定义字符串的时候系统自动加上去的,就像定义数组a一样。数组a定义了一个字符串,数组b定义了一个字符数组。因此,strlen(a)=5,而strlen(b)的长度就不确定的,因为strlen找不到结束符。 */
四、C++ 数组和指针
一维数组和指针
-
数组名就是指针,但是数组名取地址和数组名不一样,表现在加+的地址。数组名或者数组指针或者数组第一个元素指针+1,以数组类型如int的大小加地址;但数组名取地址的指针+1,加的大小是整个数组的大小的下一个地址。
-
1 2 3 4 5 6 7 8 9 10 11 12 13 14 15 16 17 18 19 20 21 22 23 24 25 26 27#include <bits/stdc++.h> using namespace std; using ll = long long; int main() { int a[10] = {1, 2, 3, 4, 5}; int *p = a; auto *q = &a; int *m = &a[0]; for (int i = 0; i <= 1; ++i) { cout << "*p=a " << p + i << endl; cout << "a " << a + i << endl; cout << "&a[0] " << m + i << endl; cout << "&a " << q + i << endl; } return 0; } /*输出结果 *p=a 0x361fdd0 a 0x361fdd0 &a[0] 0x361fdd0 &a 0x361fdd0 *p=a 0x361fdd4 a 0x361fdd4 &a[0] 0x361fdd4 &a 0x361fdf8 //很明显这个加1,不一样 */ -
对于指针k而言,
*k++这种操作是没问题的,但是*array++是不允许的,这是因为array是数组的标识名,是常量,不能跟++。
多维数组和指针
-
首先要理解多维数组的形式,声明一个marray[][MAXSIZE],这里marray[i]每个都是指针,指向该行的首地址,但多维数组的列长度是确定的,这里与指针数组就区别开了。
-
多维数组实质存放在连续的地址空间,而不是逻辑上的多维矩阵,这意味着我们指针的操作可以变得非常强大。
-
声明如下的二维数组
-
1 2 3 4static char daytab[2][13] = { {0, 31, 28, 31, 30, 31, 30, 31, 31, 30, 31, 30, 31}, {0, 31, 29, 31, 30, 31, 30, 31, 31, 30, 31, 30, 31} }; -
这里的daytab,作为指针,指向的是数组{daytab[0],daytab[1]}的首地址;
-
而daytab[0]也是指针,指向的是{0, 31, 28, 31, 30, 31, 30, 31, 31, 30, 31, 30, 31}的首地址。
-
当我们要求取
daytab[0][0]时,是用**daytab。*daytab事实上就等于daytab[0],**daytab就是*daytab[0],所以这里其实是一个三级结构。 -
当我们要操作某一行某一列的时候,可以用
*(daytab+i)+j表示daytab[i][j]的地址,用*(*(daytab+i)+j)表示daytab[i][j]的值;而由于地址的连续性,使用*(*daytab + len*i + j)和*(*(daytab+i)+j)是完全等价的,这里len是二维数组的列数。
指针数组和数组指针
- 确定优先级——
()>[]>*; (*p)[n]:根据优先级,先看括号内,则p是一个指针,这个指针指向一个一维数组,数组长度为n,这是“数组的指针”,即数组指针;*p[n]:根据优先级,先看[],则p是一个数组,再结合*,这个数组的元素是指针类型,共n个元素,这是“指针的数组”,即指针数组。- p是数组,则就是指针数组;p是指针,则是数组指针。
数组指针
-
指向一个数组的指针,例如5个int,则指针++步进20字节。
-
1 2 3 4 5 6 7 8 9 10 11 12 13 14 15 16 17 18 19 20 21 22 23 24 25 26 27 28 29 30 31 32 33 34 35 36 37 38 39 40 41#include <bits/stdc++.h> using namespace std; using ll = long long; int main() { //一维数组 int a[5] = {1, 2, 3, 4, 5}; //定义一个指向有5个元素的数组的指针,此时的指针步进为20个字节=4*5 int (*p)[5]; //把数组a的地址赋给p,则p为数组a的地址,则*p表示数组a本身 p = &a; //%p输出地址, %d输出十进制 printf(" a = %p\n", a); //输出数组名,一般用数组的首元素地址来标识一个数组,则输出数组首元素地址 printf(" p = %p\n", p); //根据上面,p为数组a的地址,输出数组a的地址 printf(" *p = %p\n", *p); //*p表示数组a本身,用数组的首元素地址来标识一个数组 printf("&a[0]=%p\n", &a[0]); //a[0]的地址 printf("&a[1]=%p\n", &a[1]); //a[1]的地址 printf("p[0]= %p\n", p[0]); //数组指针的地址 printf("p[1]= %p\n", p[1]); //数组指针++的地址 printf("**p = %d\n", **p); //*p为数组a本身,即为数组a首元素地址,则*(*p)为值,当*p为数组首元素地址时,**p表示首元素的值1 printf("(*p)[0]=%d\n", (*p)[0]); //指向数组的第一个元素 printf("(*p)[3]=%d\n", (*p)[3]); //指向数组的第4个元素 return 0; } /*输出 a = 000000000362fe00 p = 000000000362fe00 *p = 000000000362fe00 &a[0]=000000000362fe00 &a[1]=000000000362fe04 p[0]= 000000000362fe00 p[1]= 000000000362fe14 **p = 1 (*p)[0]=1 (*p)[3]=4 */ -
指向二维数组
-
1 2 3 4 5 6 7 8 9 10 11 12 13 14 15 16 17 18 19 20 21 22 23 24 25 26 27 28 29 30 31 32#include <bits/stdc++.h> using namespace std; using ll = long long; int main() { //将二维数组赋给指针 int b[2][13] = { {0, 31, 28, 31, 30, 31, 30, 31, 31, 30, 31, 30, 31}, {0, 31, 29, 31, 30, 31, 30, 31, 31, 30, 31, 30, 31} }; int(*pp)[13]; //定义一个数组指针,指向含13个元素的一维数组 pp = b; //将该二维数组的首地址赋给pp,也就是b[0]或&b[0],二维数组中pp=b和pp=&b[0]是等价的 cout << "pp = " << pp << endl; cout << "b = " << b << endl; pp++; //pp=pp+1,该语句执行过后pp的指向从行b[0][]变为了行b[1][],pp=&b[1] cout << "pp+1 = " << pp << endl; cout << "b[1] = " << b[1] << endl; cout << "b[1][2] = " << b[1][2] << endl; cout << "*(*pp + 2) = " << *(*pp + 2) << endl; return 0; } /*输出 pp = 0x361fdb0 b = 0x361fdb0 pp+1 = 0x361fde4 b[1] = 0x361fde4 b[1][2] = 29 *(*pp + 2) = 29 */
指针数组
- 数组的元素是指针
|
|
char* 和 char[]的区别
-
1.
char*和char[]都可以表示字符串 -
2.
char[]可读可写,可以修改字符串的内容。char*可读不可写,写入就会导致段错误。 -
具体原因是因为:指针指向常量字符串(位于常量存储区),而常量字符串的内容是不可以被修改的,企图修改常量字符串的内容而导致运行错误。
-
1 2 3 4 5 6 7 8 9 10 11 12 13 14 15 16 17 18 19 20 21 22#include <bits/stdc++.h> using namespace std; using ll = long long; int main() { char *p = "China"; char q[] = "England"; cout << p << endl; cout << q << endl; //不可行 // p[2]='d';//字符串处于常量存储区,不可更改 q[2]='f'; cout << q << endl; return 0; } /*输出结果 China England Enfland */ -
sizeof(char*)得出指针的大小 -
sizeof(char[])得出数组的字节数 -
在C++语言中char str[]={'h','e','l','l','o'},只是赋值了字符串的内容,但是却没有赋值字符串的结束标志,所以,它不能将字符串"hello"正确赋给数组。
-
要想达到将字符串"hello"正确地初始化赋给数组、的目的,可以使用以下的三种方法中的任何一种,都可以达到目的:
char str[]={'h','e','l','l','o','\0'};char str[6]={'h','e','l','l','o'};char str[]="hello";
-
常见例题
-
1 2 3 4 5 6 7 8 9 10 11 12 13 14 15 16 17 18int main() { //A,错误,没有给结束标志 char str[] = {'h', 'e', 'l', 'l', 'o'}; str[0] = 'a'; //B 正确 char str[6] = {'h', 'e', 'l', 'l', 'o'}; string str2(str); //C 正确 char str[] = "hello"; str[0] = 'a'; //D,有问题,不可更改 str[0] char *str = "hello"; str[0] = 'a'; return 0; } -
1 2 3 4 5 6 7 8 9 10 11 12 13 14 15 16 17#include <iostream> using namespace std; int main() { char maxhub[] = "maxbub\0\0\x11\\"; cout << sizeof(maxhub) << "," << strlen(maxhub) << "," << sizeof(maxhub + 1); return 0; } /*输出结果 11,6,8 //原因 ①sizeof(maxhub) 表示包含最后的 \0 的字节数目,其中\x11表示一个字节,x11是16进制。所以有11个字节。 ②strlen(maxhub) 表示遇到第一个 \0 前的字节数。所以有6个。 ③maxhub+1 是一个 char* 类型,所以大小是指针的大小。计算机为64位。 */
五、结构体变量
-
结构体定义
1 2 3 4 5 6struct PersonInfo{ int index; char name[30]; short age; }; PersonInfo person1, person1; -
引用结构体成员有两种方式:一种是声明结构体变量,通过成员运算符
.进行引用;一种是声明结构体变量指针,通过指向运算符->引用。 -
面试必考——结构体内存对齐原则和计算方法
内存对齐
-
虽然所有的变量最后都会保存到特定的地址内存中去,但是相应的内存空间必须满足内存对齐的要求,主要基于存在以下两个原因:
-
硬件平台原因:并不是所有的平台都能够访问任意地址上的任意数据,某些硬件平台只能够访问对齐的地址,否则就会出现硬件异常错误。
-
性能原因:如果数据存放在未对齐的内存空间中,则处理器在访问变量时要做两次次内存访问,而对齐的内存访问只需要一次。
-
假定现在有一个 32 位微处理器,那这个处理器访问内存都是按照 32 位进行的,也就是说一次性读取或写入都是四字节。假设现在有一个处理器要读取一个大小为 4 字节的变量,在内存对齐的情况下,处理器是这样进行读取的:
-

-
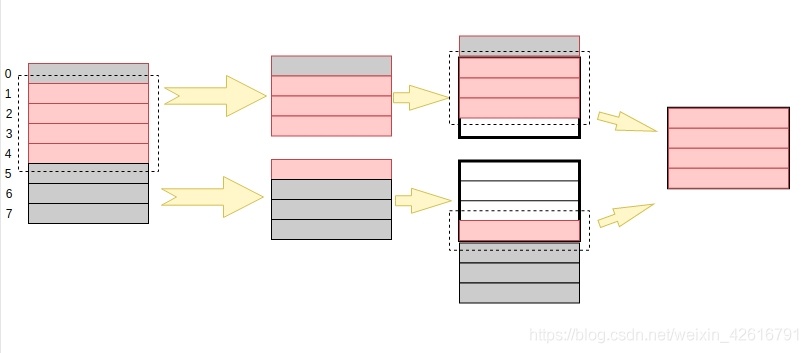
那如果数据存储没有按照内存对齐的方式进行的话,处理器就会这样进行读取:
-
-
对比内存对齐和内存没有对齐两种情况我们可以明显地看到: 在内存对齐的情况下,只需要两个个步骤就可以将数据读出来,首先处理器找到要读出变量所在的地址,然后将数据读出来。 在内存没有对齐的情况下,却需要以下四个步骤才能够将数据取出来:
- 处理器找到要读取变量所在的地址,也就是图中红色方块所在位置。
- 由于此时内存未对齐,处理器是 32 位的,一次性读取或者写入都是 4 字节,所以需要将 0-3 地址内的数据和 4-7 地址里的数据都取出来。
- 由于 0 - 3 地址范围的 0 地址里的数据不属于我们要读取的数据,因此将这一小块的数据进行移位,把 0 地址里的数据移出去;同理, 4 - 7 地址范围里的数据也要进行移位,保留 4 地址里的数据
- 合并移位之后的数据,得出结果
通过上述的分析,我们可以知道内存对齐能够提升性能,这也是我们要进行内存对齐的原因之一。
-
-
-
对齐原则
- 1.结构体各成员变量的内存空间的首地址必须是“对齐系数”和“变量实际长度”中较小者的整数倍。
- 2.对于结构体来说,在其各个数据都对齐之后,结构体本身也需要对齐,即结构体占用的总大小应该为“对齐系数”和“最大数据长度”中较小值的整数倍。
- 3.结构体作为成员:如果一个结构里有某些结构体成员,则结构体成员要从其内部最大元素大小的整数倍地址开始存储。
-
在给定了基本原则之后,我们通过一个例子来说明结构体的内存对齐,假定当前的处理器是 32 位的,对齐系数为4。结构体如下:
-
1 2 3 4 5 6 7 8 9 10struct data_test { char a; /*本身大小 1 字节*/ short b; /*本身大小 2 字节*/ char c[2]; /*数组单个成员 1 字节*/ double d; /*本身大小 8 字节*/ char e; /*本身大小 1 字节*/ int f; /*本身大小 4 字节*/ char g; /*本身大小 1 字节*/ }data[2]; -
根据我们刚刚给出的第一条对齐原则,先确定出每个变量的存储位置,变量存储方式是小端对齐,为了看起来更加形象,以 16 个字节作为一行来表示变量的存储位置(这里所说的存储位置是指相对于结构体起始地址地偏移)。
-

-
当结构体数组相邻排列的时候,需要考虑原则2
-

-
这里需要注意的是,上述原则针对的是结构体占用的总大小,而不是结构体的首地址,所以,在结构体本身还没有对齐的情况下,data[0] 的大小是 25 个字节,但是根据上述原则,在对齐系数为 4 的前提下,结构体大小应该是 4 的整数倍,所以要对结构体进行所占内存进行填充,因此:data[0] 最终的大小是 28 字节,结构体数组 data 的大小为 56 字节
-
1 2 3 4默认对齐值: Linux 默认#pragma pack(4) window 默认#pragma pack(8) 可以通过预编译命令#pragma pack(n),n=1,2,4,8,16来改变这一系数,其中的n就是指定的“对齐系数”。
六、联合体/共生体变量
-
union定义
1 2 3 4 5 6 7 8 9union myUnion{ int i; char ch; float num; double sum; }u; u.i=50; u.ch='a'; u.num=50.26; -
联合体没有引用,就如上面的不能直接引用u。
-
联合体的每个成员分别占用自己的内存单元,联合体变量所占的内存大小等于最大的成员占用的内存大小。一个联合体变量不能同时存放多个成员的量,某一时刻只能存放一个成员的量,也就是最后赋予它的值。联合体变量的地址和他的各成员地址都是同一地址。
七、枚举类型
-
1 2 3enum weekday{ sunday=0,monday=1,tuesday=2,wednesday=3,thursday=4,friday=5,saturday=6 }; -
如果不加=0,默认也是从0开始,但你可以设置从不同的地方开始。
-
声明枚举类型之后,可以用它定义变量
-
但是枚举变量只能是枚举类型大括号里面的成员;
1 2 3 4 5 6 7 8 9 10 11 12enum weekday { sunday, monday, tuesday, wednesday, thursday, friday, saturday }; weekday d = saturday; cout << d << endl; -
一个整数不能给枚举类型赋值。
1 2//但是以下是错误的 weekday dd=2;
-
八、面向对象OO
- Object Oriented
- 面向对象编程OOP——Object Oriented Progarmming
- 特点:
- 封装
- 继承
- 多态
九、网络通信
-
1.OSI参考模型
Open System Interconnection——开放式系统互联,分为七层结构
- 第一层:物理层
- 第二层:数据链路层
- 第三层:网络层
- 第四层:传输层
- 第五层:会话层
- 第六层:表示层
- 第七层:应用层
-
2.TCP/IP参考模型
分为四层结构:
- 第一层:数据链路层
- 第二层:网络层
- 第三层:传输层
- 第四层:应用层
-
3.IP地址
-
4.数据包格式
- 4.1 IP数据包
- 4.2 TCP数据包
- 4.3 UDP数据包
- 4.4 ICMP数据包
-
5.套接字
套接字实际上是一个指向传输提供者的句柄,可分为以下三种:
- 原始套接字:接收数据有IP头,在WinSock2规范提出;
- 流式套接字:TCP,面向连接,可靠;
- 数据包套接字:UDP,无连接,不可靠。
windows提供的套接字简称为WinSock。
十、C++ Primier学习笔记
chap2 变量和基本类型
-
类型转换
- 非布尔转为布尔:0为false,其他为true
- 布尔转为非布尔:false为0,true为1
- 浮点数转为整数:省去小数部分
- 整数转为浮点数:小数部分为0,超出范围有精度损失
- 赋予无符号类型超出表示范围的值时,结果是值对无符号类型总数取模后的余数
- 赋予有符号类型超出表示范围的值时,结果是未定义undefined
-
无符号类型不会小于0,关系到循环的写法
- 当存在有符号和无符号数时,有符号会转化为无符号数
-
1 2 3 4 5 6024 //八进制 0x24 //十六进制 24 //十进制 \r //回车,光标回到行首 \n //换行,光标下一行 \t //tab,制表 -
局部作用域变量允许重定义全局变量,并且隐式覆盖了全局变量,要调用全局变量,要么局部作用域没有同名的变量,要么加全局作用域符::,例如::reused
-
引用reference
1 2 3 4 5 6 7 8 9//一般我们说的都是左值引用,在变量左边加&。其实还有右值引用,后讲 //引用不能用于定义变量,引用只是变量的别名 //引用必须初始化 int i=1024; int &j=i;//j是i的引用 int &z;//错误,引用必须初始化 //空指针nullptr int *poi=nullptr; //NULL也可以,但nullptr是c11的新标准 等于 int *poi=0; -
指针pointer
- 在条件表达式里面,如果为空指针(即指针的值为0),为false,其他为true
1 2 3 4 5//注意指针类型和对象类型的一致性 int *p; int i=50; p=&i; *p=5; -
1 2 3/*对于& *来讲 前面有类型名,就是声明,即作为引用或指针 不紧随类型名出现,就是操作符,即取地址和解引用 -
void *指针
一种特殊的指针类型,可以存放任意类型对象的地址
-
指向指针的指针
1 2 3int val=5; int *p=&val; int **pi=&p; -
指向指针的引用
引用本身不是一个对象,因此不能定义指向引用的指针,但是可以定义指向指针的引用。
从右往左阅读r的定义,离r越近的符号对r有最直接的影响,即r是一个引用。
1 2 3int i=45; int *p; int *&r=p;//r是对指针p的引用 -
const常量和const引用
1 2 3 4 5 6 7 8 9//对const的引用,即指向常量的引用,简称为常量引用 const int &r1=42; //常量引用可以引用非const类型 //但const的引用只能是常量引用 int i=50; const int &r2=i;//正确 int &r3=r2*2;//错误 -
指针和const
- 指向常量的指针(类似常量引用)
1 2 3 4 5//指向常量的指针,指针可变,可指向const或者普通类型,但同时const的指针只能是指向常量的指针,和常量引用类似。当指向const时,即为底层const。 const int ci=45; const int *p2=&ci;//底层const int c3=42; p2=&c3;//可以指向普通类型,同时p2可变-
常量指针,const指针
与命名符最近的是const,所以是常量,然后才是指针,即这个指针的地址不可变,但这不意味着不能通过指针修改其所指对象的值,能否这样做完全依赖该常量指针所指的对象是否为const类型,是则不能更改。
1 2int err=0; int *const durRrr=&err;//顶层const -
用顶层const表示指针本身是常量,即常量指针;
用底层const表示指针所指的对象是一个常量,即指向常量的指针。
-
constexpr变量
-
使得变量为常量
-
常见误区
1 2const int *p=nullptr;//p是指向常量int的指针 constexpr int *q=nullptr;//q是指向int的常量指针, 等于int *const q
-
-
类型别名和指针常量的误区
-
using 、typedef
1 2typedef double wages; using SI=Sales_items; -
误区,使用了typedef后与顶层const不一样
1 2 3typedef char *pstring;//此处的*是声明符 const pstring cstr=0;//cstr是指向char的常量指针,切记!!! const pstring *ps;//ps是一个指针,他的对象是指向char的常量指针。
-
-
auto和decltype
- auto:自动分析表达式的类型,一般使用在lambda表达式里面,auto &a, 一般传入引用
- decltype:选择并返回操作数的数据类型。
-
struct
-
预编译
chap3 字符串、向量和数组
-
1 2#include <iostream> using namespace std; -
头文件不应包含using,一般在cpp内使用
-
string可变字符串
-
size_type(一般是无符号)
-
1 2 3 4string str("some"); for (auto c:str){ cout<<c<<endl; }
-
-
vector向量
- 不能用下标添加数据(Opencv的mat类可以)
- 但可以在原元素上用下标进行修改,即内存本身已经存在了。
-
size_type(一般是无符号)
- 初始化
- vector< T> v3(n,value)
- vector< T> v3{a,b,c...}
- vector< T> v3=v2
1 2 3 4 5 6 7 8 9 10vector<int> v; v.size();//类型为size_type//无符号 v.empty(); v.push_back(t); // vector<int> v{1,2,3,4,5}; for (auto &i:v){ i*=i;//i是引用 } - 初始化
-
迭代器
-
习惯使用!=和==判断条件。因为不是所有的迭代器都有<的运算
-
iterator
-
*it返回迭代器it所指元素、对象的引用。
-
++iterator
-
--iterator
-
1 2 3for (auto it=s.begin();it!=s.end(),++i){ *it=toupper(*it); }
-
-
数组
-
数组的长度必须是常量表达式(尽管有些编译器允许非常量,但为了保险,还是用常量)
1 2constexpr unsigned sz=42; int *pz[sz]; -
不允许拷贝和赋值——与vector不一样。
-
数组下标的类型是size_t,一种和机器相关的无符号类型
-
1 2 3 4unsigned scores[11]={}; for (auto i:scores){ cout<<i<<endl; } -
1 2 3 4 5 6 7 8 9 10 11 12 13/* 现有数组a[10]; 数组名a: 数组名可以作为数组第一个元素的指针。我们由数组和指针的关系知道,a代表这个地址数值,它相当于一个指针,指向第一个元素(&a[0]),即指向数组的首地址。数组中的其他元素可以通过a的位移得到,此时的进阶是以数组中单个的元素类型为单位的,即a+i= & a[i]。 数组名取地址&a: 对于一个普通的变量b,&b是指用取地址符号取得变量b的存放地址;a在内存中没有分配空间,只对数组a的各个元素分配了存储空间,此处数组名字a显然不是普通的变量,&a也不代表所取a的存储地址。 &a在数值上等于&a[0],也等于a。此时,&a数值上等于整个数组的起始位置地址,含义上代表整个数组所占内存的大小,因为它的进阶单位是整个数组的字节长度,(&a + 1)等于的是数组结束之后的下一段的起始位置地址。 数组首地址&a[0]: 这个就是取地址的最直接的应用,a[0]在内存中实际分类存储空间,而&a[0]就是取该存储空间的地址,这与对于任意满足范围的i,&a[i]就是取第i个元素的存储地址一样。 */ -
数组指针也是迭代器
1 2 3 4 5 6 7int a[]={0,1,2,3,4}; int *beg=begin(a); int *en=end(a); while(beg!=en){ cout<<*beg<<endl; ++beg; }
-
-
string和C风格字符串
1 2 3 4 5 6//C风格字符串 const char ca[]={'h','e','l','l','o'}; const char *cap=ca; //转换 string s("hello!"); const char *str=s.c_str();
chap4 表达式
-
sizeof():返回字节数
-
位操作
-
条件运算符 ?:
-
类型转换
-
隐式转换
-
强制转换
- static_cast
- const_cast
- dynamic_cast
- reinterpret_cast
-
1double slope=static_cast<double>(j)/i;
-
chap5 语句
- if
- 传统for
- 范围for语句
- do while语句:无论条件,都会先执行一次
- while语句
- switch case default break
- break语句:终止离他最近的while、do while 、for、 switch语句,并执行下一语句。
- continue语句:终止本次迭代,开始下一次迭代
- goto语句:无条件跳转本函数其他语句,尽量不用
- throw
- try catch
chap6 函数
-
函数参数
- 传值形参
- 指针传参:两个指针不一样,但指向同一个对象
- 引用传参:避免拷贝
-
数组形参
- 实际传递的是第一个元素的地址,同时应传递数组大小的形参
- P194三种管理形参的方式
-
数组引用形参
1void print(int (&arr)[10]); -
return返回值
- 不要返回局部变量的引用和指针
- 返回数组指针
函数指针
-
可以利用typedef进行函数指针的重命名
-
1 2 3 4 5 6 7 8 9 10 11 12 13 14 15 16 17 18 19 20 21 22 23#include <iostream> #include <iomanip> typedef int (*pfun)(int, int);//此时pfun是一种类型 using namespace std; int avg(int a, int b) { return int((a + b) / 2); } int main() { pfun PFUN;//PFUN是一个变量 int a = 50; int b = 60; int ret, ret2; int (*pFun)(int, int); pFun = avg; PFUN = avg; ret = (*pFun)(a, b); ret2 = (*PFUN)(a, b); cout << "ret=" << ret << endl; cout << "ret2=" << ret2 << endl; return 0; } -

-
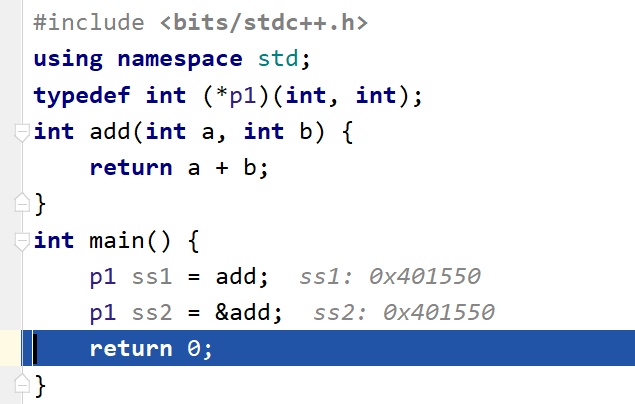
函数名本身就是指针,编译器在调用函数指针的时候会直接把函数名转为函数指针,而且直接不加
(*p)用函数指针调用函数也可以 -
1 2 3 4 5 6 7 8 9 10 11 12 13#include <bits/stdc++.h> using namespace std; typedef int (*p1)(int, int); int add(int a, int b) { return a + b; } int main() { p1 ss1 = add; p1 ss2 = &add;//两个地址是一样的 cout<<ss1(1,2)<<endl; cout<<(*ss2)(3,4)<<endl;//都可以调用 return 0; } -
-
void (*signal(int sig, void(*func)(int)))(int);如何理解 -
可以看成是一个signal()函数,它自己是带两个参数(一个为整型,一个为函数指针),而这个signal()函数的返回值也为一个函数指针;这个函数指针指向一个带一个整型参数并且返回值为void的一个函数。
-
1 2 3 4 5 6 7 8 9 10 11 12 13 14 15 16 17 18 19 20 21 22 23 24 25 26 27//函数定义: #include <iostream> using namespace std; typedef void(*f_ptr)();//f_ptr是一个类型,函数指针 void aaa() { cout << "check out" << endl; } // void (* f())() f_ptr f() //返回值是函数指针的函数定义, 语义一目了然 { return aaa; } int main() { // void (*(*f_ptr)())() = f; // f_ptr()(); f_ptr(*ff)() = f; //返回函数指针的函数指针 ff()(); return 0; } /* *输出 *check out **/
chap7 类
-
1.数据成员初始化
-
c++17之后支持直接赋值初始化
-
默认构造函数初始化
-
带参数的构造函数初始化
-
初始化列表
1 2 3 4 5 6 7class foo{ public: foo(string s, int i):name(s),id(i){};//初始化列表 private: string name; int id; };
-
-
2.const成员变量
- const 成员变量的用法和普通 const 变量的用法相似,只需要在声明时加上 const 关键字
- 初始化 const 成员变量只有一种方法,就是通过构造函数的初始化列表。
-
3.const成员函数
-
const加在小括号后面花括号前面。
-
const 成员函数可以使用类中的所有成员变量,但是不能修改它们的值,这种措施主要还是为了保护数据而设置的。const 成员函数也称为常成员函数。
-
1 2 3 4 5 6 7 8 9 10 11 12 13 14 15 16 17 18 19 20 21 22 23 24 25 26 27 28class Student{ public: Student(char *name, int age, float score); void show(); //声明常成员函数 char *getname() const; int getage() const; float getscore() const; private: char *m_name; int m_age; float m_score; }; Student::Student(char *name, int age, float score): m_name(name), m_age(age), m_score(score){ } void Student::show(){ cout<<m_name<<"的年龄是"<<m_age<<",成绩是"<<m_score<<endl; } //定义常成员函数 char * Student::getname() const{ return m_name; } int Student::getage() const{ return m_age; } float Student::getscore() const{ return m_score; } -
必须在成员函数的声明和定义处同时加上 const 关键字。char *getname() const和char *getname()是两个不同的函数原型,如果只在一个地方加 const 会导致声明和定义处的函数原型冲突。
-
注意是在函数尾部加const,此时才表示是常成员函数;
-
如果是在函数头部加const,表示返回的是常量。
-
-
4.拷贝构造函数
-
拷贝构造函数的参数是一个已经初始化的类对象
-
输入参数为常量左值引用
-
1 2 3 4 5CPerson::CPerson(const CPerson ©Person){ m_iIndex=copyPerson.m_iIndex; m_age=copyPerson.m_age; m_salary=copyPerson.m_salary; } -
以上只是示例,实际上成员数据一般设置为private,并不可以直接访问得到。
-
-
5.析构函数
-
6.普通成员函数
-
7.内联成员函数
-
8.静态数据成员
-
定义静态数据成员通常在类的外部进行初始化
-
类和类的对象都可以直接访问同一个静态数据成员
-
静态数据成员可以作为普通成员函数的默认参数,但是普通数据成员不可以
-
1 2 3 4 5 6 7 8 9 10 11 12 13 14 15 16 17 18 19 20 21 22 23 24 25 26 27 28 29 30 31 32 33 34 35 36#include <iostream> #include <iomanip> using namespace std; class MyClass { private: /* data */ static int data; public: MyClass(/* args */); ~MyClass(); void change(int param); }; int MyClass::data = 50; void MyClass::change(int param) { cout << "change forward: " << data << endl; data = param; cout << "change later: " << data << endl; } MyClass::MyClass(/* args */) { } MyClass::~MyClass() { } int main() { MyClass p1; p1.change(20); p1.change(80); MyClass p2; p2.change(15); p1.change(25); return 0; } -

-
-
9.静态成员函数
-
静态成员函数只能访问类的静态数据成员,不能访问普通的数据成员
-
在函数前加static修饰
-
1 2 3 4 5 6 7 8 9 10 11 12 13 14 15 16 17class MyClass { private: static int data; public: MyClass(); ~MyClass(); static void show_static(); //静态成员函数 void change(int param); }; int MyClass::data = 50; //定义的时候不用加static void MyClass::show_static() { cout << data << endl; }
-
-
10.this指针
-
11.友元函数
-
可以使得普通函数具备类似成员函数一样的能力访问private、protected成员数据。
-
1 2 3 4 5 6 7 8 9 10 11 12 13 14 15 16 17 18 19 20 21 22 23 24 25 26 27 28 29 30 31 32 33 34 35 36 37#include <iostream> #include <iomanip> using namespace std; class MyFriClass { private: int width; int height; public: MyFriClass(int a, int b); ~MyFriClass(); //设置全局函数 friend void calc_area(const MyFriClass &friendclass); }; void calc_area(const MyFriClass &friendclass) { cout << "area= " << friendclass.width * friendclass.height << endl; } MyFriClass::MyFriClass(int a, int b) { width = a; height = b; } MyFriClass::~MyFriClass() { } int main() { MyFriClass p1(25,20); calc_area(p1); return 0; } -

-
-
12.友元类和友元方法
-
类的私有数据和函数只有该类可以访问,但有时候当其他类也可以访问该类的私有数据时,可以提高很大的效率和便利。
-
为此,C++提供了友元类和友元函数。
-
当用户希望一个类A可以完全访问另外一个类B时,可以将类A设置为类B的友元类
1 2 3 4 5 6 7 8 9class A{ ... }; class B{ private: ... public: friend class A;//A可以访问B的私有部分 }; -
当用户希望一个类A的成员函数可以完全访问另外一个类B时,可以将类A的成员函数设置为类B的友元函数
1 2 3 4 5 6 7 8 9 10 11 12 13 14 15 16 17 18 19 20 21 22 23 24 25 26 27 28 29 30 31 32 33 34 35 36 37 38 39 40 41 42 43 44 45 46 47 48 49 50 51 52 53 54 55 56 57 58 59//注意点:类A应该先定义,但是类B要先声明 #include <iostream> #include <iomanip> using namespace std; //必须将先定义的类的成员函数作为后定义类的友元函数,调换顺序会出现语法错误 class CItem;//类B class CList//类A { private: CItem *m_pItem; public: CList(); ~CList(); void OutputItem(); }; class CItem { friend void CList::OutputItem(); private: int data; public: CItem(int input); ~CItem(); }; CItem::CItem(int input) { data = input; } CItem::~CItem() { } CList::CList() { m_pItem = new CItem(55); } CList::~CList() { delete m_pItem; m_pItem = nullptr; } void CList::OutputItem() { cout << "item data:" << m_pItem->data << endl; } int main() { CList P1; P1.OutputItem(); return 0; }
-
-
13.命名空间
chap8 继承和派生
-
1.访问权限
-
继承方式 基类的public成员 基类的protected成员 基类的private成员 继承引起的访问控制关系概括 public继承 仍为派生类的public成员 仍为派生类的protected成员 派生类不可见 基类的非私有成员在子类的访问属性不变,私有成员不可访问 protected继承 变为派生类的protected成员 变为派生类的protected成员 派生类不可见 基类的非私有成员成为子类的保护成员,私有成员不可访问 private继承 变为派生类的private成员 变为派生类的private成员 派生类不可见 基类的非私有成员成为子类的私有成员,私有成员不可访问 -
2.总结
1 2 3 4 5 61. 基类的 private 成员在派生类中是不能被访问的,如果基类成员不想在类外直接被访问,但需要在派生类中能访问,就定义为 protected 。可以看出保护成员限定符是因继承才出现的。 2. public继承是一个接口继承,保持is-a原则,每个父类可用的成员对子类也可用,因为每个子类对象也都是一个父类对象。 3. protetced/private继承是一个实现继承,基类的部分成员并非完全成为子类接口的一部分,是 has-a 的关系原则,所以非特殊情况下不会使用这两种继承关系,在绝大多数的场景下使用的都是公有继承。 4. 不管是哪种继承方式,在派生类内部都可以访问基类的公有成员和保护成员,基类的私有成员存在但是在子类中不可见(不能访问)。 5. 使用关键字class时默认的继承方式是private,使用struct时默认的继承方式是public,不过最好显示的写出继承方式。 6. 在实际运用中一般使用都是public继承,极少场景下才会使用protetced/private继承。 -
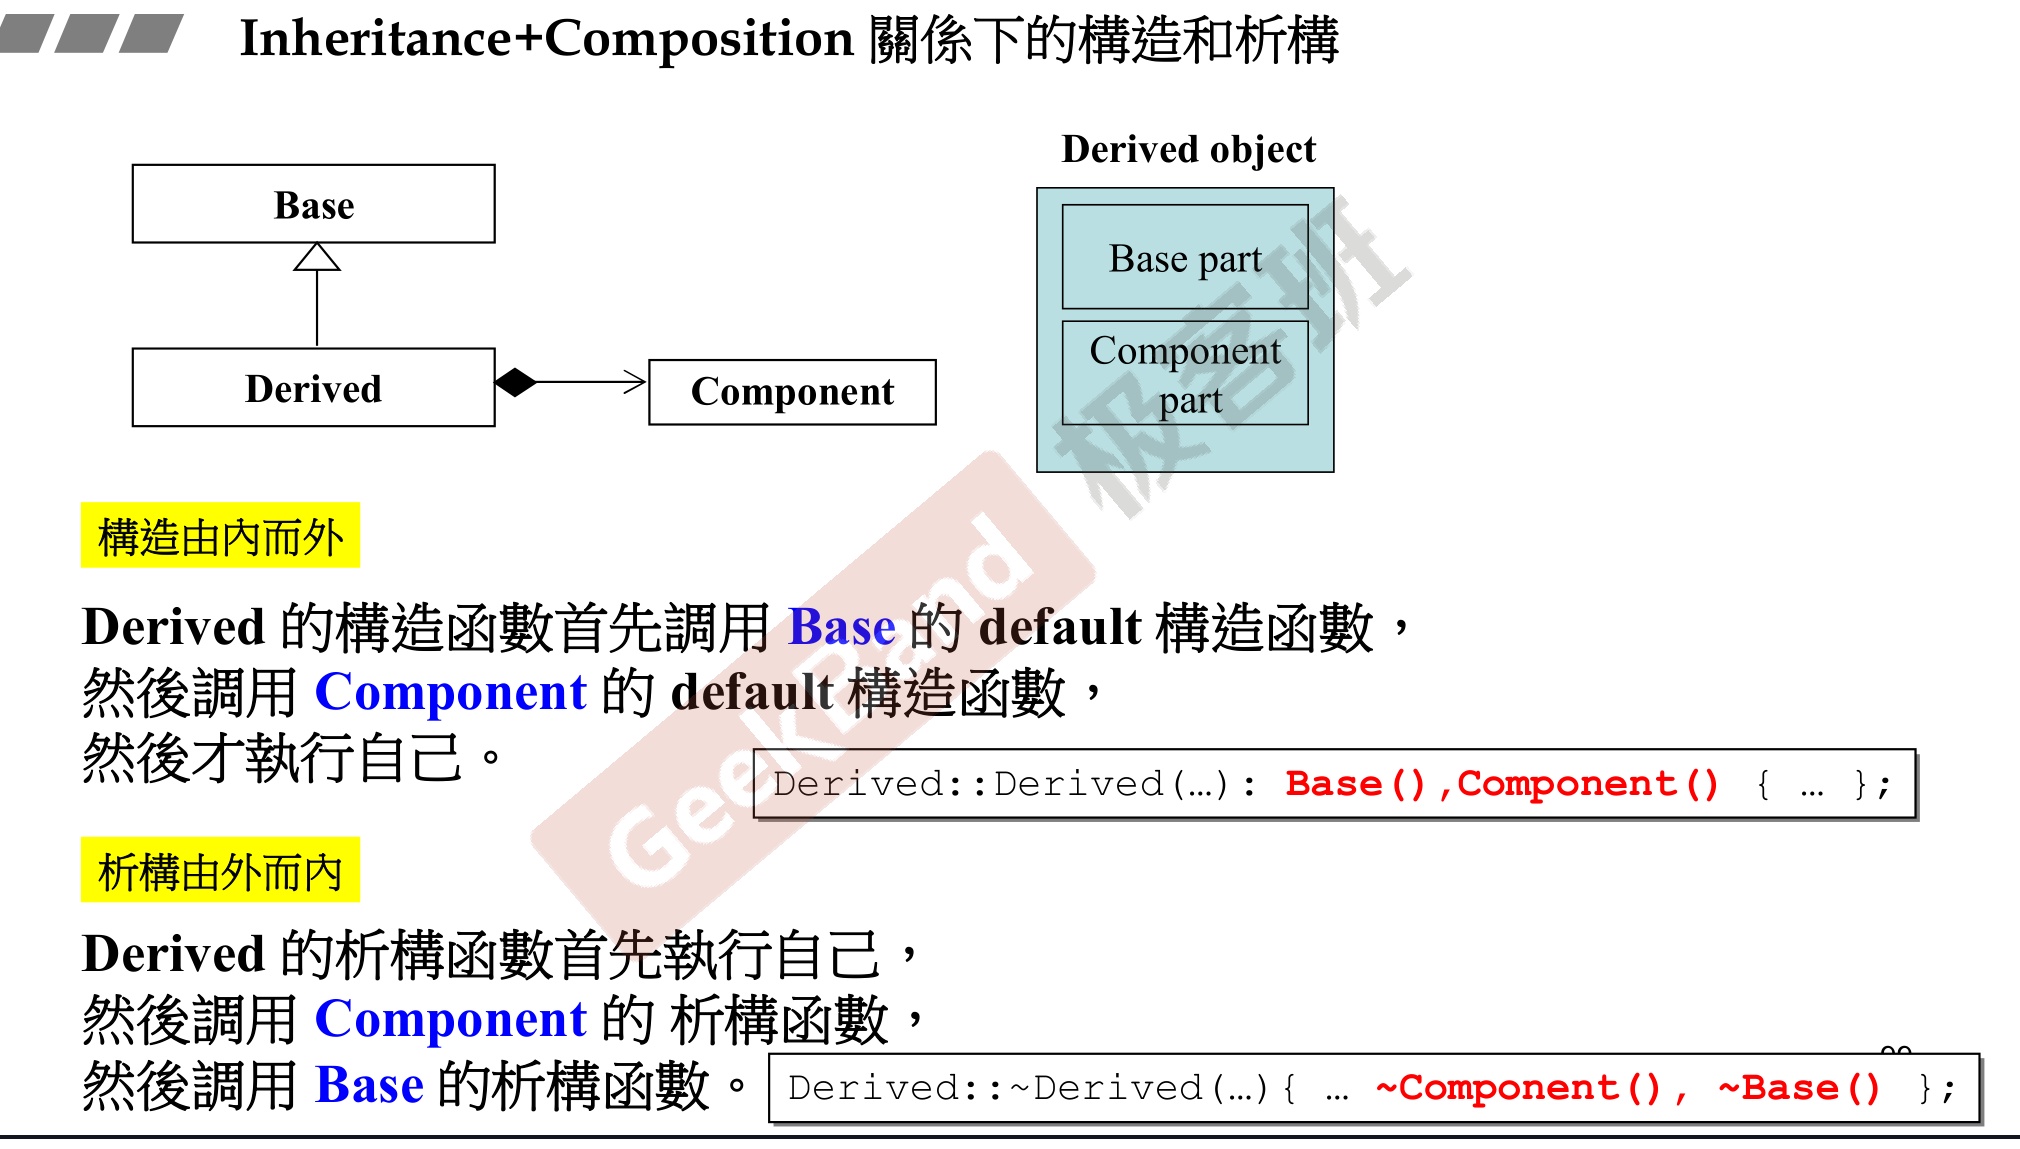
3.继承关系中构造函数调用顺序
-
3.1调用基类构造函数——按照继承列表中的顺序调用
-
3.2调用派生类中的类成员对象的构造函数——按照在派生类中的成员对象说明顺序调用
-
3.3调用派生类本身的构造函数
-
注意点:创建子类对象时,无论调用的是那种子类的构造函数,都会自动调用父类默认的无参构造函数;若想使用父类带参数的构造函数,则需要通过显式的方法调用
-
1 2 3 4 5 6 7 8 9 10 11 12 13 14 15 16 17 18 19 20 21 22 23 24 25 26 27 28 29 30 31 32 33 34 35 36 37 38 39 40 41 42 43 44 45 46 47 48 49 50 51 52 53 54 55 56 57 58 59 60 61#include <iostream> #include <iomanip> using namespace std; class CEmploy { private: int data; public: CEmploy(/* args */); CEmploy(char name[]); ~CEmploy(); }; CEmploy::CEmploy(char name[]) { cout << name << "调用基类带参构造函数" << endl; } CEmploy::CEmploy(/* args */) { cout << "调用基类默认构造函数" << endl; } CEmploy::~CEmploy() { } class COperator : public CEmploy { private: /* data */ public: COperator(/* args */); COperator(char name[]); ~COperator(); }; COperator::COperator(/* args */) { cout << "调用派生类默认构造函数" << endl; } //显式调用基类带参构造函数 COperator::COperator(char name[]) : CEmploy(name) { cout << name << "调用派生类带参构造函数" << endl; } COperator::~COperator() { } int main() { COperator p1; char str2[] = "Jack"; COperator p2(str2); return 0; } -

-
-
4.继承关系中析构函数调用过程
- 4.1调用派生类的析构函数
- 4.2调用派生类中的类成员对象的析构函数——与派生类中的成员对象说明顺序相反
- 4.3调用基类析构函数——与继承列表中的顺序相反
-
5.子类定义了一个和父类一样的函数,那么子类调用的是子类自己的成员函数;如果要调用父类的成员函数,则需要显式调用。
-
1 2 3 4 5 6 7 8 9 10 11 12 13 14 15 16 17 18 19 20 21 22 23 24 25 26 27 28 29 30 31 32 33 34 35 36 37 38 39 40 41 42 43 44 45 46 47 48 49 50 51 52 53 54 55 56 57 58 59 60 61 62 63 64 65 66 67 68 69 70 71#include <iostream> #include <iomanip> using namespace std; class CEmploy { private: int data; public: CEmploy(/* args */); CEmploy(char name[]); ~CEmploy(); void test_fun(int input); }; void CEmploy::test_fun(int input) { cout << "父类函数" << input << endl; } CEmploy::CEmploy(char name[]) { cout << name << "调用基类带参构造函数" << endl; } CEmploy::CEmploy(/* args */) { cout << "调用基类默认构造函数" << endl; } CEmploy::~CEmploy() { } class COperator : public CEmploy { private: /* data */ public: COperator(/* args */); COperator(char name[]); ~COperator(); void test_fun(int input); }; void COperator::test_fun(int input) { cout << "子类函数" << input << endl; } COperator::COperator(/* args */) { cout << "调用派生类默认构造函数" << endl; } COperator::COperator(char name[]) : CEmploy(name) { cout << name << "调用派生类带参构造函数" << endl; } COperator::~COperator() { } int main() { COperator p1; char str2[] = "Jack"; COperator p2(str2); p1.test_fun(50); p2.CEmploy::test_fun(50); return 0; } -

-
-
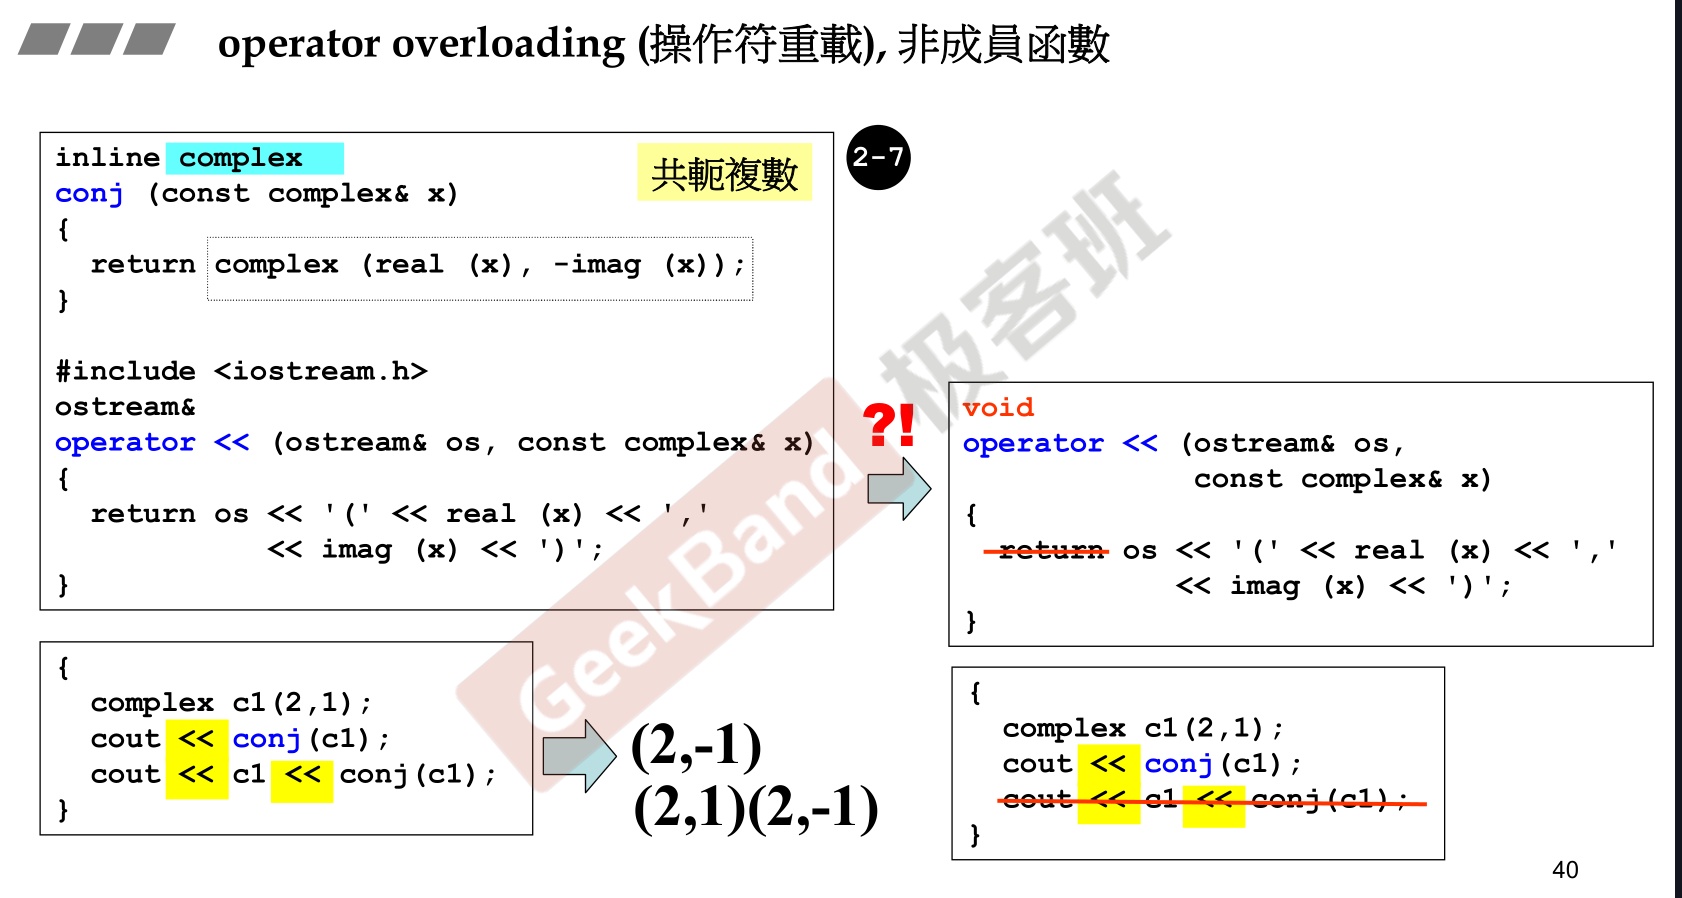
6.重载运算符
-
operator 类型名(输入参数)
-
1 2 3 4 5 6 7 8 9 10 11 12 13 14 15 16 17 18 19 20 21 22 23 24 25 26 27 28 29 30 31 32 33 34 35 36 37 38 39 40 41 42 43 44 45 46 47#include <iostream> #include <iomanip> using namespace std; class COperator_check { private: public: int data; public: COperator_check(/* args */); COperator_check(const int input); //运算符重载 COperator_check operator+(COperator_check a) { return COperator_check(data + a.data); } void inshow(); ~COperator_check(); }; void COperator_check::inshow() { cout << data << endl; } COperator_check::COperator_check(const int input) { data = input; } COperator_check::COperator_check(/* args */) { } COperator_check::~COperator_check() { } int main() { COperator_check p1(50), p2(60); COperator_check p3 = p1 + p2; p3.inshow(); return 0; } -

-
-
7.多重继承
- 多重继承的基类构造函数被调用顺序安装类派生表中声明的顺序为准。
-
8.函数重载和虚函数的区别
- 8.1.函数重载可以用于非成员函数和类的成员函数,而虚函数只能用于类的成员函数。
- 8.2.函数重载可用于构造函数,而虚函数不能用于构造函数。
- 8.3.如果对成员函数进行重载,重载的函数与被重载的函数应该是用一个类中的成员函数,不能分属于两个不同继承层次的类,函数重载处理的是横向的重载。虚函数是对同一类族中的基类和派生类的同名函数的处理,即允许在派生类中对基类的成员函数重新定义。虚函数处理的是纵向的同名函数。
- 8.4.重载的函数必须具有相同的函数名,函数类型可以相同也可以不同,但函数的参数个数和参数类型二者中至少有一个不同,否则在编译时无法区分。而虚函数则要求同一类族中的所有虚函数的函数名,函数类型,函数的参数个数和参数类型都全部相同,否则就不是重定义了,也就不是虚函数了。
- 8.5.函数重载是在程序编译阶段确定操作的对象的,属于静态关联。虚函数是在程序运行阶段确定操作对象的,属于动态关联。
-
9.虚函数
-
只有类的成员函数才能是虚函数;
-
静态成员函数不能是虚函数,因为静态成员函数不受限于某个对象;
-
内联函数不能是虚函数,因为内联函数是不能在运行中动态确定位置的;
-
构造函数不能是虚函数,析构函数通常是虚函数;
-
基类函数头加virtual,派生类函数尾部加override。
-
1 2 3 4 5 6 7 8 9 10 11 12 13 14 15 16 17 18 19 20 21 22 23 24 25 26 27 28 29 30 31 32 33 34 35 36 37 38 39 40 41 42 43 44 45 46 47 48 49 50 51 52 53 54 55 56 57#include <iostream> #include <iomanip> using namespace std; class baseClass { private: /* data */ public: virtual void Outname(); baseClass(/* args */); ~baseClass(); }; void baseClass::Outname() { cout << "这是基类的虚函数" << endl; } baseClass::baseClass(/* args */) { } baseClass::~baseClass() { } class sonClass : public baseClass { private: /* data */ public: //虚函数重写 void Outname() override; sonClass(/* args */); ~sonClass(); }; void sonClass::Outname() { cout << "这是子类虚函数" << endl; } sonClass::sonClass(/* args */) { } sonClass::~sonClass() { } int main() { sonClass p1; p1.Outname(); return 0; } -

-
-
10.虚继承
-
虚继承在一般的应用中很少用到,所以也往往被忽视,这也主要是因为在C++中,多重继承是不推荐的,也并不常用,而一旦离开了多重继承,虚继承就完全失去了存在的必要。
-
虚继承:在继承定义中包含了virtual关键字的继承关系。
-
不加虚继承,会多次调用基类的公共构造函数
1 2 3 4 5 6 7 8 9 10 11 12 13 14 15 16 17 18 19 20 21 22 23 24 25 26 27 28 29 30 31 32 33 34 35 36 37 38 39 40 41 42 43 44 45 46 47 48 49 50 51 52 53 54 55 56 57 58 59 60 61 62 63 64 65 66 67 68 69 70 71 72 73 74 75 76 77 78 79 80 81#include <iostream> #include <iomanip> using namespace std; class CAnimal { private: /* data */ public: CAnimal(/* args */); ~CAnimal(); }; CAnimal::CAnimal(/* args */) { cout << "动物类被构造" << endl; } CAnimal::~CAnimal() { } class CBird : public CAnimal { private: /* data */ public: CBird(/* args */); ~CBird(); }; CBird::CBird(/* args */) { cout << "鸟类被构造" << endl; } CBird::~CBird() { } class CFish : public CAnimal { private: /* data */ public: CFish(/* args */); ~CFish(); }; CFish::CFish(/* args */) { cout << "鱼类被构造" << endl; } CFish::~CFish() { } class CWaterBird : public CBird, public CFish { private: /* data */ public: CWaterBird(/* args */); ~CWaterBird(); }; CWaterBird::CWaterBird(/* args */) { cout << "水鸟类被构造" << endl; } CWaterBird::~CWaterBird() { } int main() { CWaterBird p1; return 0; }
-
加上虚继承,只调用一次公共构造函数
1 2 3 4 5 6 7 8 9 10 11 12 13 14 15 16 17 18 19 20 21 22 23 24 25 26 27 28 29 30 31 32 33 34 35 36 37 38 39 40 41 42 43 44 45 46 47 48 49 50 51 52 53 54 55 56 57 58 59 60 61 62 63 64 65 66 67 68 69 70 71 72 73 74 75 76 77 78 79 80 81 82 83#include <iostream> #include <iomanip> using namespace std; class CAnimal { private: /* data */ public: CAnimal(/* args */); ~CAnimal(); }; CAnimal::CAnimal(/* args */) { cout << "动物类被构造" << endl; } CAnimal::~CAnimal() { } //虚继承 class CBird : virtual public CAnimal { private: /* data */ public: CBird(/* args */); ~CBird(); }; CBird::CBird(/* args */) { cout << "鸟类被构造" << endl; } CBird::~CBird() { } //虚继承 class CFish : virtual public CAnimal { private: /* data */ public: CFish(/* args */); ~CFish(); }; CFish::CFish(/* args */) { cout << "鱼类被构造" << endl; } CFish::~CFish() { } class CWaterBird : public CBird, public CFish { private: /* data */ public: CWaterBird(/* args */); ~CWaterBird(); }; CWaterBird::CWaterBird(/* args */) { cout << "水鸟类被构造" << endl; } CWaterBird::~CWaterBird() { } int main() { CWaterBird p1; return 0; }
-
-
11.抽象类和纯虚函数
-
包含纯虚函数的类称为抽象类,一个抽象类至少有一个纯虚函数。
-
抽象类不能被实例化,但是可以使用指向抽象类的指针。
-
纯虚函数不能被继承,抽象类的派生类必须给出纯虚函数的定义。
-
1 2 3 4 5 6 7 8 9 10 11 12 13 14 15 16 17 18 19 20 21 22 23 24 25 26 27 28 29 30 31 32 33 34 35 36 37 38 39 40 41 42 43 44 45 46 47 48 49 50 51 52 53 54 55 56#include <iostream> #include <iomanip> using namespace std; class CFigure { private: /* data */ public: CFigure(/* args */); ~CFigure(); //定义纯虚函数 virtual double get_area() = 0; }; CFigure::CFigure(/* args */) { } CFigure::~CFigure() { } class CCircle : public CFigure { private: double radius; public: CCircle(double input); //重写纯虚函数 double get_area(); ~CCircle(); }; CCircle::CCircle(double input) { radius = input; } double CCircle::get_area() { return radius * radius * 3.14; } CCircle::~CCircle() { } int main() { CFigure *p1; p1 = new CCircle(55.5); double are = p1->get_area(); cout << are << "面积" << endl; return 0; } -

-
-
12.关于虚函数实现多态
- 需要满足三个条件
- 类满足赋值兼容规则,即公有继承
- 声明虚函数
- 只能通过指针或引用访问虚函数。若通过对象实体,是静态绑定,无法正确调用虚函数。
- 需要满足三个条件
chap9 模板
- 模板是c++的高级特性,分为函数模板和类模板
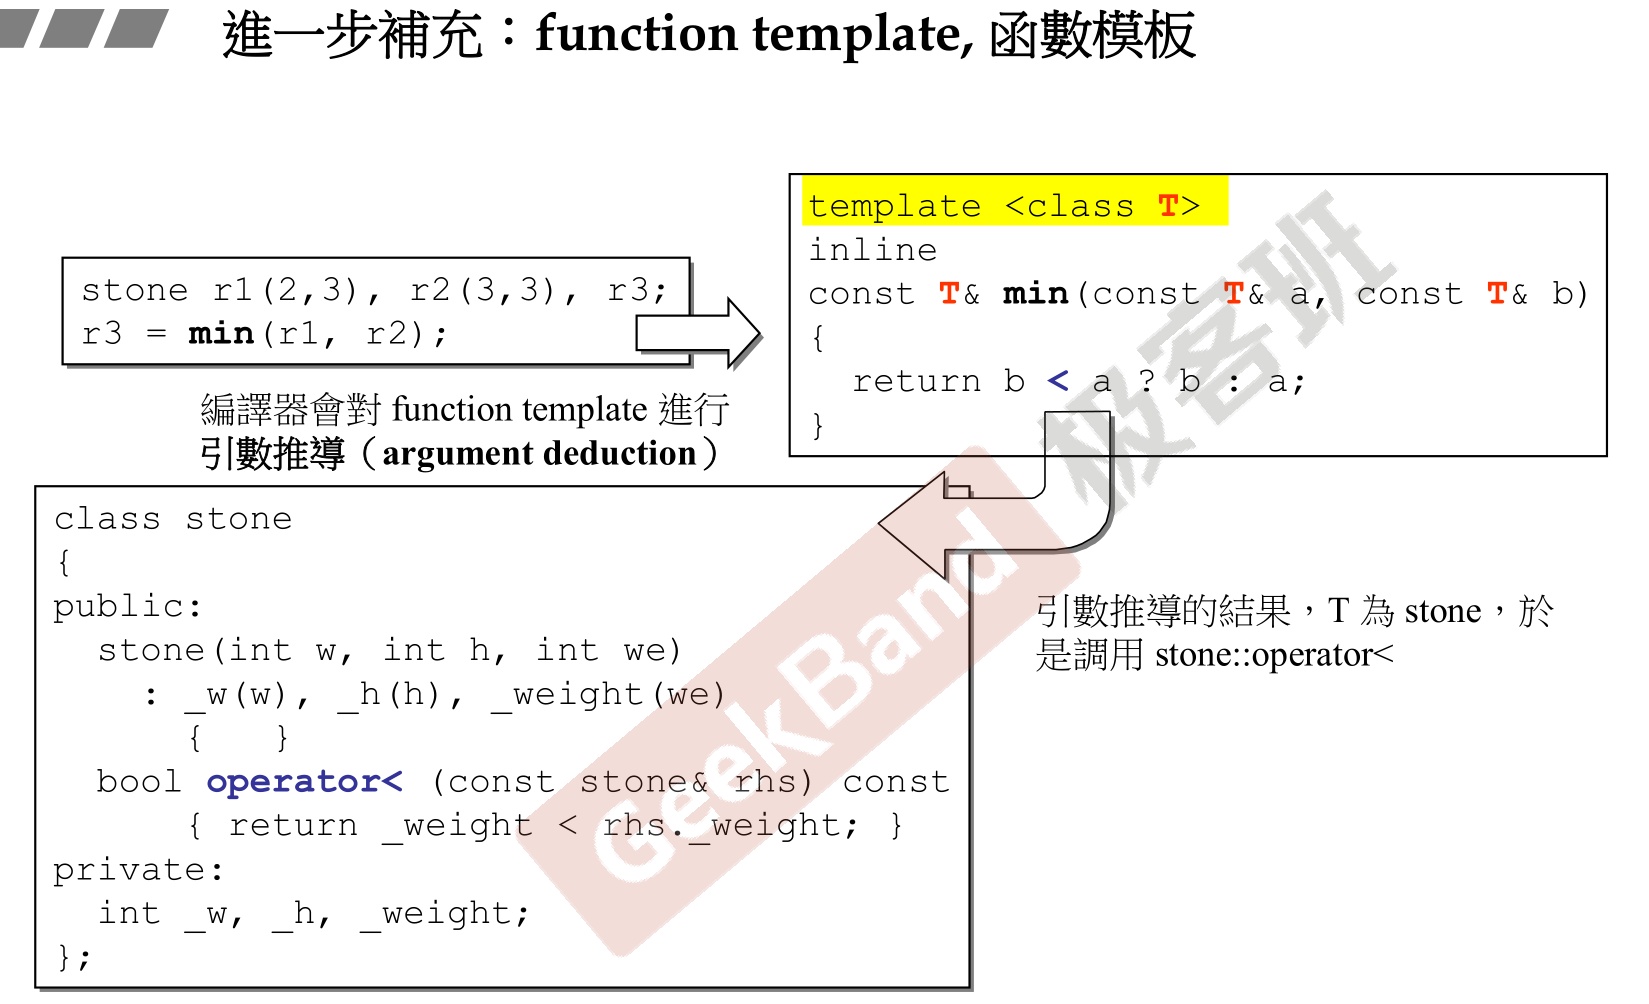
9.1 函数模板
-
函数模板不是一个实在的函数,编译器不能为其生成可执行的代码。定义函数模板只是对函数功能的描述,具体执行时,将更加传递的实际参数决定其功能。
-
调用的时候可以不加
<type>,因为编译器运行的时候会自动判断。但仅仅只是函数模板可以这样。类模板还是需要添加具体的类。 -
1 2 3 4 5 6 7 8 9 10 11//函数模板的一般定义形式 template <类参数表> 返回类型 函数名 (实际参数表){ ...//函数体 } //例子:将函数模板分为template部分和函数名部分 template<class T> void fun(T t){ ...//函数实现 } -
1 2 3 4 5 6 7 8 9 10 11 12 13 14 15 16 17 18 19 20 21 22 23 24 25 26 27 28 29 30 31#include <string> #include <iostream> #include <iomanip> //注意string是std库,添加std命名空间 using namespace std; template <class Type> Type min(Type a, Type b) { if (a < b) { return a; } else { return b; } } int main() { int ret = min<int>(10, 5); string a = "mr"; string b = "za"; string rey = min<string>(a, b); cout << "整数最小值" << ret << endl; cout << "字符串最小值" << rey << endl; return 0; } -

9.2 类模板
-
类模板是用类生成类,减少了类的定义数量
-
一般定义
1 2 3 4 5 6 7 8 9 10 11//1.类模板定义 template <类参数表> class 类模板名{ ...//类模板实体 } //2.成员函数类外定义 template <类参数表> 返回类型 类模板名 <类参数表>::成员函数名(形参列表){ ...//函数体 } -
例子
1 2 3 4 5 6 7 8 9 10 11 12 13 14 15 16 17 18 19 20 21 22 23 24 25 26 27 28 29 30 31 32 33 34 35 36 37 38 39 40 41 42 43 44 45 46 47 48 49 50 51 52 53 54 55 56 57#include <iostream> #include <iomanip> using namespace std; template <class Type> class Container { private: Type CItem; public: Container(); void begin(const Type &tNew); void end(const Type &tNew); void insert(const Type &tNew); void empty(const Type &tNew); void disp() { cout << CItem << endl; }; }; template <class Type> Container<Type>::Container() { CItem = 0; } //类模板成员函数定义 template <class Type> void Container<Type>::begin(const Type &tNew) { CItem = tNew; } template <class Type> void Container<Type>::end(const Type &tNew) { CItem = tNew; } template <class Type> void Container<Type>::insert(const Type &tNew) { CItem = tNew; } template <class Type> void Container<Type>::empty(const Type &tNew) { CItem = tNew; } int main() { Container<int> MyContainer; MyContainer.disp(); int i = 50; MyContainer.insert(i); MyContainer.disp(); return 0; }
chap10 STL标准模板库
- standard template library:标准模板库
- vector
- deque
- list
- set
- multiset
- map
- multimap
- 非修正序列算法
- 修正序列算法
- 排序算法
- 数值算法
chap11 RTTI和异常处理
- RTTI——run time type identification——运行时类型识别
- 面向对象编程的一个特点是运行时进行类型识别,这是面向对象中多态的支持,使用RTTI能够使类的设计更抽象,更符合人的思维。
- 异常处理是在程序运行时对可能发生的错误进行控制,防止系统灾难性错误的发生。
11.1 RTTI
-
C++引入这个机制是为了让程序在运行时能根据基类的指针或引用来获得该指针或引用所指的对象的实际类型。但是现在RTTI的类型识别已经不限于此了,它还能通过typeid操作符识别出所有的基本类型的变量对应的类型。为什么会出现RTTI这一机制呢?这和C++语言本身有关系,C++是一门静态类型语言,其数据类型是在编译期就确定的,不能在运行时更改。然而由于面向对象程序设计中多态性的要求,C++中的指针或引用本身的类型,可能与它实际代表的类型并不一致,有时我们需要将一个多态指针转换为其实际指向对象的类型,就需要知道运行时的类型信息,这就有了运行时类型识别需求。
-
和Java相比,C++要想获得运行时类型信息,只能通过RTTI机制,并且C++最终生成的代码是直接与机器相关的。
-
Java中任何一个类都可以通过反射机制来获取类的基本信息(接口、父类、方法、属性、Annotation等),而且Java中还提供了一个关键字,可以在运行时判断一个类是不是另一个类的子类或者是该类的对象,Java可以生成字节码文件,再由JVM(Java虚拟机)加载运行,字节码文件中可以含有类的信息。
-
RTTI只适用于包含虚函数的类。因为RTTI是以虚函数表(vptr)为基础实现的,而且只要存在派生,则基类的析构函数必然是虚函数,因此这一点不必深究。
-
C++通过以下两个关键字提供RTTI功能:
-
- typeid:该运算符返回其表达式或类型名的实际类型
-
- dynamic_cast:该运算符将基类的指针或引用安全地转换为派生类类型的指针或引用(也就是所谓的下行转换)
-
我们常常使用typeid判断某个对象的类型,dynamic_cast动态转换对象的指针或引用类型。
-
对于typeid,以下例子可以看出,对于
1 2 3 4 5 6 7 8 9class A{ virtual void fun(); }; class B:public A{ virtual void fun(); }; A* p=new B(); A &t=*p;- 指针
p的typeid()是基类A的指针类型;但是*p(即p的指向)的typeid()是派生类B; - 引用
t的typeid()是派生类B;但是引用t的地址的typeid()是基类A的指针类型。
- 指针
-
同时,即使dynamic_cast动态转换类对象了,虚函数仍然以最新的派生类的虚函数为执行对象,虽然该派生类的成员函数仍然可以调用。
-
上述特性,见下例。
1 2 3 4 5 6 7 8 9 10 11 12 13 14 15 16 17 18 19 20 21 22 23 24 25 26 27 28 29 30 31 32 33 34 35 36 37 38 39 40 41 42 43 44 45 46 47 48 49 50 51 52 53 54 55 56 57 58 59 60 61 62 63 64 65 66 67 68 69 70 71 72 73 74 75 76 77 78 79 80 81 82 83 84 85 86 87 88 89 90 91 92 93 94 95 96 97 98 99 100 101 102 103 104 105 106 107 108#include <iostream> #include <typeinfo> using namespace std; class A { public: virtual void func() const { cout << "Class A" << endl; } private: int m_a; }; class B : public A { public: virtual void func() const { cout << "Class B" << endl; } void fun1() { cout << "this class B only fun" << endl; } private: int m_b; }; class C : public B { public: virtual void func() const { cout << "Class C" << endl; } void fun2() { cout << "this class C only fun" << endl; } private: int m_c; }; class D : public C { public: virtual void func() const { cout << "Class D" << endl; } void fun3() { cout << "this class D only fun" << endl; } private: int m_d; }; int main() { A *pa = new A(); pa->func(); B *pb; C *pc; D *pd; //情况① pb = dynamic_cast<B*>(pa); //向下转型失败 if (pb == NULL) { cout << "Downcasting failed: A* to B*" << endl; } else { cout << "Downcasting successfully: A* to B*" << endl; pb->func(); } pc = dynamic_cast<C*>(pa); //向下转型失败 if (pc == NULL) { cout << "Downcasting failed: A* to C*" << endl; } else { cout << "Downcasting successfully: A* to C*" << endl; pc->func(); } cout << "-------------------------" << endl << endl; //情况② pa = (A*)new D(); //向上转型都是允许的 cout << "以下是typeid的例子------------------" << endl; A &t = *pa; cout << "指针的指向*pa的类型: " << typeid(*pa).name() << endl; cout << "指针pa的类型: " << typeid(pa).name() << endl; cout << "引用t的类型: " << typeid(t).name() << endl; cout << "引用t的地址的类型: " << typeid(&t).name() << endl; cout << "------------------------------------" << endl << endl; pa->func(); pb = dynamic_cast<B*>(pa); //向下转型成功 if (pb == NULL) { cout << "Downcasting failed: A* to B*" << endl; } else { cout << "Downcasting successfully: A* to B*" << endl; pb->func(); pb->fun1(); } pc = dynamic_cast<C*>(pa); //向下转型成功 if (pc == NULL) { cout << "Downcasting failed: A* to C*" << endl; } else { cout << "Downcasting successfully: A* to C*" << endl; pc->func(); pc->fun2(); } pd = dynamic_cast<D*>(pa); if (pd == NULL) { cout << "Downcasting failed: A* to D*" << endl; } else { cout << "Downcasting successfully: A* to D*" << endl; pd->func(); pd->fun3(); } return 0; }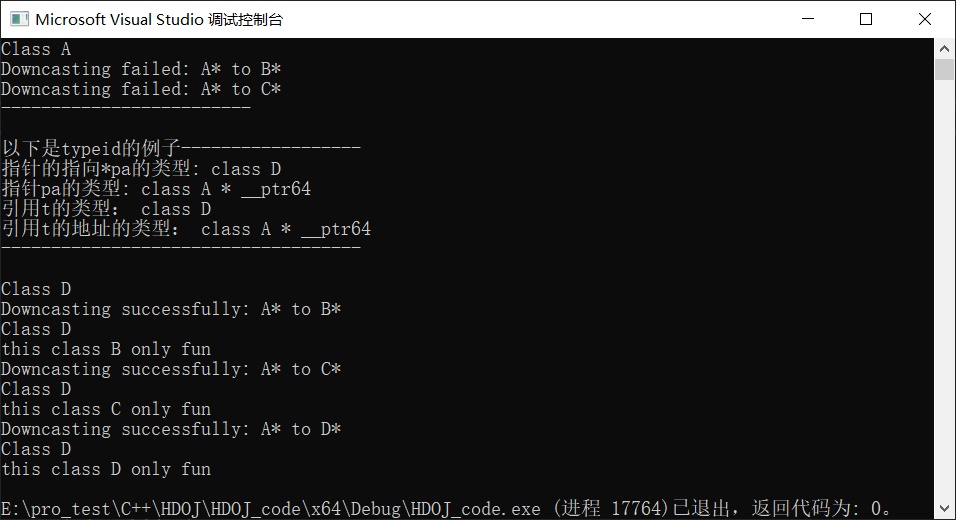
-
11.2 异常处理
- 抛出异常——throw
- 异常捕获——catch
- 异常匹配——try...catch
- 标准异常——标准异常类均派生自一个公共的基类exception
chap12 文件操作
- C++为不同类型数据的标准输入输出定义了专门的类库。其中ios为根基类,直接派生四个类
- 输入流类
istream - 输出流类
ostream - 文件流基类
fstreambase - 字符串流基类
strstreambase
- 输入流类
- c++系统的I/O标准类都定义在
iostream.h,fstream.h,strstream.h这三个头文件中:- 进行标准I/O操作使用
iostream.h头文件,他包含ios、iostream、istream、ostream等类; - 进行文件I/O操作使用
fstream.h头文件,他包含fstream、ifstream、ofstream和fstreambase等类; - 进行串I/O操作时使用
strstream.h头文件,他包含strstrem、istrstrem、ostrstream、strstreambase、iostream等类。
- 进行标准I/O操作使用
- 文件的读写方式
- 文件的末尾判断eof
- 在指定位置读取文件内容
- 删除文件
关键字
explicit
-
首先, C++中的explicit关键字只能用于修饰只有一个参数的类构造函数, 它的作用是表明该构造函数是显示的, 而非隐式的, 跟它相对应的另一个关键字是implicit, 意思是隐藏的,类构造函数默认情况下即声明为implicit(隐式)
-
参考例子
1 2 3 4 5 6 7 8 9 10 11 12 13 14 15 16 17 18 19 20 21 22 23 24 25 26 27 28 29 30 31 32class CxString // 没有使用explicit关键字的类声明, 即默认为隐式声明 { public: char *_pstr; int _size; CxString(int size) { _size = size; // string的预设大小 _pstr = malloc(size + 1); // 分配string的内存 memset(_pstr, 0, size + 1); } CxString(const char *p) { int size = strlen(p); _pstr = malloc(size + 1); // 分配string的内存 strcpy(_pstr, p); // 复制字符串 _size = strlen(_pstr); } // 析构函数这里不讨论, 省略... }; // 下面是调用: CxString string1(24); // 这样是OK的, 为CxString预分配24字节的大小的内存 CxString string2 = 10; // 这样是OK的, 为CxString预分配10字节的大小的内存 CxString string3; // 这样是不行的, 因为没有默认构造函数, 错误为: “CxString”: 没有合适的默认构造函数可用 CxString string4("aaaa"); // 这样是OK的 CxString string5 = "bbb"; // 这样也是OK的, 调用的是CxString(const char *p) CxString string6 = 'c'; // 这样也是OK的, 其实调用的是CxString(int size), 且size等于'c'的ascii码 string1 = 2; // 这样也是OK的, 为CxString预分配2字节的大小的内存 string2 = 3; // 这样也是OK的, 为CxString预分配3字节的大小的内存 string3 = string1; // 这样也是OK的, 至少编译是没问题的, 但是如果析构函数里用free释放_pstr内存指针的时候可能会报错, 完整的代码必须重载运算符"=", 并在其中处理内存释放 -
上面的代码中, "CxString string2 = 10;"和"CxString string6 = 'c' "这两句句为什么是可以的呢? 在C++中, 如果的构造函数只有一个参数时, 那么在编译的时候就会有一个缺省的转换操作:将该构造函数对应数据类型的数据转换为该类对象。就是我们说的只有一个参数的类构造函数的隐式调用。
-
但是, 上面的代码中的_size代表的是字符串内存分配的大小, 那么调用的第二句 "CxString string2 = 10;" 和第六句 "CxString string6 = 'c';" 就显得不伦不类, 而且容易让人疑惑. 有什么办法阻止这种用法呢? 答案就是使用explicit关键字. 我们把上面的代码修改一下, 如下:
1 2 3 4 5 6 7 8 9 10 11 12 13 14 15 16 17 18 19 20 21 22 23 24 25 26 27class CxString // 使用关键字explicit的类声明, 显示转换 { public: char *_pstr; int _size; explicit CxString(int size) { _size = size; // 代码同上, 省略... } CxString(const char *p) { // 代码同上, 省略... } }; // 下面是调用: CxString string1(24); // 这样是OK的 CxString string2 = 10; // 这样是不行的, 因为explicit关键字取消了隐式转换 CxString string3; // 这样是不行的, 因为没有默认构造函数 CxString string4("aaaa"); // 这样是OK的 CxString string5 = "bbb"; // 这样也是OK的, 调用的是CxString(const char *p) CxString string6 = 'c'; // 这样是不行的, 其实调用的是CxString(int size), 且size等于'c'的ascii码, 但explicit关键字取消了隐式转换 string1 = 2; // 这样也是不行的, 因为取消了隐式转换 string2 = 3; // 这样也是不行的, 因为取消了隐式转换 string3 = string1; // 这样也是不行的, 因为取消了隐式转换, 除非类实现操作符"="的重载 -
可见:explicit关键字的作用就是防止类构造函数的隐式自动转换。
-
上面也已经说过了, explicit关键字只对有一个参数的类构造函数有效, 如果类构造函数参数大于或等于两个时, 是不会产生隐式转换的, 所以explicit关键字也就无效了。
-
但是, 也有一个例外, 就是当除了第一个参数以外的其他参数都有默认值的时候, explicit关键字依然有效, 此时, 当调用构造函数时只传入一个参数。例如:
1 2 3 4 5 6explicit CxString(int age, int size = 0) { _age = age; _size = size; // 代码同上, 省略... }
override
-
作用:在成员函数声明或定义中, override 确保该函数为虚函数并覆写来自基类的虚函数。
-
位置:函数调用运算符之后,函数体或纯虚函数标识 “= 0” 之前。
-
使用以后有以下好处:
1.可以当注释用,方便阅读
2.告诉阅读你代码的人,这是方法的复写
3.编译器可以给你验证 override 对应的方法名是否是你父类中所有的,如果没有则报错。
-
公有继承
纯虚函数 => 继承的是:接口 (interface)
普通虚函数 => 继承的是:接口 + 缺省实现 (default implementation)
非虚成员函数 =>继承的是:接口 + 强制实现 (mandatory implementation)
-
不要重新定义一个继承自基类的非虚函数 (never redefine an inherited non-virtual function)
-
在声明需要重写的普通虚函数后,加关键字 *override*
-
1 2 3 4 5 6 7 8 9 10 11 12 13 14class Base { public: virtual void mf1() const; virtual void mf2(int x); virtual void mf3() &; void mf4() const; // is not declared virtual in Base }; class Derived: public Base { public: virtual void mf1() const override; // adding "virtual" is OK, but not necessary virtual void mf2(int x) override; void mf3() & override; };
final
-
作用
- ① 阻止了从类继承;
- ② 阻止一个虚函数的重载
-
1 2 3 4class A final {}; class B :public A{ //错误,B无法继承A,因为A已经被声明为final }; -
1 2 3 4 5 6 7 8 9 10class A{ public: virtual void func() final; }; class B: public A{ public: void func() { //错误。A中已经声明func不能被B重写 } }
decltype
-
decltype被称作类型说明符,它的作用是选择并返回操作数的数据类型。 -
1 2//sum的类型就是函数f返回值的类型 decltype(f()) sum = x; -
有以下三种基本使用decltype的方式
- decltype +变量var
- decltype +表达式expr
- decltype +函数名func_name
-
decltype是为了解决复杂的类型声明而使用的关键字,称作decltype类型说明符。
decltype可以作用于变量、表达式及函数名。①作用于变量直接得到变量的类型;②作用于表达式,结果是左值的表达式得到类型的引用,结果是右值的表达式得到类型;③作用于函数名会得到函数类型,不会自动转换成指针。
decltype不会去真的求解表达式的值,可以放心使用。
auto
- auto可以在声明变量的时候根据变量初始值的类型自动为此变量选择匹配的类型,类似的关键字还有decltype。
|
|
-
auto和其他变量类型有明显的区别:
1.auto声明的变量必须要初始化,否则编译器不能判断变量的类型。
2.auto不能被声明为返回值,auto不能作为形参,auto不能被修饰为模板参数
-
尤其适用容器的迭代器变量名!!
volatile
-
volatile这个单词在英文之中的意思是:易变的,不稳定的的含义。
-
volatile 关键字是一种类型修饰符,用它声明的类型变量表示可以被某些编译器未知的因素更改,比如:操作系统,硬件或者其他线程等。遇到这个关键字声明的变量,编译器对访问该变量的代码就不再进行优化,从而可以提供对特殊地址的稳定访问。
-
以vc6.0的内嵌汇编代码为例
1 2 3 4 5 6 7 8 9 10 11 12 13 14 15 16 17 18 19 20 21 22 23#include <stdio.h> int main() { int i = 10; int a = i; printf("i = %d", a); //下面汇编语句的作用就是改变内存中 i 的值 //但是又不让编译器知道 __asm { mov dword ptr[ebp - 4], 20h; } int b = i; printf("i = %d", b); return 0; } /* 结果 在 Debug 版本模式运行程序: i = 10 i = 32 在Release版本模式下运行程序: i = 10 i = 10 上述输出的结果明显表明,Release 模式下,编译器对代码进行了优化,第二次没有输出正确的 i 值 */ -
当i前面加上volatile关键词的时候
1 2 3 4 5 6 7 8 9 10 11 12 13 14 15 16 17 18 19 20 21#include <stdio.h> int main() { volatile int i = 10; int a = i; printf("i = %d", a); //下面汇编语句的作用就是改变内存中 i 的值 //但是又不让编译器知道 __asm { mov dword ptr[ebp - 4], 20h; } int b = i; printf("i = %d", b); return 0; } /* 结果显示:在Debug和Release版本模式下运行程序,结果都是 i = 10 i =32 这就是表示volatile关键字发挥了作用 */ -
volatile在哪使用
- (1)、中断服务程序中修改的供其它程序检测的变量需要加volatile;
- (2)、多任务环境下各任务间共享的标志应该加volatile;
- (3)、存储器映射的硬件寄存器通常也要加volatile说明,因为每次对它的读写都可能有不同意义。如并行设备的硬件寄存器(状态寄存器等等)。
-
C++的volatile对并发编程基本没有帮助。volatile的唯一的功能就是用它声明的类型变量表示可以被某些编译器未知的因素更改,比如:操作系统,硬件或者其他线程等。按照C++标准,这是volatile唯一的功能,但是在一些编译器(如MSVC)中,volatile还有线程同步的功能,但这就是编译器自己的拓展了,并不能跨平台应用。
-
volatile有三个特性:易变性,不可优化,顺序性。
-
易变性和不可优化 指的是:volatile相当于显式的要求编译器禁止对 volatile 变量进行优化,并且要求每个变量赋值时,需要显式从寄存器 %eax 拷贝。volatile 关键字在嵌入式编程之中会需要用到,因为在特定环境下,寄存器的变量可能会发生变化。因此volatile 声明了寄存器部分的数据是『易变的』,需要防止编译器优化变量,强制载入寄存器。
-
C/C++ volatile关键词的第三个特性:”顺序性”,能够保证Volatile变量间的顺序性,编译器不会进行乱序优化。volatile变量与非Volatile变量的顺序,编译器不保证顺序,可能会进行乱序优化。同时,C/C++ volatile关键词,并不能用于构建happens-before语义,因此在进行多线程程序设计时,要小心使用volatile,不要掉入volatile变量的使用陷阱之中。事实上,在多线程同步中,判断循环退出应先assert(something==1)进行假言判断,构造happens-before语义。
-
事实上,C++11开始有一个很好用的库,那就是atomic类模板,在
<atomic>头文件中,多个线程对atomic对象进行访问是安全的,并且提供不同种类的线程同步。不同种类的线程同步非常复杂,要涉及到C++的内存模型与并发编程,不在此展开。 -
C/C++ Volatile关键词,并不能用于构建happens-before语义,因此在进行多线程程序设计时,要小心使用volatile,不要掉入volatile变量的使用陷阱之中。
-
什么叫happens-before,就是 前一个操作的结果对后续操作时可见的。happens-before是什么?JMM最最核心的概念
-
对比Java里面,在Java中也有volatile关键字,Java之中volatile的作用是:
-
确保内存可见性:读写变量具有全局有序性,保证当前线程读到的值是内存中最新的,而不是当前线程中缓存中的值。但是volatile关键字并不保证线程读写变量的相对顺序,所以适用场景有限。
-
禁止指令重排序(happens-before原则):指令重排序是JVM为了提高运行程序的效率,在不影响单线程执行结果的前提下,对指令的执行过程进行优化。注意是单线程,多线程下指令重排序就可能会影响结果。
-
-
注意Java的有序性是指:
- 在当前线程读写操作前的修改操作的值对当前操作可见。
- 在进行指令优化时,不能将在对volatile变量访问的语句放在其后面执行,也不能把volatile变量后面的语句放到其前面执行。
-
因此我们可以总结得到:
-
Java中的volatile关键字可以保证变量的happens-before关系;
-
而C++中的volatile关键字不能保证变量的happens-before关系,只是单纯说明没有编译器优化该变量,但与其他变量的关系有待考究。
-
extern "C"
-
C++号称是C语言的超集,也确实,从语言的基本语法上,C++是包含所有C语言的语法的,而且C++为了兼容C,连C语言的标准库也被纳入到C++的标准库中,比如在C++中我们仍然可以使用 <stdio.h> ,它就是C++标准库的一部分(注意最好用新的标准
,而不是老的 )。但是,C++和C语言的编译器在有些地方还是有差别的。比如,C++是支持面向对象的特性(尽管C++被称为不彻底的面向对象语言),面向对象就要支持函数重载,而函数重载的实现和C++编译器是分不开的。 -
extern "C" 用到函数声明之前,它的作用就是告诉编译器,对于该函数的链接要采用C语言编译器的链接方式,也就是告诉编译器找_fun,而不是_fun_int_int。
-
如果有多个函数声明都需要在前面加extern "C",那可以用extern "C"{}的形式。
-
例子
-
有一个.c文件p.c文件如下
1 2 3 4 5#include <stdio.h> void print(int a,int b) { printf("这里调用的是C语言的函数:%d,%d\n",a,b); } -
p的头文件p.h定义如下
1void print(int a, int b); -
还有一个main.cpp文件
1 2 3 4 5 6 7 8 9#include <iostream> using namespace std; #include "p.h" int main(){ cout<<"现在调用c语言函数\n"<<endl; print(3,4); return 0; } -
用gcc -c命令编译p.c,生成p.o文件;
用g++ -c命令编译main.cpp,生成main.o文件;
用g++链接两个.o文件,会发现报错。

-
-
因为:p.c我们使用的是C语言的编译器gcc进行编译的,其中的函数print编译之后,在符号表中的名字为 _print 而我们链接的时候采用的是g++进行链接,也就是C++链接方式,程序在运行到调用print函数的代码时,会在符号表中寻找_print_int_int(是按照C++的链接方法来寻找的,所以是找_print_int_int而不是找_print)的名字,发现找不到,所以会提示“未定义的引用”。此时如果我们在对print的声明中加入 extern “C” ,这个时候,g++编译器就会按照C语言的链接方式进行寻找,也就是在符号表中寻找_print,这个时候是可以找到的,是不会报错的。
-
解决办法:我们修改p.h为: extern "C" void print(int a,int b);即可
十一、C++11新特性
1. 右值引用
1.1 综述
-
右值引用只不过是一种C++11新的的 C++ 语法,真正理解起来有难度的是基于右值引用引申出的 2 种 C++ 编程技巧,分别为移动语义和完美转发。
-
值得一提的是,左值的英文简写为“lvalue”,右值的英文简写为“rvalue”。很多人认为它们分别是"left value"、"right value" 的缩写,其实不然。lvalue 是“loactor value”的缩写,可意为存储在内存中、有明确存储地址(可寻址)的数据,而 rvalue 译为 "read value",指的是那些可以提供数据值的数据(不一定可以寻址,例如存储于寄存器中的数据)。
-
如何判断左值和右值
-
可位于赋值号(=)左侧的表达式就是左值;反之,只能位于赋值号右侧的表达式就是右值。
1 2int a = 5; 5 = a; //错误,5 不能为左值 -
有名称的、可以获取到存储地址的表达式即为左值;反之则是右值。
-
-
C++ 语法上是支持定义常量右值引用的,例如:
1const int&& a = 10;//编译器不会报错 -
示例1
1 2 3 4 5 6 7 8 9 10 11 12 13 14 15int&& a = 1; //正确,实质上就是将不具名(匿名)变量取了个别名 int b = 1; int && c = b; //编译错误! b是左值,不能将一个左值赋值给一个右值引用 class A { public: int a; }; A getTemp() { return A(); } A && a = getTemp(); //getTemp()的返回值是右值(临时变量) /*getTemp()返回的右值本来在表达式语句结束后,其生命也就该终结了(因为是临时变量),而通过右值引用,该右值又重获新生,其生命期将与右值引用类型变量a的生命期一样,只要a还活着,该右值临时变量将会一直存活下去。实际上就是给那个临时变量取了个名字。 */ -
常量左右值引用表格
引用类型 可以引用的值类型 使用场景 非常量左值 常量左值 非常量右值 常量右值 非常量左值引用 Y N N N 无 常量左值引用 Y Y Y Y 常用于类中构建拷贝构造函数 非常量右值引用 N N Y N 移动语义、完美转发 常量右值引用 N N Y Y 无实际用途 -
左值引用只能绑定左值,右值引用只能绑定右值,如果绑定的不对,编译就会失败。
-
但是,常量左值引用却是个奇葩,它可以算是一个“万能”的引用类型,它可以绑定非常量左值、常量左值、右值,而且在绑定右值的时候,常量左值引用还可以像右值引用一样将右值的生命期延长,缺点是,只能读不能改。
-
所以
1 2 3 4 5 6 7 8 9 10 11const int & a = 1; //常量左值引用绑定 右值, 不会报错 class A { public: int a; }; A getTemp() { return A(); } const A &a = getTemp(); //不会报错 而 A &a 会报错 -
示例2——常量左值引用可以接受右值
1 2 3 4 5 6 7 8 9 10 11 12 13 14 15 16 17 18 19 20 21 22 23 24 25 26 27 28 29 30 31 32 33 34 35 36 37#include <iostream> using namespace std; class Copyable { public: Copyable(){} Copyable(const Copyable &o) { cout << "Copied" << endl; } }; Copyable ReturnRvalue() { return Copyable(); //返回一个临时对象 } void AcceptVal(Copyable a) { } void AcceptRef(const Copyable& a) { } int main() { cout << "pass by value: " << endl; AcceptVal(ReturnRvalue()); // 应该调用两次拷贝构造函数 cout << "pass by reference: " << endl; AcceptRef(ReturnRvalue()); //应该只调用一次拷贝构造函数 } /* 期望中: AcceptVal(ReturnRvalue())需要调用两次拷贝构造函数,一次在ReturnRvalue()函数中,构造好了Copyable对象,返回的时候会调用拷贝构造函数生成一个临时对象,在调用AcceptVal()时,又会将这个对象拷贝给函数的局部变量a,一共调用了两次拷贝构造函数。 而AcceptRef()的不同在于形参是常量左值引用,它能够接收一个右值,而且不需要拷贝,所以只有一次调用拷贝构造函数,就是在ReturnRvalue()函数中,构造好了Copyable对象,返回的时候会调用拷贝构造函数生成一个临时对象。 而实际的结果是,不管哪种方式,一次拷贝构造函数都没有调用! 这是由于编译器默认开启了返回值优化(RVO/NRVO, RVO, Return Value Optimization 返回值优化,或者NRVO, Named Return Value Optimization)。编译器很聪明,发现在ReturnRvalue内部生成了一个对象,返回之后还需要生成一个临时对象调用拷贝构造函数,很麻烦,所以直接优化成了1个对象对象,避免拷贝,而这个临时变量又被赋值给了函数的形参,还是没必要,所以最后这三个变量都用一个变量替代了,不需要调用拷贝构造函数。 可以在编译的时候加上-fno-elide-constructors选项(关闭返回值优化)。 即可看到确实分别调用两次拷贝构造函数和一次拷贝构造函数。 */
1.2 移动语义
-
移动构造函数和移动赋值构造函数。
1 2 3 4 5 6 7 8 9 10 11 12 13 14 15 16 17 18 19 20 21 22 23 24 25 26 27 28 29 30 31 32 33 34 35 36 37 38 39 40 41 42 43 44 45 46 47 48 49 50 51 52 53 54 55 56 57 58 59 60 61 62 63 64 65 66 67 68 69 70 71 72 73 74 75 76 77 78 79 80 81 82 83 84 85 86 87 88 89 90 91 92 93 94#include <iostream> #include <cstring> #include <vector> using namespace std; class MyString { public: static size_t CCtor; //统计调用拷贝构造函数的次数 static size_t MCtor; //统计调用移动构造函数的次数 static size_t CAsgn; //统计调用拷贝赋值函数的次数 static size_t MAsgn; //统计调用移动赋值函数的次数 public: // 构造函数 MyString(const char* cstr=0){ if (cstr) { m_data = new char[strlen(cstr)+1]; strcpy(m_data, cstr); } else { m_data = new char[1]; *m_data = '\0'; } } // 拷贝构造函数 MyString(const MyString& str) { CCtor ++; m_data = new char[ strlen(str.m_data) + 1 ]; strcpy(m_data, str.m_data); } // 移动构造函数 MyString(MyString&& str) noexcept :m_data(str.m_data) { MCtor ++; str.m_data = nullptr; //不再指向之前的资源了 } // 拷贝赋值函数 =号重载 MyString& operator=(const MyString& str){ CAsgn ++; if (this == &str) // 避免自我赋值!! return *this; delete[] m_data; m_data = new char[ strlen(str.m_data) + 1 ]; strcpy(m_data, str.m_data); return *this; } // 移动赋值函数 =号重载 MyString& operator=(MyString&& str) noexcept{ MAsgn ++; if (this == &str) // 避免自我赋值!! return *this; delete[] m_data; m_data = str.m_data; str.m_data = nullptr; //不再指向之前的资源了 return *this; } ~MyString() { delete[] m_data; } char* get_c_str() const { return m_data; } private: char* m_data; }; size_t MyString::CCtor = 0; size_t MyString::MCtor = 0; size_t MyString::CAsgn = 0; size_t MyString::MAsgn = 0; int main() { vector<MyString> vecStr; vecStr.reserve(1000); //先分配好1000个空间 for(int i=0;i<1000;i++){ vecStr.push_back(MyString("hello")); } cout << "CCtor = " << MyString::CCtor << endl; cout << "MCtor = " << MyString::MCtor << endl; cout << "CAsgn = " << MyString::CAsgn << endl; cout << "MAsgn = " << MyString::MAsgn << endl; } /* 结果 CCtor = 0 MCtor = 1000 CAsgn = 0 MAsgn = 0 */- 可以看到,移动构造函数与拷贝构造函数的区别是,拷贝构造的参数是
const MyString& str,是常量左值引用,而移动构造的参数是MyString&& str,是右值引用,而MyString("hello")是个临时对象,是个右值,优先进入移动构造函数而不是拷贝构造函数。而移动构造函数与拷贝构造不同,它并不是重新分配一块新的空间,将要拷贝的对象复制过来,而是"偷"了过来,将自己的指针指向别人的资源,然后将别人的指针修改为nullptr,这一步很重要,如果不将别人的指针修改为空,那么临时对象析构的时候就会释放掉这个资源,"偷"也白偷了。 - 对于一个左值,肯定是调用拷贝构造函数了,但是有些左值是局部变量,生命周期也很短,能不能也移动而不是拷贝呢?
C++11为了解决这个问题,提供了std::move()方法来将左值转换为右值,从而方便应用移动语义。我觉得它其实就是告诉编译器,虽然我是一个左值,但是不要对我用拷贝构造函数,而是用移动构造函数吧 - 如果我们没有提供移动构造函数,只提供了拷贝构造函数,
std::move()会失效但是不会发生错误,因为编译器找不到移动构造函数就去寻找拷贝构造函数,也这是拷贝构造函数的参数是const T&常量左值引用的原因! c++11中的所有容器都实现了move语义,move只是转移了资源的控制权,本质上是将左值强制转化为右值使用,以用于移动拷贝或赋值,避免对含有资源的对象发生无谓的拷贝。move对于拥有如内存、文件句柄等资源的成员的对象有效,如果是一些基本类型,如int和char[10]数组等,如果使用move,仍会发生拷贝(因为没有对应的移动构造函数),所以说move对含有资源的对象说更有意义。
- 可以看到,移动构造函数与拷贝构造函数的区别是,拷贝构造的参数是
1.3 完美转发
-
先来了解通用引用的概念
-
universal references(通用引用)是完美转发的基础。
-
当右值引用和模板结合的时候,就复杂了。
T&&并不一定表示右值引用,它可能是个左值引用又可能是个右值引用。例如:1 2 3 4 5 6 7template<typename T> void f( T&& param){ } f(10); //10是右值 int x = 10; // f(x); //x是左值 -
这里的
&&是一个未定义的引用类型,称为universal references,它必须被初始化,它是左值引用还是右值引用却决于它的初始化,如果它被一个左值初始化,它就是一个左值引用;如果被一个右值初始化,它就是一个右值引用。 -
总结: &&和模板仪器使用的时候,会变成通用引用universial references,而不是表面的右值引用。
-
-
定义:所谓转发,就是通过一个函数将参数继续转交给另一个函数进行处理,原参数可能是右值,可能是左值,如果还能继续保持参数的原有特征,那么它就是完美的。即保持原本的左右值特性的转发
-
1 2 3 4 5 6 7 8 9 10 11 12 13 14 15 16 17 18 19 20 21 22 23 24 25 26 27#include <iostream> using namespace std; void process(int& i) { cout << "process(int&):" << i << endl; } void process(int&& i) { cout << "process(int&&):" << i << endl; } void myforward(int&& i) { cout << "myforward(int&&):" << i << endl; process(i); } int main() { int a = 0; process(a); //a被视为左值 process(int&):0 process(1); //1被视为右值 process(int&&):1 process(move(a)); //强制将a由左值改为右值 process(int&&):0 myforward(2); //右值经过forward函数转交给process函数,却成为了一个左值, //原因是该右值有了名字和地址,所以是 process(int&):2 myforward(move(a)); // 同上,在转发的时候右值变成了左值 process(int&):0 }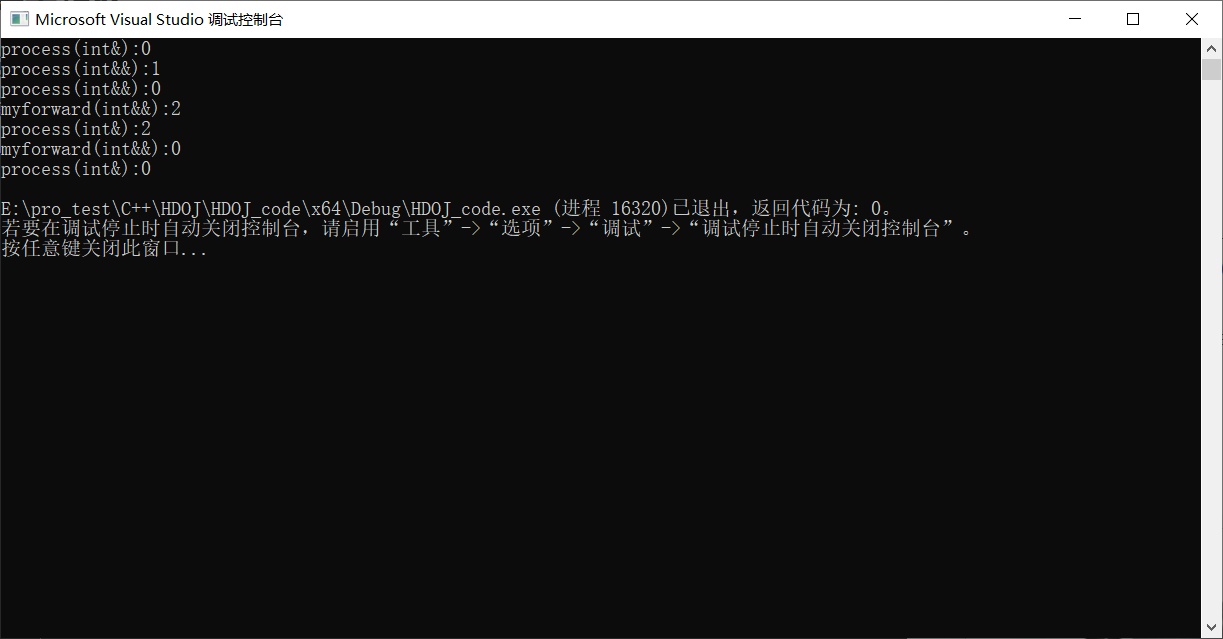
-
以上例子就是不完美转发的实验。
-
但c++11提供的std::forward()函数解决完美转发的问题。
-
std::forward被称为完美转发,它的作用是保持原来的
值属性不变。啥意思呢?通俗的讲就是,如果原来的值是左值,经std::forward处理后该值还是左值;如果原来的值是右值,经std::forward处理后它还是右值。1 2 3 4 5 6 7 8 9 10 11 12 13 14 15 16 17 18 19 20 21 22 23 24 25 26 27#include <iostream> template<typename T> void print(T & t) { std::cout << "左值" << std::endl; } template<typename T> void print(T && t) { std::cout << "右值" << std::endl; } template<typename T> void testForward(T && v) //注意,此时的&&是通用引用,而不是右值引用 { print(v);//转换为左值 print(std::forward<T>(v));//保留 print(std::move(v));//转换为右值 } int main(int argc, char * argv[]) { testForward(1);//右值 std::cout << "======================" << std::endl; int x = 1; testForward(x);//左值 }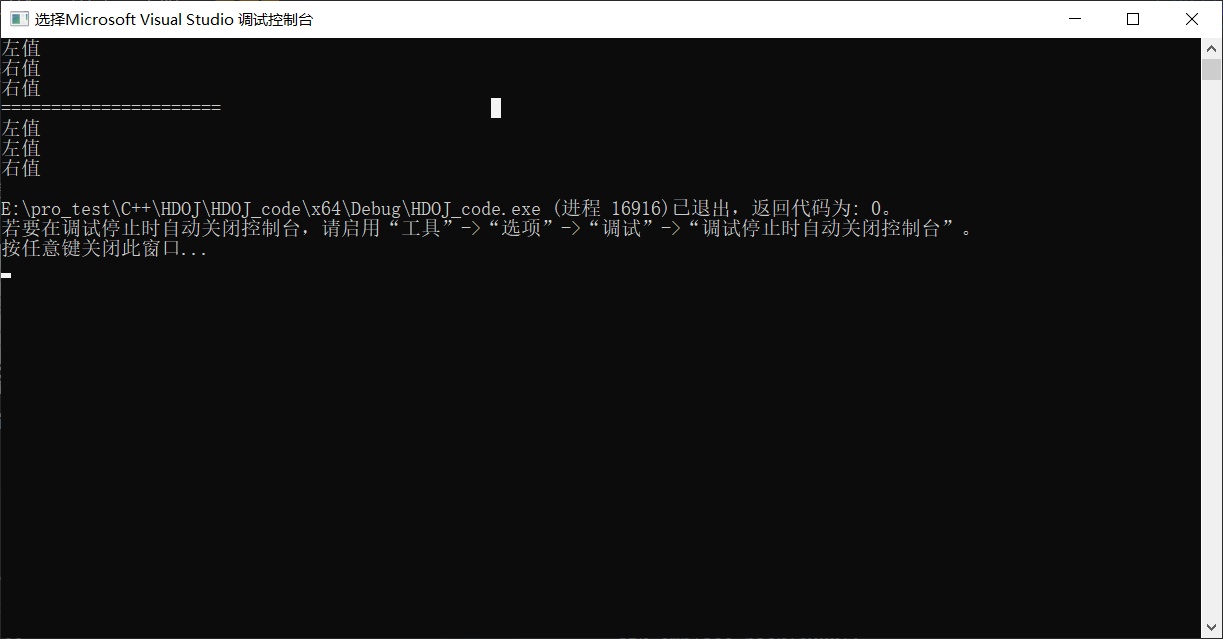
-
总结:std::forward()和universal references通用引用共同实现了完美转发。
1.4 emplace_back()函数
-
emplace_back减少内存拷贝和移动
我们之前使用
vector一般都喜欢用push_back(),由上文可知容易发生无谓的拷贝,解决办法是为自己的类增加移动拷贝和赋值函数,但其实还有更简单的办法!就是使用emplace_back()替换push_back()。 -
emplace_back()可以直接通过构造函数的参数构造对象,但前提是要有对应的构造函数。 -
对于
map和set,可以使用emplace()。基本上emplace_back()对应push_back(),emplce()对应insert()。
2 .标准库move函数
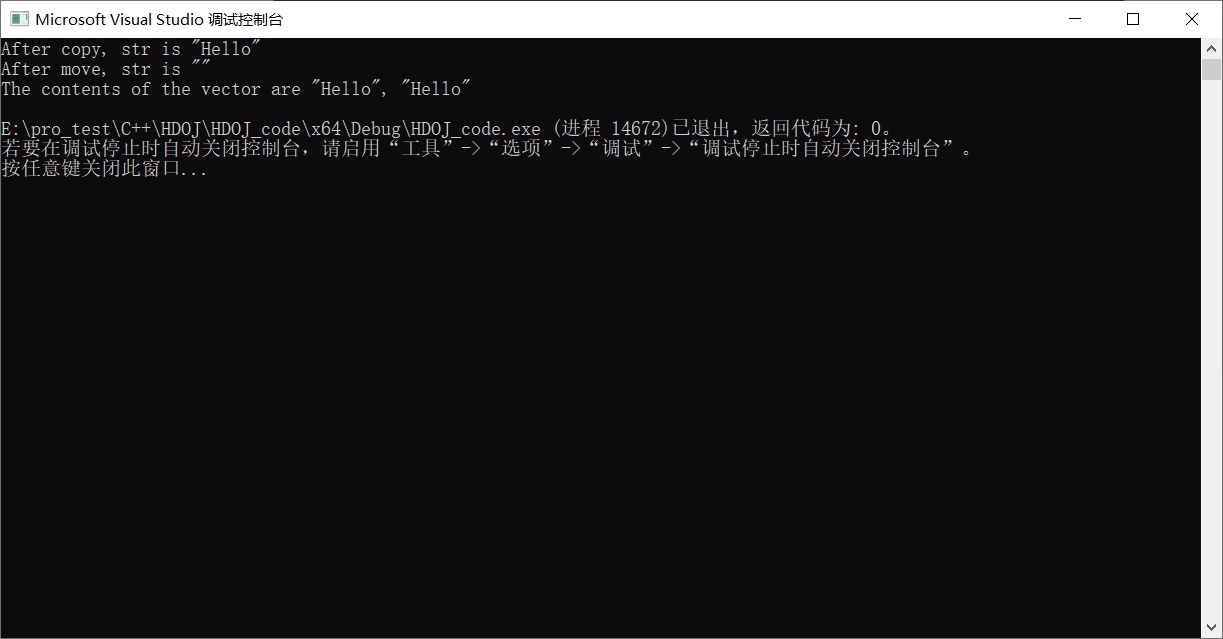
- 我们可以通过调用std::move函数来获得绑定到左值上的右值引用,此函数定义在头文件< utility>中。std :: move用于指示对象obj可以“移动”,即允许资源从obj到另一个对象的有效传输。注意,对move我们不应该使用using声明,而是应该直接调用std::move而不是move,以避免名字冲突。
|
|
- move告诉编译器:我们有一个左值,但我们希望像一个右值一样处理它。我们必须认识到,调用move就意味着:除了对 rr1 赋值或销毁外,我们再使用它。在调用move之后,我们不能对moved-from对象(即rr1)做任何假设。
|
|
3. 指针和动态内存
3.1 C语言的空指针
-
对于空(null)指针的概念,在 C 标准中明确地定义:值为 0 的整型常量表达式,或强制(转换)为“void*”类型的此类表达式,称为空指针常量。当将一个空指针常量赋予一个指针或与指针作比较时,将把该常量转换为指向该类型的指针,这样的指针称为空指针。空指针在与指向任何对象或函数的指针作比较时保证不会相等。
-
根据上面的定义,我们可以对空指针做如下几点剖析:
-
每一种指针类型都有一个空指针,它与同类型的其他所有指针值都不相同。
-
由系统保证空指针不指向任何实际的对象或函数,也就是说,任何对象或者函数的地址都不可能是空指针,空指针与任何对象或函数的指针值都不相等。因此,取地址操作符 & 永远也不能得到空指针,同样对 malloc() 函数的成功调用也不会返回空指针,但如果调用失败,则 malloc() 函数返回空指针。
-
空指针表示“未分配”或者“尚未指向任何地方”。它与未初始化的指针有所不同,空指针可以确保不指向任何对象或函数,而未初始化指针可能指向任何地方。
-
0、0L、'\0'、3-3、0*17以及(void*)0等都是空指针常量。在一般情况下,对于 C 语言系统,选择“(void*)0”或 0的居多(也有个别的选择 0L);而对于 C++语言系统,由于存在严格的类型转化的要求,“void*”不能像在 C 语言中那样自由转换为其他指针类型,所以通常只选 0 作为空指针常量,而不选择“(void*)0”。
1 2 3 4 5 6 7 8 9 10 11 12int *p; p=0; /*或者*/ p=0l; /*或者*/ p='\0'; /*或者*/ p=3-3; /*或者*/ p=0*17; /*或者*/ p=(void*)0;- 对于空指针究竟指向内存的什么地方,在标准中并没有明确规定。也就是说,用哪个具体的地址值(0 地址还是某一特定地址)来表示空指针完全取决于系统的实现。在一般情况下,空指针指向 0 地址,即空指针的内部用全 0 来表示,也可以称它为零空指针。当然,也有一些系统用一些特殊的地址值或特殊的方式来表示空指针,也可以称它为非零空指针。
-
3.2 C语言的NULL指针与C++的nullptr
-
作为一种良好的编程习惯,很多程序员都不愿意在程序中到处出现未加修饰的 0 或者其他空指针常量。为了让程序中的空指针使用更加明确,从而保持统一的编程风格,标准 C 专门定义了一个标准预处理宏 NULL,其值为“空指针常量”,通常是 0 或者“((void*)0)”,即在指针上下文中的 NULL 与 0 是等价的,而未加修饰的 0 也是完全可以接受的。如在 VC++ 中定义预处理宏 NULL 的代码如下:
-
1 2 3 4 5 6 7 8/* Define NULL pointer value */ #ifndef NULL #ifdef __cplusplus #define NULL 0 #else #define NULL ((void *)0) #endif #endif -
由此可见,常数 0 是一个空指针常量,而 NULL 仅仅是它的一个别名。NULL 可以确保是 0,但空指针却不一定。
-
在C语言中,我们常常用NULL作为指针变量的初始值,而在C++中,却不建议你这么做。
-
在C的头文件中,通常定义如下
1#define NULL ((void*)0) -
但在c++的定义中,是这样定义的
1#define NULL 0 -
而在c++中,是不能将void *类型的指针隐式转换成其他指针类型的,从以下例子可以看出
1 2 3 4 5 6 7 8 9 10 11#include <bits/stdc++.h> using namespace std; int main() { char p[] = "12345"; int *a = (void*)p; return 0; } /*编译报错 error: invalid conversion from 'void*' to 'int*' */ -
但是使用nullptr就可以,nullptr并非整型类别,甚至也不是指针类型,但是能转换成任意指针类型。nullptr的实际类型是std:nullptr_t。
-
在C++中,如果你想表示空指针,那么使用nullptr,而不是NULL。
3.3 野指针
-
“野指针”不是NULL指针,是指向“垃圾”内存的指针。“野指针”的成因主要有三种:
1)指针变量没有被初始化。任何指针变量刚被创建时不会自动成为NULL指针,它的缺省值是随机的,它会乱指一气。所以,指针变量在创建的同时应当被初始化,要么将指针设置为NULL,要么让它指向合法的内存。
2)指针p被free或者delete之后,没有置为NULL,让人误以为p是个合法的指针。
free和delete只是把指针所指的内存给释放掉,但并没有把指针本身干掉。free以后其地址仍然不变(非NULL),只是该地址对应的内存是垃圾,p成了“野指针”。如果此时不把p设置为NULL,会让人误以为p是个合法的指针。
3)指针操作超越了变量的作用范围。如下程序所示。
1 2 3 4 5 6 7 8 9 10 11 12 13 14class A { public: void Func(void){ cout << “Func of class A” << endl; } }; void Test(void) { A *p; { A a; p = &a; // 注意 a 的生命期 ,只在这个程序块中(花括号里面的两行),而不是整个test函数 } p->Func(); // p是“野指针” }
3.4 malloc和new的区别
- new和malloc都用于动态申请内存
- 从本质上来说,malloc是C中的函数,需要声明特定的头文件。而new是C++中的关键字(操作符),它本身不是函数,所以不依赖于头文件,C++译器就可以把new编译成目标代码(还会根据参数的类型插入相应的构造函数)。
- 从使用上来说,有下几点不同:
- new和delete是操作符,可以重载,只能在C++中使用。而malloc,free是函数,可以覆盖,C、C++中都可以使用。
- new可以自动计算所需要的字节大小。而malloc必须人为的计算出所需要的字节数。在Linux中可以有这样:malloc(0),这是因为Linux中malloc有一个下限值16Bytes,注意malloc(-1)是禁止的,但是在某些系统中是不允许malloc(0)的。
- 分配内存成功的话,new返回指定类型的指针。而malloc返回void指针,可以在返回后强行转换为实际类型的指针。对于C++,如果写成:p = malloc (sizeof(int)); 则程序无法通过编译,报错:“不能将 void* 赋值给 int * 类型变量”。所以必须通过 (int *) 来将强制转换。而对于C,没有这个要求,但为了使C程序更方便的移植到C++中来,建议养成强制转换的习惯。
- 分配内存失败时,new会throw一个异常std::bad_alloc。而malloc会返回空指针。
- new可以调用对象的构造函数,对应的delete调用相应的析构函数。而malloc仅仅分配内存,free仅仅回收内存,并不执行构造函数和析构函数。
- 申请的内存所在位置:new操作符从自由存储区(free store)上为对象动态分配内存空间,而malloc函数从堆上动态分配内存。自由存储区是C++基于new操作符的一个抽象概念,凡是通过new操作符进行内存申请,该内存即为自由存储区。而堆是操作系统中的术语,是操作系统所维护的一块特殊内存,用于程序的内存动态分配,C语言使用malloc从堆上分配内存,使用free释放已分配的对应内存。那么自由存储区是否能够是堆(问题等价于new是否能在堆上动态分配内存),这取决于operator new 的实现细节。自由存储区不仅可以是堆,还可以是静态存储区,这都看operator new在哪里为对象分配内存。
- malloc 只管分配内存,并不能对所得的内存进行初始化,所以得到的一片新内存中,其值将是随机的。但是new可以对申请的内容初始化,如
int *p2 = new int(0);//初始化为0。
4. 智能指针
-
C++ 标准模板库 STL(Standard Template Library) 一共给我们提供了四种智能指针:auto_ptr、unique_ptr、shared_ptr 和 weak_ptr,其中 auto_ptr 是 C++98 提出的,C++11 已将其摒弃,并提出了 unique_ptr 替代 auto_ptr。虽然 auto_ptr 已被摒弃,但在实际项目中仍可使用,但建议使用更加安全的 unique_ptr,后文会详细叙述。shared_ptr 和 weak_ptr 则是 C+11 从准标准库 Boost 中引入的两种智能指针。此外,Boost 库还提出了 boost::scoped_ptr、boost::scoped_array、boost::intrusive_ptr 等智能指针,虽然尚未得到 C++ 标准采纳,但是在开发实践中可以使用。
-
例题
-
1 2 3 4 5 6 7 8 9 10 11 12 13 14 15 16 17 18 19 20 21 22#include <iostream> #include <memory> std::shared_ptr<int> Copy(std::shared_ptr<int> sp) { std::shared_ptr<int> a = std::move(sp);//此时sp为空,sp的引用计数为0,a的引用计数为2;因为sp本来是2,其拷贝了p2,所以和p2指向同一块内存,引用次数+1 return std::shared_ptr<int>(a); } int main() { std::shared_ptr<int> p1(new int(2)); std::shared_ptr<int> p2(new int(2)); std::weak_ptr<int> p3; p3 = p1; auto p4 = Copy(p2);//p2和p4指向同一块内容,共享指针,所以是2 std::cout << p1.use_count() << "," << p2.use_count() << "," << p3.use_count() << "," << p4.use_count() << std::endl; return 0; } /*输出 1,2,1,2 */
4.1 普通指针存在的问题
-
1资源泄漏:申请的内存没有释放等等。
1 2 3 4 5 6 7int main(){ int *pTemp = new int; *pTemp = 1; pTemp = new int;//错误,之前int的内存已经泄漏 delete pTemp; return 1; } -
2.迷途指针:当多个指针指向同一个内存时,其中一个指针释放了内存,但其他指针不知道。
1 2 3 4 5 6 7int main(){ int *p1 = new int; int *p2 = p1; delete p1; *p2 = 1;//错误,p2指向的内存已经被释放 return 0; } -
3.野指针:没有初始化就直接使用的指针。
1 2 3 4 5int main(){ int *p; *p = 1;//错误,未对指针进行初始化,形成野指针 return 0; }
4.2 shared_ptr 共享指针
4.2.1 概述
-
shared_ptr 是一个标准的共享所有权的智能指针,允许多个指针指向同一个对象,定义在 memory 文件中,命名空间为 std。shared_ptr最初实现于Boost库中,后由 C++11 引入到 C++ STL。shared_ptr 利用引用计数的方式实现了对所管理的对象的所有权的分享,即允许多个 shared_ptr 共同管理同一个对象。像 shared_ptr 这种智能指针,《Effective C++》称之为“引用计数型智能指针”(reference-counting smart pointer,RCSP)。
-
shared_ptr 是为了解决 auto_ptr 在对象所有权上的局限性(auto_ptr 是独占的),在使用引用计数的机制上提供了可以共享所有权的智能指针,当然这需要额外的开销: (1)shared_ptr 对象除了包括一个所拥有对象的指针外,还必须包括一个引用计数代理对象的指针; (2)时间上的开销主要在初始化和拷贝操作上, * 和 -> 操作符重载的开销跟 auto_ptr 是一样; (3)开销并不是我们不使用 shared_ptr 的理由,,永远不要进行不成熟的优化,直到性能分析器告诉你这一点。
-
特性
- 具有共享所有权语义
- 每当shared_ptr的最后一个所有者被销毁时,关联对象都将被删除(或关联资源被清除)。通过引用计数方式实现。
-
其实现原理为: shared_ptr由两个指针构成, 一个指向控制块(称为拥有指针), 一个指向存储的指针(称为存储指针)。控制块会控制其存储指针的生存期.;但是, 重点来了, 控制块中存储的指针未必是shared_ptr存储的指针,因为有别名构造函数,但是一般都是一致的。
-
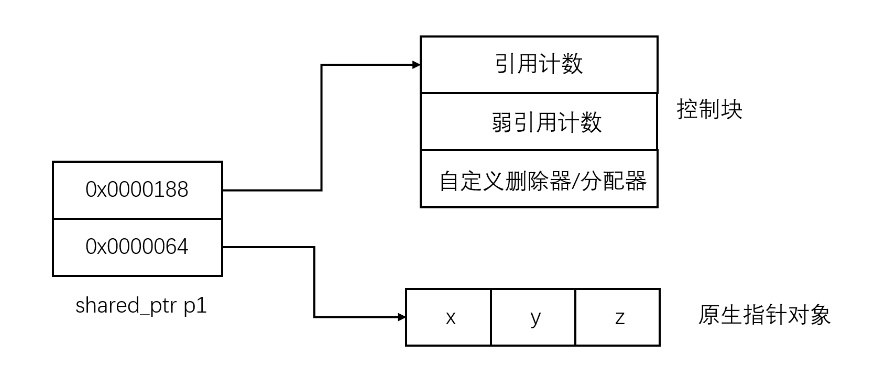
-
std::shared_ptr 可以通过 get() 方法来获取原始指针,通过 reset() 来减少一个引用计数, 并通过use_count()来查看一个对象的引用计数。例如:
-
1 2 3 4 5 6 7 8 9 10 11 12 13 14 15 16 17 18auto pointer = std::make_shared<int>(10); auto pointer2 = pointer; // 引用计数+1 auto pointer3 = pointer; // 引用计数+1 int *p = pointer.get(); // 这样不会增加引用计数,慎用,不要轻易delete该裸指针 std::cout << "pointer.use_count() = " << pointer.use_count() << std::endl; // 3 std::cout << "pointer2.use_count() = " << pointer2.use_count() << std::endl; // 3 std::cout << "pointer3.use_count() = " << pointer3.use_count() << std::endl; // 3 pointer2.reset(); std::cout << "reset pointer2:" << std::endl; std::cout << "pointer.use_count() = " << pointer.use_count() << std::endl; // 2 std::cout << "pointer2.use_count() = " << pointer2.use_count() << std::endl; // 0, pointer2 已 reset std::cout << "pointer3.use_count() = " << pointer3.use_count() << std::endl; // 2 pointer3.reset(); std::cout << "reset pointer3:" << std::endl; std::cout << "pointer.use_count() = " << pointer.use_count() << std::endl; // 1 std::cout << "pointer2.use_count() = " << pointer2.use_count() << std::endl; // 0 std::cout << "pointer3.use_count() = " << pointer3.use_count() << std::endl; // 0, pointer3 已 reset
4.2.2 创建方式
-
有三种方式,推荐第三种
-
1 2 3 4 5 6 7 8 9 10/* 方式一:shared_ptr<string> pTom(new string("tom")); 方式二:shared_ptr<string> pTom; pTom.reset(new string("tom")); 方式三:shared_ptr<string> pTom = make_shared<string>("tom"); 推荐:使用方式三,更快(一次复制),更安全 */
4.2.3 使用方式
-
*sp解引用 -
sp->fcn解引用并调用指针对象的成员函数 -
向容器中插入sp,只是增加一次引用次数。
-
1 2 3 4 5 6 7 8 9 10 11 12 13 14 15 16 17 18 19 20 21 22 23 24 25 26 27 28 29 30 31 32 33 34 35 36 37 38 39 40 41 42 43 44 45 46 47 48 49 50 51 52 53 54 55 56 57 58 59#include <iostream> #include <memory> #include <string> #include <vector> using namespace std; int main() { shared_ptr<string> pTom = make_shared<string>("tom"); shared_ptr<string> pJerry = make_shared<string>("jerry"); //两种调用指针对象的成员库函数方法 (*pTom)[0] = 'T'; //tom -> Tom pJerry->replace(0, 1, "J"); //jerry -> Jerry,->调用string的成员库函数 cout << *pTom << " " << *pJerry << endl; cout << "==================" << endl; (*pTom).replace(0, 1, "FF"); cout << *pTom << " " << *pJerry << endl; cout << "==================" << endl; //创建智能指针数组 vector<shared_ptr<string>> vtWhoCleanRoom; vtWhoCleanRoom.push_back(pTom); vtWhoCleanRoom.push_back(pJerry); vtWhoCleanRoom.push_back(pTom); //此时vtWhoCleanRoom的内容为Tom Jerry Tom for (const auto &it : vtWhoCleanRoom) { cout << *it << " "; } cout << endl; cout << "==================" << endl; //此时vtWhoCleanRoom的内容为Tomy Jerry Tomy *pTom = "changeTom";//说明数组里面的智能指针和现在的智能指针指向同一个对象,但是增加了引用次数 for (const auto &it : vtWhoCleanRoom) { cout << *it << " "; } cout << endl; cout << "==================" << endl; int kk = pTom.use_count(); cout << "pTom use_count = " << kk << endl; return 0; } /*输出 Tom Jerry ================== FFom Jerry ================== FFom Jerry FFom ================== changeTom Jerry changeTom ================== pTom use_count = 3 */
4.2.4 比较运算符
-
①所有比较运算符都会调用共享指针sp指向对象的比较运算符,比如int类型的共享指针的比较调用int的比较运算符。
-
②支持==、!=、<、<=、>、>=。
-
③同类型的共享指针才能使用比较运算符。
-
1 2 3 4 5 6 7 8 9 10 11 12 13 14 15 16 17 18 19 20 21#include <iostream> #include <memory> #include <string> #include <vector> using namespace std; int main() { shared_ptr<int> sp1 = make_shared<int>(1); shared_ptr<int> sp2 = make_shared<int>(2); shared_ptr<int> spnu; shared_ptr<double> spd = make_shared<double>(1.5); bool check1 = sp1 < sp2;//调用int的比较,true bool check2 = sp1 > spnu;//已定义指针基本大于空指针,true bool check3 = spnu == spnu; //空指针等于空指针,true bool check4 = sp1 < spd; //编译错误 return 0; }
4.2.5 强制类型转换
-
共享指针强制转换运算符允许将其中包裹的指针强制转换为其他类型。
-
不能使用普通的强制转换运算符,比如常用的
static_cast 或者 dynamic_cast等等。因为它会导致未定义的行为,虽然结果可能是对的。 -
共享指针的强制类型转换运算符包括static_pointer_cast、 dynamic_pointer_cast、 const_pointer_cast。
-
1 2 3 4 5 6 7 8 9 10 11 12 13 14 15 16 17 18 19 20 21 22 23 24 25#include <iostream> #include <memory> #include <string> #include <vector> using namespace std; int main() { shared_ptr<void> sp(new int(1)); //第一种,强制转换,不一定出错,但是未定义,实际开发应避免这些情况 shared_ptr<int> sp1(static_cast<int *>(sp.get())); //第二种,利用智能指针的强制转换运算符,推荐 shared_ptr<int> spi = static_pointer_cast<int>(sp); cout << *sp1 << endl; cout << *spi << endl; return 0; } /*输出 1 1 */
4.2.6 线程安全接口
-
shared_ptr的底层实现原理是引用计数,关于这个计数是否线程安全呢,如果我们把shared_ptr分别传递到不同的线程中,是否会在成引用计数的竞争问题。我们来看shared_ptr引用计数的底层实现。shared_ptr继承了一个模板类,用它来管理引用计数。其中有两个变量一个表示shared_ptr的引用数,另外一个表示weak_ptr的引用数。
-
因此我们知道weak_ptr不会增加智能指针shared_ptr的引用数也就是说不持有对象,他的使用必须通过lock方法获取它指向的shared_ptr才能使用。
-
共享指针shared_ptr的引用计数在手段上使用了atomic原子操作,只要在shared_ptr在拷贝或赋值时增加引用,析构时减少引用就可以了。
-
因此智能指针在多线程下传递使用时引用计数是不会有线程安全问题的,但是这能真正的保证shared_ptr指针的线程安全问题吗?
-
虽然通过原子操作解决了智能指针的引用计数的线程安全问题;但是智能指针指向的对象的线程安全问题,智能指针没有做任何的保证。首先智能指针有两个变量,一个是指向的对象的指针,还有一个就是我们上面看到的引用计数管理对象。当智能指针发生拷贝的时候,标准库STL的实现是先拷贝智能指针,再拷贝引用计数对象(拷贝引用计数对象的时候,会使use_count加一),这两个操作并不是原子的,隐患就出现在这里。
-
(shared_ptr)的引用计数本身是安全且无锁的,但对象的读写则不是,因为 shared_ptr 有两个数据成员,读写操作不能原子化。根据文档, shared_ptr 的线程安全级别和内建类型、标准库容器、std::string 一样。
-
一个 shared_ptr 对象实体可被多个线程同时读取(例1);
-
两个 shared_ptr 对象实体可以被两个线程同时写入(例2),“析构”算写操作;
-
如果要从多个线程读写同一个 shared_ptr 对象,那么需要加锁。
-
请注意,以上是 shared_ptr 智能指针本身的线程安全级别,不是它管理的对象的线程安全级别。
-
例子:
1shared_ptr<int> p(new int(42)); -
代码示例 1.
shared_ptr从两个线程中读取 p1 2 3 4 5// thread A shared_ptr<int> p2(p); // reads p // thread B shared_ptr<int> p3(p); // OK, multiple reads are safe -
shared_ptr代码示例 2.从两个线程编写不同的实例1 2 3 4 5// thread A p.reset(new int(1912)); // writes p // thread B p2.reset(); // OK, writes p2 -
因此,共享指针的同时读写操作需要进行加锁。
-
标准库STL提供了共享指针的原子接口。
-
操作 结果 atomic_is_lock_free(&sp) 如果sp的原子接口是无锁的,则返回true atomic_load(&sp) 返回sp atomic_store(&sp,sp2) 使用sp2对sp进行赋值 atomic_exchange(&sp,sp2) 交换sp与sp2的值 -
示例
-
1 2 3 4 5 6 7 8 9std::shared_ptr<X> global; //创建空的共享指针,线程1 //线程2,把local赋给golbal,原子操作 void foo() { std::shared_ptr<X> local{new X}; ... std::atomic_store(&global, local); } -
不使用库函数的原子操作,可以使用互斥锁Mutex,参考陈硕的P18 里面的加锁例子。
4.2.7 错误使用
-
多个共享指针不能拥有同一个对象,但可以拥有同一个共享指针内存
-
1 2 3 4//这样是可以的,指向本身是共享指针开辟的内存 auto pointer = std::make_shared<int>(10); auto pointer2 = pointer; // 引用计数+1 auto pointer3 = pointer; // 引用计数+1 -
1 2 3 4//这样是不可以的,导致段错误,因为sp2并不知道sp1的存在,两者的引用次数都是1,最后导致p析构两次,发生段错误。 CTest* p = new CTest("test"); shared_ptr<CTest> sp1(p); shared_ptr<CTest> sp2(p); //错误 -
1 2 3 4 5 6 7 8 9 10 11 12 13 14 15 16 17 18 19 20 21 22 23 24 25 26 27 28 29 30#include <iostream> #include <memory> #include <string> #include <vector> using namespace std; class CTest{ public: CTest(const string &sName):m_name(sName){} ~CTest(){ cout<<m_name<<" is destroyed ! "<<endl; } private: string m_name; }; int main() { CTest *p = new CTest("tyc"); shared_ptr<CTest> sp1(p); shared_ptr<CTest> sp2(p); return 0; } /* 输出 tyc is destroyed ! Signal: SIGSEGV (Segmentation fault) -
改进措施
- 可以使用
enable_shared_from_this模板和shared_from_this方法生成共享指针
- 可以使用
-
1 2 3 4 5 6 7 8 9 10 11 12 13 14 15 16 17 18 19 20 21 22 23 24 25 26 27 28 29 30 31 32 33 34 35#include <iostream> #include <memory> #include <string> #include <vector> using namespace std; class CTest:public enable_shared_from_this<CTest>{ public: CTest(const string &sName):m_name(sName){} ~CTest(){ cout<<m_name<<" is destroyed ! "<<endl; } //共享指针生成函数 shared_ptr<CTest> getSharPtr(){ return shared_from_this(); } private: string m_name; }; int main() { CTest *p = new CTest("tyc"); shared_ptr<CTest> sp1(p); //生成共享指针 shared_ptr<CTest> sp2 = p->getSharPtr(); return 0; } /*输出 tyc is destroyed ! 进程已结束,退出代码 0
4.2.8 共享指针的销毁
-
一:自定义删除器操作
-
①定义删除器sp(…, D);
-
②删除器可以定义为普通函数、匿名函数、函数指针等符合签名要求的可调用对象;
-
③只有最后引用对象的sp销毁时才会销毁对象。
-
1 2 3 4 5 6 7 8 9 10 11 12 13 14 15 16 17 18 19 20 21 22 23 24 25 26 27 28 29#include <iostream> #include <memory> #include <string> #include <vector> using namespace std; void delFun(string *p) { cout << "Fun delete " << *p << endl; delete p; } int main() { cout << "begin" << endl; shared_ptr<string> pTom; { shared_ptr<string> pTom1(new string("Tom"), [](string *p) { cout << "Lamada delete " << *p << endl; delete p; }); pTom = pTom1;//赋值给了外面的共享指针,生命周期变长,同时引用次数+1,后释放 //因为pJerry 是局部变量,先释放 shared_ptr<string> pJerry(new string("Jerry"), delFun); } cout << "end" << endl; return 0; } /* -
二:为数组自定义删除器
-
可以为数组创建一个共享指针,但不自定义或更改默认删除器的写法是错误的。因为共享指针提供的默认删除程序,将调用delete,而不是delete []。可以使用自定义的删除器,删除器中使用delete [];也可以使用
default_delete作删除器, 因为它使用delete []。 -
1 2 3 4 5 6 7 8 9 10 11 12 13 14 15 16 17 18 19 20 21 22#include <iostream> #include <memory> using namespace std; int main() { //错误但能编译通过, 因为默认只是delete std::shared_ptr<char> sp1(new char[20]); //使用自定义删除器,匿名函数 std::shared_ptr<char> sp2(new char[20], [](char *p) { delete[] p; } ); //使用标准库删除器default_delete std::shared_ptr<char> sp3(new char[20], std::default_delete<char[]>()); return 0; } -
三:释放其他资源
-
共享指针除了可以释放内存,还可以释放其他资源;而要释放其他资源,例如进行文件的删除操作。
-
1 2 3 4 5 6 7 8 9 10 11 12 13 14 15 16 17 18 19 20 21 22 23 24 25 26 27 28 29 30 31 32 33 34 35 36 37 38#include <iostream> #include <fstream> #include <memory> #include <cstdio> using namespace std; class FileDeleter { public: // 构造函数,输入删除文件的名称 FileDeleter(const string &sFileName) : m_sFileName(sFileName) { } //重载运算符(), 自定义删除器,当调用这个类作为删除器的时候,相当于调用 FileDeleter(ofstream *pOfs) void operator()(ofstream *pOfs) { delete pOfs; //关闭文件 remove(m_sFileName.c_str()); //删除文件,在库<cstdio>里面 cout << "Delete file -- " << m_sFileName << endl; } private: string m_sFileName; }; int main() { const string sFileName = "TempFile.txt"; //自定义删除器,删除器为一个类 std::shared_ptr<ofstream> fp(new ofstream(sFileName), FileDeleter(sFileName)); cout << "Program exit" << endl; return 0; } /*输出 Program exit Delete file -- TempFile.txt -
四:
get_deleter()的相关操作 -
①get_deleter()返回指向删除器的指针(如果有的话),否则返回nullptr。
-
②共享指针不提供release()操作来放弃所有权并将对象的控制权返回给调用者,原因是其他共享指针可能仍然拥有对象。
-
1 2 3 4 5 6 7 8 9 10 11 12 13 14 15 16 17 18#include <iostream> #include <memory> using namespace std; int main() { // 自定义删除器 auto del = [](int *p) { delete p; }; //创建共享指针 std::shared_ptr<int> p(new int, del); //返回删除器 decltype(del) *pd = std::get_deleter<decltype(del)>(p); return 0; }
4.2.9 接口列表
-
操作 结果 shared_ptr sp 默认构造函数;使用默认删除器(调用delete)创建一个空的共享指针 shared_ptr sp(ptr) 使用默认删除器(调用delete)创建一个拥有*ptr的共享指针 shared_ptr sp(ptr,del) 使用del作为删除器创建拥有*ptr的共享指针 shared_ptr sp(ptr, del, ac) 使用del作为删除器并使用ac作为分配器创建一个拥有*ptr的共享指针 shared_ptr sp(nullptr) 使用默认删除器(调用delete)创建空的共享指针 shared_ptr sp(nullptr, del) 使用del作为删除器创建一个空的共享指针 shared_ptr sp(nullptr, del, ac) 使用del作为删除器和ac作为分配器创建一个空的共享指针 shared_ptr sp(sp2) 创建与sp2共享所有权的共享指针 shared_ptr sp(move(sp2)) 创建一个共享指针,该共享指针拥有先前由sp2拥有的指针(sp2之后为空) shared_ptr sp(sp2, ptr) 别名构造函数;创建一个共享指针,共享sp2的所有权,但引用*ptr shared_ptr sp(wp) 从弱指针wp创建共享指针 -
操作 结果 shared_ptr sp(move(up)) 从unique_ptr创建共享指针 shared_ptr sp(move(ap)) 从auto_ptr创建共享指针 sp.~shared_ptr() 析构函数;如果sp拥有对象,则调用deleter sp = sp2 赋值(sp之后与sp2共享所有权,放弃先前拥有的对象的所有权) sp = move(sp2) 移动赋值(sp2将所有权转移到sp) sp = move(up) 使用unique_ptr进行移动赋值(up将所有权转让给sp) sp = move(ap) 使用auto_ptr进行移动赋值(ap将所有权转让给sp) sp1.swap(sp2) 交换sp1和sp2的指针和删除器 swap(sp1, sp2) 交换sp1和sp2的指针和删除器 sp.reset() 放弃所有权并将共享指针重新初始化为空 sp.reset(ptr) 放弃所有权并使用默认删除器(称为delete)重新初始化共享指针,拥有*ptr -
操作 结果 sp.reset(ptr, del) 放弃所有权并使用del作为删除器重新初始化共享指针,拥有* ptr sp.reset(ptr, del, ac) 放弃所有权并重新初始化共享指针,拥有* ptr,使用del作为删除器,使用ac作为分配器 make_shared(...) 为通过传递的参数初始化的新对象创建共享指针 allocate_shared(ac, ...) 使用分配器ac为由传递的参数初始化的新对象创建共享指针 sp.get() 返回存储的指针(通常是拥有对象的地址,如果没有则返回nullptr) *sp 返回拥有的对象(如果没有则为未定义的行为) sp->... 提供对拥有对象的成员访问权限(如果没有,则行为未定义) sp.use_count() 返回共享所有者(包括sp)的数目;如果共享指针为空,则返回0 sp.unique() 返回sp是否是唯一所有者(等效于sp.use_count()== 1,但可能更快) if (sp) 运算符bool();返回sp是否为空 sp1 == sp2 对存储的指针调用==(存储的指针可以为nullptr) -
操作 结果 sp1 != sp2 对存储的指针调用!=(存储的指针可以为nullptr) sp1 < sp2 对存储的指针调用<(存储的指针可以为nullptr) sp1 <= sp2 对存储的指针调用<=(存储的指针可以为nullptr) sp1 > sp2 对存储的指针调用>(存储的指针可以为nullptr) sp1 >= sp2 对存储的指针调用>=(存储的指针可以为nullptr) static_pointer_cast(sp) sp的static_cast<>语义 dynamic_pointer_cast(sp) sp的dynamic_cast<>语义 const_pointer_cast(sp) sp的const_cast<>语义 get_deleter(sp) 返回删除器的地址(如果有),否则返回nullptr strm << sp 调用原始指针的输出运算符(等于strm << sp.get()) sp.owner_before(sp2) 提供严格的弱排序和另一个共享指针 sp.owner_before(wp) 通过弱指针提供严格的弱排序
4.2.10 易错点
-
1 2 3 4 5 6 7 8 9 10 11 12 13 14shared_ptr<int> init() { shared_ptr<int> sp2 = make_shared<int>(3); shared_ptr<int> sp3(sp2); cout << sp2.use_count() << endl; //输出2 return sp2; //返回sp2,故引用计数递增,变为3(返回的copy的一个shared_ptr指针,sp2和sp3都会被销毁) } //sp2和sp3离开作用域,引用计数减2,变为3-2=1 int main() { auto p = init(); //此处赋值的拷贝与return处的拷贝是一致的 cout << p.use_count() << endl; //输出1 return 0; }
4.2.11 别名构造函数
-
shared_ptr<T> sp(sp2,ptr):sp也成了sp2的共享对象的拥有者,但sp却指向ptr,即控制块指针和sp2一致,但存储指针指向ptr。 -
通常用于在拥有它们所属的对象时指向成员对象。
-
简单的例子
-
1 2 3 4 5 6 7 8 9 10 11 12 13 14 15 16 17struct Bar { // some data that we want to point to }; struct Foo { Bar bar; }; shared_ptr<Foo> f = make_shared<Foo>(some, args, here); shared_ptr<Bar> specific_data(f, &f->bar); // ref count of the object pointed to by f is 2 f.reset(); // the Foo still exists (ref cnt == 1) // so our Bar pointer is still valid, and we can use it for stuff some_func_that_takes_bar(specific_data); -
最终作用是可以引用一个临时成员,只要 specific_data 存在,临时 Foo 仍然保持活动状态。与 shared_ptr 示例一样,我们拥有的是一个 Bar,它的生命周期与一个 Foo 相关联——一个我们无法访问的 Foo。
-
别名构造函数也可以用于使得不同类的生命周期相同。
-
但需注意,如果存储指针的对象不是拥有对象的成员,会存在内存泄漏的风险,如下例所示。
-
1 2 3 4 5 6 7 8 9 10 11 12 13 14 15 16 17 18 19 20 21 22 23 24 25 26 27 28 29 30 31 32 33 34 35 36 37 38 39 40 41 42 43 44 45 46 47 48 49 50 51 52 53#include <iostream> #include <memory> using namespace std; class Person { public: Person(int n) : name(n) {} ~Person() { cout << "Person的析构 " << name << endl; } int name; }; int main() { //第一部分 shared_ptr<Person> sp1{new Person(5)};//sp1是共享对象(也就是new出来的Person)的唯一拥有者 //别名构造函数,控制块指针同sp1, 但存储指针指向Person(6) shared_ptr<Person> sp2{sp1, new Person(6)};//现在sp1,sp2都是共享对象的拥有者 cout << sp1.use_count() << ", " << sp2.use_count() << endl; //2,2 //第二部分 sp1.reset(); //reset会让sp1放弃对共享对象的所有权并重新初始化,sp1的控制区指针被置空。 //现在sp2成了共享对象的唯一拥有者,但是其存储指针不一样。 cout << sp1.use_count() << ", " << sp2.use_count() << endl; //0,1 shared_ptr<Person> sp3{sp1, new Person(7)};//因为sp1已经不拥有任何共享对象,导致sp3也没有 cout << sp3.use_count() << endl; //0 cout << sp1.use_count() << ", " << sp2.use_count() << endl;//0,1 if (sp3.get() == nullptr) //因为get返回的是存储指针,所以这里为false cout << "第一次sp3的存储指针已置空" << endl; else { //进一步说明sp3存储指针指向Person(7) cout << (sp3.get()->name) << endl; } //第三部分 sp3.reset(); if (sp3.get() == nullptr) //为true,说明reset不仅能够置空控制区指针;还可以置空存储指针 cout << "第二次sp3的存储指针已置空" << endl; return 0; } /*输出 2, 2 0, 1 0 0, 1 7 第二次sp3的存储指针已置空 Person的析构 5 -
可以看到,6和7的析构函数没有调用,存在内存泄漏。其中到第二部分的内存分别如下图所示。
-
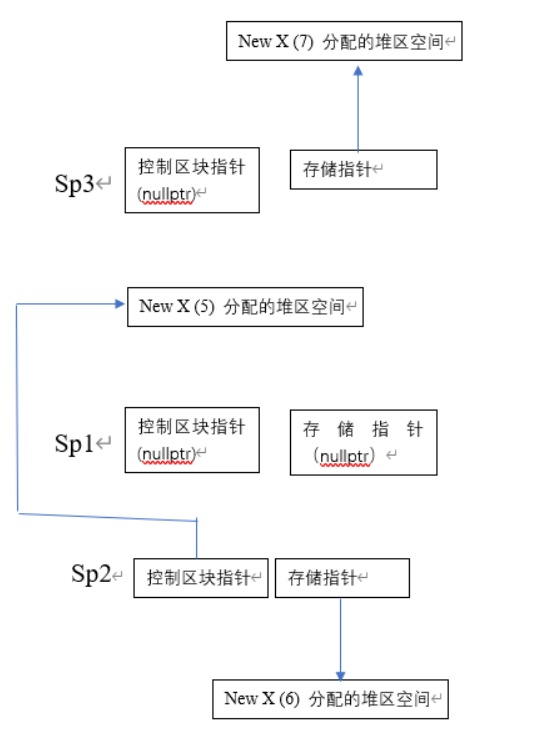
4.2.12 shared_ptr中的owner_before
-
shared_ptr中的owner_before成员函数的功能为“判断两个指针是否指向同一对象”。
-
用a.owner_before(b)来举例:如果a与b同为空或者同时指向同一个对象(包含继承关系),就返回false;如果是其它情况,则用指针所指向的对象的地址来比较大小,若a的地址<b的地址,则返回true,若a的地址>b的地址,则返回false。
-
前面说过,共享指针的比较运算符一般利用保存指针对象的比较运算符,而不是拥有指针(即控制块指针)的大小比较。
-
owner_before则会使用
拥有指针(即控制块指针)进行比较,比较规则为弱序规则。 -
C++中的弱序:
- ptr和ptr1是不是同类型指针;
- ptr指针指向的地址小于ptr1指针指向的地址;
- 满足以上两种条件,我们就可以称“ptr<ptr1”。
-
我们使用“shared_ptr/weak_ptr中的owner_before成员函数“去判断两个拥有指针是否指向”同一对象“时,可以这样做”先使用C++逻辑运算中的逻辑或操作(||),然后再总体上取个非(!)操作“。
-
1 2 3 4 5 6 7 8 9 10 11 12 13 14 15 16 17 18 19 20 21 22#include <iostream> #include <memory> using namespace std; int main() { int *pn = new int(10); shared_ptr<int> spa(new int(20)); shared_ptr<int> spb(spa, pn); // 别名构造 weak_ptr<int> wpc(spb); bool b1 = spa > wpc.lock(); // true,因为20>10 cout << "spa > wpc = " << boolalpha << b1 << endl; bool b2 = !(spa.owner_before(wpc) || wpc.owner_before(spa)); // 比较的是拥有指针是否一致 cout << "spa == wpc = " << boolalpha << b2 << endl; return 0; } /* 输出 spa > wpc = true spa == wpc = true
4.3 weak_ptr 弱指针
4.3.1 共享指针存在的问题一:交叉引用导致内存泄漏
-
含义:不同对象相互引用,形成环路,导致内存泄漏,没有回收。
-
示例1:循环引用导致ap和bp的引用计数为2,在离开作用域之后,ap和bp的引用计数减为1,并不会减为0,导致两个指针都不会被析构,产生了内存泄露。解决办法是把A和B任何一个成员变量改为
weak_ptr。 -
1 2 3 4 5 6 7 8 9 10 11 12 13 14 15 16 17 18 19 20 21 22 23 24 25 26 27 28 29 30 31 32 33 34 35 36 37 38 39 40#include <iostream> #include <memory> using namespace std; class A; class B; class A { public: shared_ptr<B> bptr; ~A() { //因为交叉引用,所以没有调用析构函数 cout << "A is deleted!" << endl; } }; class B { public: shared_ptr<A> aptr; ~B() { cout << "B is deleted!" << endl; } }; int main() { cout << "begin" << endl; { shared_ptr<A> ap(new A); shared_ptr<B> bp(new B); ap->bptr = bp; bp->aptr = ap; //对象本应该都析构了,但是因为引用计数不等于0,所以造成内存泄漏 } cout << "end" << endl; return 0; }
4.3.2 共享指针存在的问题二:明确想要共享但不想拥有对象
- 即共享了一定拥有对象的所有权,不能够是想要共享但是不拥有对象的所有权,从而导致交叉引用的问题。
4.3.3 弱指针的特性
- 弱指针是共享指针辅助类,其允许共享但不拥有对象,因此,不会增加关联对象的引用次数。
- 不能使用运算符*和->直接访问弱指针的引用对象,而是使用lock函数生成关联对象的共享指针(可能为空)。
- 当拥有该对象的最后一个共享指针失去其所有权时,任何弱指针生成的关联对象都会自动变为空。
- 弱指针可以解决共享指针存在的问题。
4.3.4 弱指针的使用
-
1 2 3 4 5 6 7 8 9 10 11 12 13 14 15 16 17 18 19 20 21 22 23 24 25 26 27 28 29 30 31 32 33 34 35 36 37 38 39 40 41#include <iostream> #include <string> #include <vector> #include <memory> using namespace std; int main() { shared_ptr<string> sp(new string("1234")); weak_ptr<string> wp(sp); (*(wp.lock()))[2] = 'a'; cout << "sp use count: " << sp.use_count() << endl; // 1 cout << "wp use count: " << wp.use_count() << endl; // 1 cout << "*(wp.lock()) = " << *(wp.lock()) << endl; // 12a4,lock函数不会增加使用次数 //cout << "*wp = " << *wp << endl; //编译错误 //cout << "*wp = " << wp->length() << endl; //编译错误 sp.reset();//共享指针销毁,弱指针自动变为空 cout << "================" << endl; cout << "After sp.reset()" << endl; cout << "wp use count: " << wp.use_count() << endl; // 0 if (wp.lock() == nullptr) { cout << "wp.lock() == nullptr " << endl; //打印该句 } else { cout << "wp.lock() != nullptr " << endl; } return 0; } /*输出 sp use count: 1 wp use count: 1 *(wp.lock()) = 12a4 ================ After sp.reset() wp use count: 0 wp.lock() == nullptr
4.3.5 弱指针解决交叉引用问题
-
1 2 3 4 5 6 7 8 9 10 11 12 13 14 15 16 17 18 19 20 21 22 23 24 25 26 27 28 29 30 31 32 33 34 35 36 37 38 39 40 41 42 43 44 45 46 47 48 49 50 51 52 53 54 55 56 57 58 59 60 61 62 63#include <iostream> #include <string> #include <vector> #include <memory> using namespace std; class Person { public: string m_sName; //父母定义为共享指针,即孩子拥有父母的所有权 shared_ptr<Person> m_pMother; shared_ptr<Person> m_pFather; //孩子们定义为若指针,即父母不拥有孩子的所有权 vector<weak_ptr<Person>> m_oKids; //弱指针 Person(const string &sName, shared_ptr<Person> pMother = nullptr, shared_ptr<Person> pFather = nullptr) : m_sName(sName), m_pMother(pMother), m_pFather(pFather) { } ~Person() { cout << "删除 " << m_sName << endl; } }; shared_ptr<Person> initFamily(const string &sName) { shared_ptr<Person> pMom(new Person(sName + "的母亲")); shared_ptr<Person> pDad(new Person(sName + "的父亲")); shared_ptr<Person> pKid(new Person(sName, pMom, pDad)); pMom->m_oKids.push_back(weak_ptr<Person>(pKid)); pDad->m_oKids.push_back(weak_ptr<Person>(pKid)); return pKid; } int main() { string sName = "张三"; shared_ptr<Person> pPerson = initFamily(sName); cout << sName << "家存在" << endl; cout << "- " << sName << "被分享" << pPerson.use_count() << "次" << endl; cout << "- " << sName << "母亲第一个孩子的名字是:" << pPerson->m_pMother->m_oKids[0].lock()->m_sName << endl; sName = "李四"; pPerson = initFamily(sName);//pPerson指向得到修改,然后就张三就被销毁,因为张三拥有父亲母亲,而父亲母亲不拥有张三,所以先销毁张三 cout << sName << "家已存在" << endl; return 0; } /*输出 张三家存在 - 张三被分享1次 - 张三母亲第一个孩子的名字是:张三 删除 张三 删除 张三的父亲 删除 张三的母亲 李四家已存在 删除 李四 删除 李四的父亲 删除 李四的母亲
4.3.6 确定弱指针指向对象仍然存在的三种方式
-
调用use_count()来询问关联对象拥有的所有者数量。如果返回值为0,则不再有有效的对象。官方文档说use_count()不一定有效。
-
调用expired(),返回值是布尔类型,返回0即false表示仍然有效。等效于检查use_count()是否等于0,但可能更快。(推荐)
-
使用共享指针构造函数将弱指针显式转换为共享指针。如果没有有效的引用对象,则此构造方法将引发bad_weak_ptr异常。
-
1 2 3 4 5 6 7 8 9 10 11 12 13 14 15 16 17 18 19 20 21 22 23 24 25 26 27 28 29 30 31 32 33 34 35 36 37 38 39 40#include <iostream> #include <memory> using namespace std; int main() { shared_ptr<int> sp = make_shared<int>(1234); weak_ptr<int> wp(sp); shared_ptr<int> sp1(wp);//弱指针转化为共享指针增加一次引用次数 cout << "wp use count: " << wp.use_count() << endl; // 2 //boolalpha把布尔类型0/1转为true/false cout << "wp expire: " << boolalpha << wp.expired() << endl; // false cout << "sp1 use count: " << sp1.use_count() << endl; // 2 cout << "===============" << endl; sp.reset(); sp1.reset(); cout << "After reset" << endl; cout << "wp use count: " << wp.use_count() << endl; // 0 cout << "wp expire: " << boolalpha << wp.expired() << endl; // true try { shared_ptr<int> sp2(wp); } catch (const bad_weak_ptr &bwp) { cout << bwp.what() << endl; //bad_weak_ptr } return 0; } /*输出 wp use count: 2 wp expire: false sp1 use count: 2 =============== After reset wp use count: 0 wp expire: true bad_weak_ptr
4.3.7 接口列表
-
操作 结果 weak_ptr wp 默认构造函数;创建一个空的弱指针 weak_ptr wp(sp) 创建一个弱指针,共享由sp拥有的指针的所有权 weak_ptr wp(wp2) 创建一个弱指针,共享由wp2拥有的指针的所有权 wp.~weak_ptr() 析构函数;销毁弱指针,但对拥有的对象无效 wp = wp2 赋值(wp之后共享wp2的所有权,放弃先前拥有的对象的所有权) wp = sp 用共享指针sp进行赋值(wp之后共享sp的所有权,放弃先前拥有的对象的所有权) wp.swap(wp2) 交换wp和wp2的指针 swap(wp1,wp2) 交换wp1和wp2的指针 wp.reset() 放弃拥有对象的所有权(如果有的话),并重新初始化为空的弱指针 wp.use_count() 返回共享所有者的数量(拥有对象的shared_ptr数目);如果弱指针为空,则返回0 wp.expired() 返回wp是否为空(等同于wp.use_count() == 0,但可能更快) wp.lock() 返回共享指针,该共享指针共享弱指针拥有的指针的所有权(如果没有共享指针,则为空共享指针) wp.owner_before(wp2) 提供和另一个弱指针严格的弱排序 wp.owner_before(sp) 通过共享指针提供严格的弱排序
4.4 唯一指针 unique_ptr
4.4.1 特性
- 指针唯一性;
- 继承了自动指针auto_ptr,更不易出错;
- 抛出异常时可最大限度避免资源泄漏。
4.4.2 手动释放资源的问题
-
1 2 3 4 5 6 7 8 9 10 11 12 13 14 15 16 17void func1() { ClassA* ptr = new ClassA; //Create an objects manually ... //Perform some operations delete ptr; //Cleanup(Manually destroy objects) } void func2() { ClassA* ptr = new ClassA; //Create an objects manually try { ... //Perform some operations } catch (...) { //Handle exception delete ptr; //Cleanup throw; //Rethrow the exception } delete ptr; //Clean up on normal exit } -
在fun1里面,如果忘记释放资源,会造成内存泄漏。
-
在fun2里面,在释放资源时如果发生异常导致资源泄露,可以通过try catch改善。
-
在fun2里面,使用异常捕获的方法会随着资源数量和异常类型的增加导致代码变得复杂。
-
唯一指针可以解决上述函数中资源释放的三个问题,例如忘记资源释放或者发生异常等等。
-
1 2 3 4 5 6 7void f() { //创建并初始化一个unique_ptr指针 unique<class A> ptr(new class A); ... //执行一些其他操作 }
4.4.3 唯一指针的使用
-
唯一指针定义了*、->运算符,没有定义类似++的指针算法。
-
唯一指针不可使用赋值语法进行初始化,应使用普通指针初始化。与共享指针一样。
-
1 2 3 4 5 6 7 8 9 10 11 12 13 14 15 16 17 18#include <iostream> #include <memory> using namespace std; int main() { unique_ptr<string> up(new string("Tom")); (*up)[0] = 'C'; //替换第一个字母 up->append("ming"); //追加字符串 cout << *up << endl; //打印整个字符串 return 0; } /*输出 Comming //错误的创建方式 unique_ptr<string> up = new string("Tom"); -
唯一指针可以为空
-
1 2 3 4//空的唯一指针 unique_ptr<string> up; up = nullptr; up.reset();//释放对象,指针为空 -
release()函数让唯一指针返回其拥有的对象, 并放弃所有权变为空指针,以便调用方对返回的对象负责。 -
1 2unique_ptr<string> up(new string("Tom")); string* sp = up.release(); //up失去拥有权
4.4.4 检查唯一指针是否拥有对象的三种方法
-
1.直接判断bool类型
-
1 2 3 4if (uq) //如果uq不为空 { cout << *uq << endl; } -
2.与
nullptr进行比较 -
1 2 3 4if (uq != nullptr) //如果uq不为空 { cout << *uq << endl; } -
3.查看其原始指针是否为空
-
1 2 3 4if (up.get() != nullptr) //如果up不为空 { cout << *uq << endl; }
4.4.5 转移所有权
-
1.唯一指针提供排他的所有权语义,但由程序员确保同一指针不会初始化两个唯一指针。因此,以下代码是错误的:
-
1 2 3 4//错误:up1和up2拥有相同的数据 string* sp = new string("hello"); unique_ptr<string> up1(sp); unique_ptr<string> up2(sp); -
2.使用普通的复制语义无法给唯一指针赋值,但使用C++11的move函数可以转移unique_ptr的所有权。同时,唯一指针获得新对象的所有权时会销毁之前拥有所有权的对象,当然move是直接转移,但本质上也是销毁重建
-
1 2 3 4 5 6 7 8 9 10 11 12 13 14 15 16#include <iostream> #include <memory> using namespace std; class A { }; int main() { unique_ptr<A> up3(new A); // //错误:编译不通过 // unique_ptr<A> up4(up3); // up4 = up3; //正确:转移所有权 unique_ptr<A> up4(move(up3));//up3变为空指针 unique_ptr<A> up5 = move(up4);//up4 变为空指针 return 0; } -
3.要将新值赋给唯一指针,该新值必须是唯一指针。或者改为nullptr释放该唯一指针。
-
1 2 3 4 5 6 7 8 9 10 11 12 13 14 15 16 17 18 19 20 21 22 23 24 25#include <iostream> #include <memory> using namespace std; class A { public: int m_a; A(int a) : m_a(a) {}; ~A() { cout << "delete " << m_a << endl; } }; int main() { unique_ptr<A> up3; //错误的赋值 // up3 = new A(3); //正确的赋值 up3 = unique_ptr<A>(new A(3)); up3 = nullptr;//正确,相当于调用reset() return 0; } /*输出 delete 3 -
4.函数传入唯一指针,需要使用move语义。
-
1 2 3 4 5 6 7 8 9 10 11 12 13 14 15 16 17 18 19 20 21 22 23 24 25 26 27 28 29#include <iostream> #include <memory> using namespace std; class A { public: int m_a; A(int a) : m_a(a) {}; ~A() { cout << "delete " << m_a << endl; } }; void sink(unique_ptr<A> up) { cout << "create " << up->m_a << endl; return;//返回前 up 还没调用析构函数,返回后自动调用,因为unique_ptr指针具有唯一性 } int main() { unique_ptr<A> up3(new A(3)); sink(move(up3));//此时up3已经失去了对象的所有权 return 0; } /*输出 create 3 delete 3 -
5.函数返回唯一指针不需要move,是因为编译器自动尝试move了。
-
1 2 3 4 5 6 7 8 9 10 11 12 13 14 15 16 17 18 19 20 21 22 23 24 25 26#include <iostream> #include <memory> using namespace std; class A { public: int m_a; A(int a) : m_a(a) {}; ~A() { cout << "delete " << m_a << endl; } }; unique_ptr<A> sink(int m) { unique_ptr<A> tmp(new A(m)); return tmp; } int main() { unique_ptr<A> up3; up3 = sink(100); return 0; } /*输出 delete 100
4.4.6 唯一指针作为类成员
-
在类中使用唯一指针可以避免资源泄漏;
-
唯一指针有助于避免对象初始化期间引发的异常引起的资源泄漏。
-
1.不用唯一指针会在抛出异常的时候导致资源泄漏。如下例所示。
-
1 2 3 4 5 6 7 8 9 10 11 12 13 14 15 16 17 18 19 20 21 22 23 24 25 26 27 28 29 30 31 32 33 34 35 36 37 38 39 40 41 42 43 44 45 46 47 48 49 50 51 52 53 54 55 56 57 58 59 60 61 62 63 64 65 66 67 68 69 70 71 72 73 74 75 76 77 78 79 80 81 82 83 84 85 86 87 88 89 90 91 92 93 94 95 96 97 98 99 100 101 102 103 104 105 106 107 108 109 110 111 112 113 114 115 116 117 118 119 120 121 122 123 124 125 126#include <iostream> #include <string> #include <memory> #include <sstream> using namespace std; class ClassA { public: ClassA(const string &sName, const string &sOwnerName, int nVal) : m_sName(sName), m_sOwnerName(sOwnerName) { cout << "“" << m_sOwnerName << "”的ClassA对象“" << m_sName << "”开始构造" << endl; if (0 == nVal) { runtime_error oRtEx("值不能为0\n"); //抛出异常后以下代码不执行退出 throw oRtEx; } else { m_dVal = 1.0 / nVal; } cout << "“" << m_sOwnerName << "”的ClassA对象“" << m_sName << "”完成构造" << endl; } ClassA(const ClassA &o2BeCopy) { m_dVal = o2BeCopy.m_dVal; m_sName = o2BeCopy.m_sName; m_sOwnerName = o2BeCopy.m_sOwnerName; } ~ClassA() { cout << "“" << m_sOwnerName << "”的ClassA对象“" << m_sName << "”析构" << endl; } void setOwnerName(const string &sOwnerName) { m_sOwnerName = sOwnerName; } private: double m_dVal; string m_sName; string m_sOwnerName; }; class ClassB { public: //如果m_ptr2的初始化抛出异常将导致资源泄露,可以从输出结果看不到m_ptr2 的析构函数的调用 ClassB(int nVal1, int nVal2, const string &sName) { cout << "名为“" << sName << "”的ClassB对象开始构造" << endl; m_ptr1 = new ClassA("m_ptr1", sName, nVal1); m_ptr2 = new ClassA("m_ptr2", sName, nVal2); m_sName = sName; cout << "名为“" << sName << "”的ClassB对象完成构造" << endl; } //拷贝构造 //如果ptr2的初始化之前抛出异常将导致资源泄露 ClassB(const ClassB &x) { cout << "名为“" << m_sName << "”的ClassB对象开始拷贝构造" << endl; m_ptr1 = new ClassA(*(x.m_ptr1)); m_ptr1->setOwnerName("拷贝构造"); ostringstream oss; oss << "名为“" << m_sName << "”的ClassB对象拷贝构造出现异常\n"; runtime_error oRtEx(oss.str()); throw oRtEx; //因为抛出异常,以下代码是不会执行的 m_ptr2 = new ClassA(*(x.m_ptr2)); m_ptr2->setOwnerName("拷贝构造"); cout << "名为“" << m_sName << "”的ClassB对象完成拷贝构造" << endl; } //赋值运算符 const ClassB &operator=(const ClassB &x) { *m_ptr1 = *x.m_ptr1; *m_ptr2 = *x.m_ptr2; return *this; } ~ClassB() { cout << "名为“" << m_sName << "”的ClassB对象开始析构" << endl; delete m_ptr1; delete m_ptr2; cout << "名为“" << m_sName << "”的ClassB对象完成析构" << endl; } private: ClassA *m_ptr1; //指针成员 ClassA *m_ptr2; string m_sName; }; int main() { try { ClassB oB(1, 0, "oB");//0会有异常,但是没有进行析构,造成资源泄漏 } catch (const exception &ex) { cout << "ClassB oB(1, 0)执行出现异常,具体原因:" << ex.what(); } cout << "==========================================" << endl; try { ClassB oB1(1, 2, "oB1"); ClassB oB2(oB1);//拷贝构造造成资源泄漏 } catch (const exception &ex) { cout << "ClassB oB2(oB1)执行出现异常,具体原因:" << ex.what(); } return 0; } /*输出 名为“oB”的ClassB对象开始构造 “oB”的ClassA对象“m_ptr1”开始构造 “oB”的ClassA对象“m_ptr1”完成构造 “oB”的ClassA对象“m_ptr2”开始构造 ClassB oB(1, 0)执行出现异常,具体原因:值不能为0 ========================================== 名为“oB1”的ClassB对象开始构造 “oB1”的ClassA对象“m_ptr1”开始构造 “oB1”的ClassA对象“m_ptr1”完成构造 “oB1”的ClassA对象“m_ptr2”开始构造 “oB1”的ClassA对象“m_ptr2”完成构造 名为“oB1”的ClassB对象完成构造 名为“”的ClassB对象开始拷贝构造 名为“oB1”的ClassB对象开始析构 “oB1”的ClassA对象“m_ptr1”析构 “oB1”的ClassA对象“m_ptr2”析构 名为“oB1”的ClassB对象完成析构 ClassB oB2(oB1)执行出现异常,具体原因:名为“”的ClassB对象拷贝构造出现异常 -
2.修改为唯一指针后不存在这种问题。如下例所示。
-
1 2 3 4 5 6 7 8 9 10 11 12 13 14 15 16 17 18 19 20 21 22 23 24 25 26 27 28 29 30 31 32 33 34 35 36 37 38 39 40 41 42 43 44 45 46 47 48 49 50 51 52 53 54 55 56 57 58 59 60 61 62 63 64 65 66 67 68 69 70 71 72 73 74 75 76 77 78 79 80 81 82 83 84 85 86 87 88 89 90 91 92 93 94 95 96 97 98 99 100 101 102 103 104 105 106 107 108 109 110 111 112 113 114 115 116 117 118 119 120 121 122 123 124 125 126 127 128 129 130#include <iostream> #include <string> #include <memory> #include <sstream> using namespace std; class ClassA { public: ClassA(const string &sName, const string &sOwnerName, int nVal) : m_sName(sName), m_sOwnerName(sOwnerName) { cout << "“" << m_sOwnerName << "”的ClassA对象“" << m_sName << "”开始构造" << endl; if (0 == nVal) { runtime_error oRtEx("值不能为0\n"); //抛出异常后以下代码不执行退出 throw oRtEx; } else { m_dVal = 1.0 / nVal; } cout << "“" << m_sOwnerName << "”的ClassA对象“" << m_sName << "”完成构造" << endl; } ClassA(const ClassA &o2BeCopy) { m_dVal = o2BeCopy.m_dVal; m_sName = o2BeCopy.m_sName; m_sOwnerName = o2BeCopy.m_sOwnerName; } ~ClassA() { cout << "“" << m_sOwnerName << "”的ClassA对象“" << m_sName << "”析构" << endl; } void setOwnerName(const string &sOwnerName) { m_sOwnerName = sOwnerName; } private: double m_dVal; string m_sName; string m_sOwnerName; }; class ClassB { public: //如果m_ptr2的初始化抛出异常将导致资源泄露,可以从输出结果看不到m_ptr2 的析构函数的调用 ClassB(int nVal1, int nVal2, const string &sName) { cout << "名为“" << sName << "”的ClassB对象开始构造" << endl; m_ptr1 = unique_ptr<ClassA>(new ClassA("m_ptr1", sName, nVal1)); m_ptr2 = unique_ptr<ClassA>(new ClassA("m_ptr2", sName, nVal2)); m_sName = sName; cout << "名为“" << sName << "”的ClassB对象完成构造" << endl; } //拷贝构造 //如果ptr2的初始化之前抛出异常将导致资源泄露 ClassB(const ClassB &x) { cout << "名为“" << m_sName << "”的ClassB对象开始拷贝构造" << endl; //这个对象是临时存在的,如果抛出异常,不用唯一指针会导致资源泄漏 m_ptr1 = unique_ptr<ClassA>(new ClassA(*(x.m_ptr1))); m_ptr1->setOwnerName("拷贝构造"); ostringstream oss; oss << "名为“" << m_sName << "”的ClassB对象拷贝构造出现异常\n"; runtime_error oRtEx(oss.str()); throw oRtEx; //因为抛出异常,以下代码是不会执行的 m_ptr2 = unique_ptr<ClassA>(new ClassA(*(x.m_ptr2))); m_ptr2->setOwnerName("拷贝构造"); cout << "名为“" << m_sName << "”的ClassB对象完成拷贝构造" << endl; } //赋值运算符 const ClassB &operator=(const ClassB &x) { *m_ptr1 = *x.m_ptr1; *m_ptr2 = *x.m_ptr2; return *this; } ~ClassB() { cout << "名为“" << m_sName << "”的ClassB对象开始析构" << endl; //不再需要手动释放资源 // delete m_ptr1; // delete m_ptr2; cout << "名为“" << m_sName << "”的ClassB对象完成析构" << endl; } private: unique_ptr<ClassA> m_ptr1; //指针成员 unique_ptr<ClassA> m_ptr2; string m_sName; }; int main() { try { ClassB oB(1, 0, "oB"); } catch (const exception &ex) { cout << "ClassB oB(1, 0)执行出现异常,具体原因:" << ex.what(); } cout << "==========================================" << endl; try { ClassB oB1(1, 2, "oB1"); ClassB oB2(oB1); } catch (const exception &ex) { cout << "ClassB oB2(oB1)执行出现异常,具体原因:" << ex.what(); } return 0; } /*输出 名为“oB”的ClassB对象开始构造 “oB”的ClassA对象“m_ptr1”开始构造 “oB”的ClassA对象“m_ptr1”完成构造 “oB”的ClassA对象“m_ptr2”开始构造 “oB”的ClassA对象“m_ptr1”析构 --------------对比上一个例子,抛出异常,该指针仍会析构 ClassB oB(1, 0)执行出现异常,具体原因:值不能为0 ========================================== 名为“oB1”的ClassB对象开始构造 “oB1”的ClassA对象“m_ptr1”开始构造 “oB1”的ClassA对象“m_ptr1”完成构造 “oB1”的ClassA对象“m_ptr2”开始构造 “oB1”的ClassA对象“m_ptr2”完成构造 名为“oB1”的ClassB对象完成构造 名为“”的ClassB对象开始拷贝构造 “拷贝构造”的ClassA对象“m_ptr1”析构 --------------对比上一个例子,抛出异常,该指针仍会析构 名为“oB1”的ClassB对象开始析构 名为“oB1”的ClassB对象完成析构 “oB1”的ClassA对象“m_ptr2”析构 “oB1”的ClassA对象“m_ptr1”析构 ClassB oB2(oB1)执行出现异常,具体原因:名为“”的ClassB对象拷贝构造出现异常
4.4.7 唯一指针对数组的处理
-
一般处理来说,若唯一指针失去所有权,则对其拥有的对象调用delete,而不是delete[]。
-
唯一指针针对数组的销毁提供了特殊处理。
-
唯一指针针对数组的接口不提供运算符*和->,而提供运算符[]。
-
1 2 3 4//编译通过,但是运行时错误,因为释放的时候删除错误 unique_ptr<string> up(new string[3]); //正确 unique_ptr<string[]> up(new string[3]); -
1 2 3 4//编译错误:没有为数组定义*运算符 cout << *up << endl; //正确 cout << up[0] << endl; -
1 2 3 4 5 6 7 8 9 10 11 12 13 14 15#include <iostream> #include <string> #include <memory> using namespace std; int main() { unique_ptr<string[]> curr(new string[2]{"sss", "tyc"}); cout << curr[0] << endl; cout << curr[1] << endl; return 0; } /*输出 sss tyc
4.4.8 销毁其他资源
-
唯一指针引用的对象在销毁时需要进行除delete或delete []之外的其它操作时,必须自定义删除器
-
定义删除器的方法是必须将删除器的类型指定为第二个模板参数。
-
删除器类型可以是函数、函数指针或类对象。
-
1 2 3 4 5 6 7 8 9 10 11 12 13 14 15 16class ClassA {}; class ClassADeleter { public: void operator () (ClassA* obj) { cout << "call ClassA object's Deleter" << endl; delete obj; } }; int main() { unique_ptr<ClassA, ClassADeleter> up(new ClassA()); return 0; } -
要为删除器指定函数或lambda表达式,必须将删除器的类型声明为
void(*)(T *)或function <void (T *)>或使用decltype。 -
1 2 3 4 5 6 7 8 9 10 11 12 13 14 15 16 17 18 19 20 21 22 23 24 25 26 27 28 29 30 31 32 33 34 35 36 37 38 39 40 41 42 43#include <iostream> #include <memory> #include <functional> using namespace std; class ClassA {}; class ClassADeleter { public: void operator () (ClassA* p) { cout << "调用ClassA对象的删除器" << endl; delete p; } }; int main() { //第一种:类 unique_ptr<ClassA, ClassADeleter> up(new ClassA()); //第二种:函数指针+lambda表达式 unique_ptr<int, void(*)(int*)> up1(new int[10], [](int* p) { cout << "Lamda delete" << endl; delete[] p; }); //第三种:lambda表达式 unique_ptr<int, function<void(int*)>> up2(new int[10], [](int* p) { cout << "function delete" << endl; delete[] p; }); //第四种:decltype表示 auto l = [](int* p) { cout << "decltype delete" << endl; delete[] p; }; unique_ptr<int, decltype(l)> up3(new int[10], l); return 0; }
4.4.9 接口列表
-
操作 结果 unique_ptr<...> up 默认构造函数;使用默认/传递的删除器类型的实例作为删除器,创建一个空的唯一指针 unique_ptr up(nullptr) 使用默认/传递的删除器类型的实例作为删除器,创建一个空的唯一指针 unique_ptr<...> up(ptr) 使用默认/传递的删除器类型的实例作为删除器,创建拥有* ptr的唯一指针 unique_ptr<...> up(ptr,del) 使用del作为删除器创建拥有* ptr的唯一指针 unique_ptr up(move(up2)) 创建一个拥有up2先前拥有的指针的唯一指针(此后up2为空) unique_ptr up(move(ap)) 创建一个拥有先前由auto_ptr ap拥有的指针的唯一指针(此后ap为空) up.~unique_ptr() 析构函数;调用拥有者对象的删除器 up = move(up2) 移动赋值(up2将所有权转移到up) up = nullptr 调用拥有者对象的删除器,并使其为空(等同于up.reset()) up1.swap(up2) 交换up1和up2的指针和删除器 swap(up1,up2) 交换up1和up2的指针和删除器 -
操作 结果 up.reset() 调用拥有者对象的删除器,并使其为空(相当于up = nullptr) up.reset(ptr) 调用拥有者对象的删除器,并将共享指针重新初始化为自己的* ptr up.release() 将所有权放弃给调用者(不调用删除器就返回拥有的对象) up.get() 返回存储的指针(拥有的对象的地址;如果没有,则返回nullptr) *up 仅单个对象;返回拥有的对象(如果没有,则为未定义的行为) up->... 仅单个对象;提供拥有对象的成员访问权限(如果没有,则为未定义的行为) up[idx] 仅数组对象;返回具有存储数组的索引idx的元素(如果没有,则为未定义的行为) if (up) 运算符bool();返回up是否为空 up1 == up2 对存储的指针调用==(可以为nullptr) up1 != up2 对存储的指针调用!=(可以为nullptr) up1 < up2 对存储的指针调用<(可以为nullptr) -
操作 结果 up1 <= up2 对存储的指针调用<=(可以为nullptr) up1 > up2 对存储的指针调用>(可以为nullptr) up1 >= up2 对存储的指针调用>=(可以为nullptr) up.get_deleter() 返回删除器的引用
4.5 自动指针 auto_ptr
-
C++98标准库提供的智能指针;功能与唯一指针相似,但存在设计问题;C++11中使用唯一指针取代它。
-
存在的问题:
- 复制和赋值运算符具有移动语义,这可能导致严重的问题。
- 没有数组的删除器,只能使用它来处理单个对象。
- 经常被滥用,尤其是假设它像类shared_ptr一样;这种错误很严重。
-
错误示例
-
1 2 3 4 5 6 7 8 9 10 11 12 13 14 15 16 17 18 19 20 21 22 23 24 25 26 27 28 29 30#include <iostream> #include <memory> using namespace std; //坏示例 //形参ap获得传进来参数的所有权 template <typename T> void bad_print(auto_ptr<T> ap) { if (ap.get() == NULL) { cout << "NULL"; } else { cout << *ap; } } //函数退出时ap将删除与其关联的对象,所以此时原本的形参已经被销毁了,因为自动指针自带移动语义 int main() { auto_ptr<int> ap(new int); *ap = 42; bad_print(ap); *ap = 18; //运行时错误 return 0; } /*输出 42 进程已结束,退出代码 -1073741819 (0xC0000005)
4.6 智能指针总结
- C++ 11提供了智能指针的两个概念
- 共享指针用于共享所有权
- 唯一指针用于独占所有权,取代自动指针
- 共享指针通过非侵入性方法实现,需要额外的性能开销,如内存;非侵入方式是指不需要改变自定义的类或者本身的类的内部代码,
- 唯一指针通过特殊的构造函数和析构函数,以及消除复制,不需要额外的性能开销。
- 一般来说,智能指针不是线程安全的。
5. std::function和std::bind
5.1 可调用对象
- 可调用对象有一下几种定义:
- 是一个函数指针,参考 C++ 函数指针和函数类型;
- 是一个具有operator()成员函数的类的对象;
- 可被转换成函数指针的类对象;
- 一个类成员函数指针;
- C++中可调用对象的虽然都有一个比较统一的操作形式,但是定义方法五花八门,这样就导致使用统一的方式保存可调用对象或者传递可调用对象时,会十分繁琐。C++11中提供了
std::function和std::bind统一了可调用对象的各种操作。
5.2 function
-
std::function 是一个可调用对象包装器,是一个类模板,可以容纳除了类成员函数指针之外的所有可调用对象,它可以用统一的方式处理函数、函数对象、函数指针,并允许保存和延迟它们的执行。
-
定义格式:std::function<函数类型>。
-
std::function可以取代函数指针的作用,因为它可以延迟函数的执行,特别适合作为回调函数使用。它比普通函数指针更加的灵活和便利。
-
类模版std::function是一种通用的多态函数包装器。
-
std::function是函数模板类(是一个类)。包含在
#include < functional>中。以前没有这个类的时候,我们在想定义一个回调函数指针,非常的麻烦。我们通常这样的定义:1typedef void(*ptr)(int,int) // 这里的ptr就是一个函数指针而使用了std::function这个类的时候,我们可以这样使用,来替换函数指针。例如:
1std::function<void(int ,int)> func;
5.3 bind
-
可将std::bind函数看作一个通用的函数适配器,它接受一个可调用对象,生成一个新的可调用对象来“适应”原对象的参数列表。
std::bind将可调用对象与其参数一起进行绑定,绑定后的结果可以使用std::function保存。std::bind主要有以下两个作用:
- 将可调用对象和其参数绑定成一个防函数;
- 只绑定部分参数,减少可调用对象传入的参数。
-
5.3.1 绑定普通函数
-
1 2 3 4 5 6 7 8double my_divide (double x, double y) {return x/y;} auto fn_half = std::bind (my_divide,_1,2); std::cout << fn_half(10) << '\n'; // 5 /* bind的第一个参数是函数名,普通函数做实参时,会隐式转换成函数指针。因此std::bind (my_divide,_1,2)等价于std::bind (&my_divide,_1,2); _1表示占位符,位于<functional>中,std::placeholders::_1; */ -
5.3.2 绑定成员函数
-
1 2 3 4 5 6 7 8 9 10 11 12 13struct Foo { void print_sum(int n1, int n2) { std::cout << n1+n2 << '\n'; } int data = 10; }; int main() { Foo foo; auto f = std::bind(&Foo::print_sum, &foo, 95, std::placeholders::_1); f(5); // 100 } -
bind绑定类成员函数时,第一个参数表示对象的成员函数的指针,第二个参数表示对象的地址。
-
必须显示的指定&Foo::print_sum,因为编译器不会将对象的成员函数隐式转换成函数指针,所以必须在Foo::print_sum前添加&;
-
使用对象成员函数的指针时,必须要知道该指针属于哪个对象,因此第二个参数为对象的地址 &foo;
-
5.3.3 绑定引用参数
-
默认情况下,bind的那些不是占位符的参数被拷贝到bind返回的可调用对象中。但是,与lambda类似,有时对有些绑定的参数希望以引用的方式传递,或是要绑定参数的类型无法拷贝。
-
1 2 3 4 5 6 7 8 9 10 11 12 13 14 15 16 17 18 19 20 21 22 23 24 25 26 27#include <iostream> #include <functional> #include <vector> #include <algorithm> #include <sstream> using namespace std::placeholders; using namespace std; ostream & print(ostream &os, const string& s, char c) { os << s << c; return os; } int main() { vector<string> words{"helo", "world", "this", "is", "C++11"}; ostringstream os; char c = ' '; for_each(words.begin(), words.end(), [&os, c](const string & s){os << s << c;} ); cout << os.str() << endl; ostringstream os1; // ostream不能拷贝,若希望传递给bind一个对象, // 而不拷贝它,就必须使用标准库提供的ref函数 for_each(words.begin(), words.end(), bind(print, ref(os1), _1, c)); cout << os1.str() << endl; }
十二、C++11 14 17 20 多线程学习笔记
笔记来源——51CTO 夏曹俊C++11 14 17 20 多线程从原理到线程池实战视频
1. C++ 11 多线程快速入门
1.1 thread的生命周期以及线程的等待和分离
-
在Windows下 引入 #include < thread>
-
在Linux下引入 #include <pthread.h>
-
在thread的构造函数添加线程函数的时候,线程函数就已经开始运行了
-
join表示阻塞主线程等待子线程
-
detach表示子线程和主线程分离
-
示例1
1 2 3 4 5 6 7 8 9 10 11 12 13 14 15 16 17 18 19 20 21 22 23 24 25#include <thread> #include <iostream> //Linux -lpthread using namespace std; bool is_exit = false; void ThreadMain() { cout << "begin sub thread main " << this_thread::get_id() << endl; for (int i = 0; i < 10; i++) { if (is_exit) break; cout << "in thread " << i << endl; this_thread::sleep_for(chrono::seconds(1));//1000ms } cout << "end sub thread main " << this_thread::get_id() << endl; } int main(int argc, char* argv[]) { //第一种 { thread th(ThreadMain); //出错,thread对象被销毁 子线程还在运行 } getchar();//使屏幕停留一下 return 0; }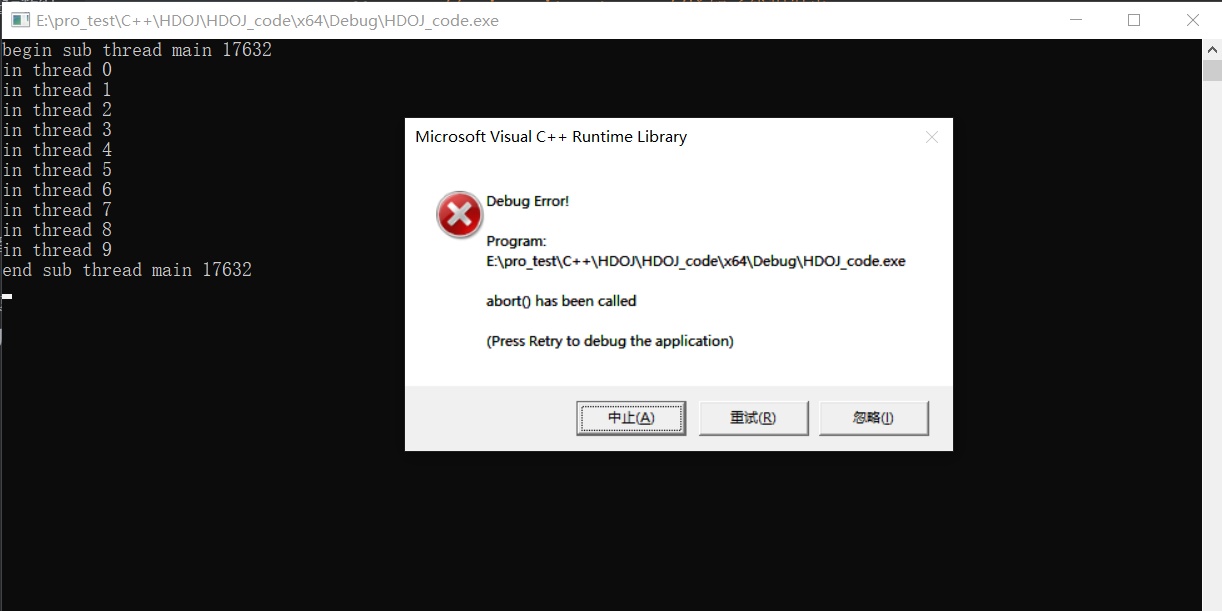
-
示例2
1 2 3 4 5 6 7 8 9 10 11 12 13 14 15 16 17 18 19 20 21 22 23 24 25 26 27#include <thread> #include <iostream> //Linux -lpthread using namespace std; bool is_exit = false; void ThreadMain() { cout << "begin sub thread main " << this_thread::get_id() << endl; for (int i = 0; i < 10; i++) { if (is_exit) break; cout << "in thread " << i << endl; this_thread::sleep_for(chrono::seconds(1));//1000ms } cout << "end sub thread main " << this_thread::get_id() << endl; } int main(int argc, char* argv[]) { //第二种 { thread th(ThreadMain); th.join();//主线程阻塞,等待子线程退出。但是这时候主线程就等在这了,干不了别的事 } getchar(); return 0; }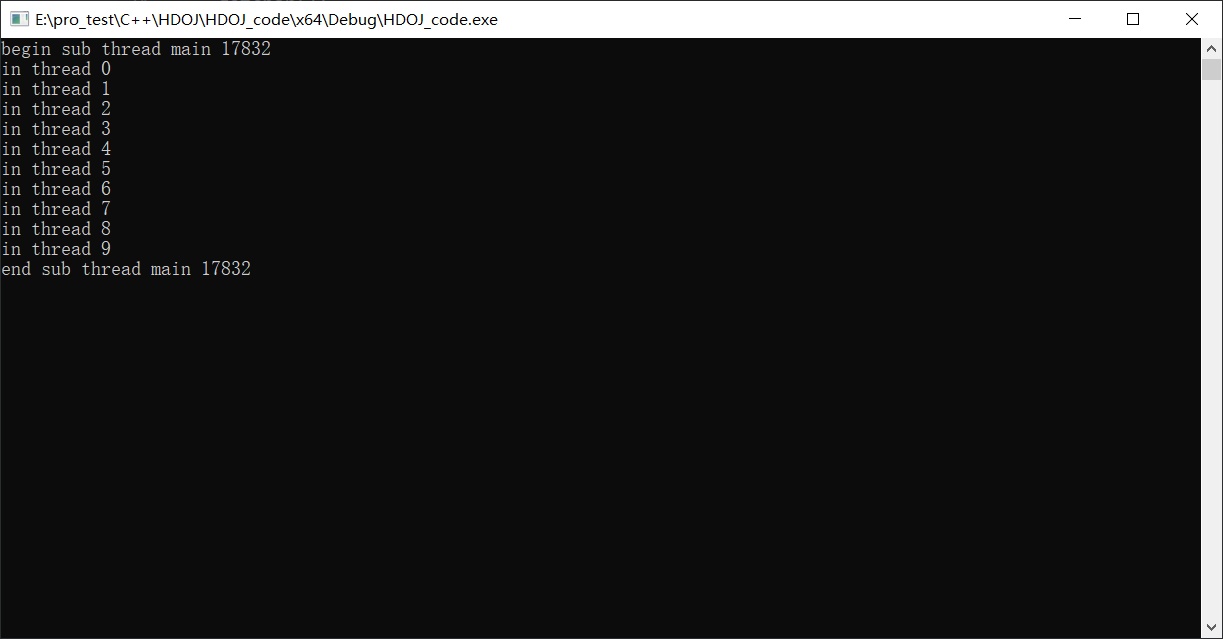
-
示例3
1 2 3 4 5 6 7 8 9 10 11 12 13 14 15 16 17 18 19 20 21 22 23 24 25 26 27 28 29 30 31#include <thread> #include <iostream> //Linux -lpthread using namespace std; bool is_exit = false; void ThreadMain() { cout << "begin sub thread main " << this_thread::get_id() << endl; for (int i = 0; i < 10; i++) { if (is_exit) break; cout << "in thread " << i << endl; this_thread::sleep_for(chrono::seconds(1));//1000ms } cout << "end sub thread main " << this_thread::get_id() << endl; } int main(int argc, char* argv[]) { //第三种 { cout << "begin main thread" << endl; thread th(ThreadMain); th.detach(); //子线程与主线程分离 守护线程 cout << "end main thread" << endl; //坑 :主线程退出后 子线程不一定退出。主线程退出后资源被释放,如果子线程访问会非法报错。 } getchar(); return 0; }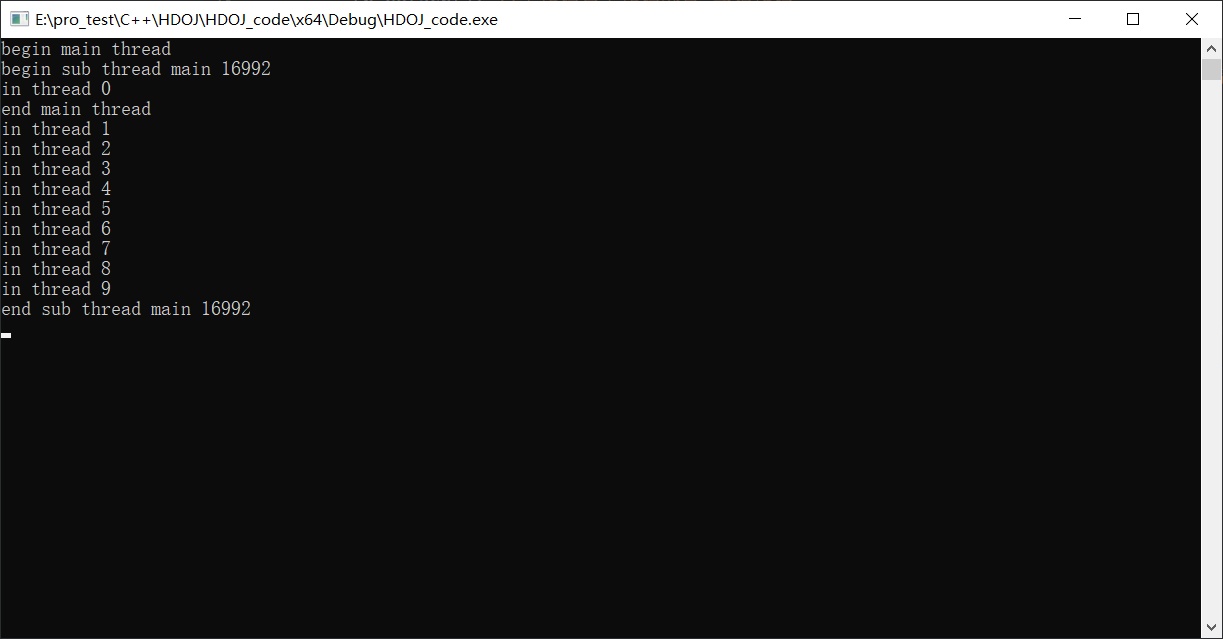
-
示例4
1 2 3 4 5 6 7 8 9 10 11 12 13 14 15 16 17 18 19 20 21 22 23 24 25 26 27 28 29 30 31#include <thread> #include <iostream> //Linux -lpthread using namespace std; bool is_exit = false; void ThreadMain() { cout << "begin sub thread main " << this_thread::get_id() << endl; for (int i = 0; i < 10; i++) { if (is_exit) break; cout << "in thread " << i << endl; this_thread::sleep_for(chrono::seconds(1));//1000ms } cout << "end sub thread main " << this_thread::get_id() << endl; } int main(int argc, char* argv[]) { //第四种 { thread th(ThreadMain); this_thread::sleep_for(chrono::seconds(1));//子线程工作了1000ms is_exit = true; //通知子线程退出 cout << "主线程阻塞,等待子线程退出" << endl; th.join(); //主线程阻塞,等待子线程退出 cout << "子线程已经退出!" << endl; } getchar(); return 0; }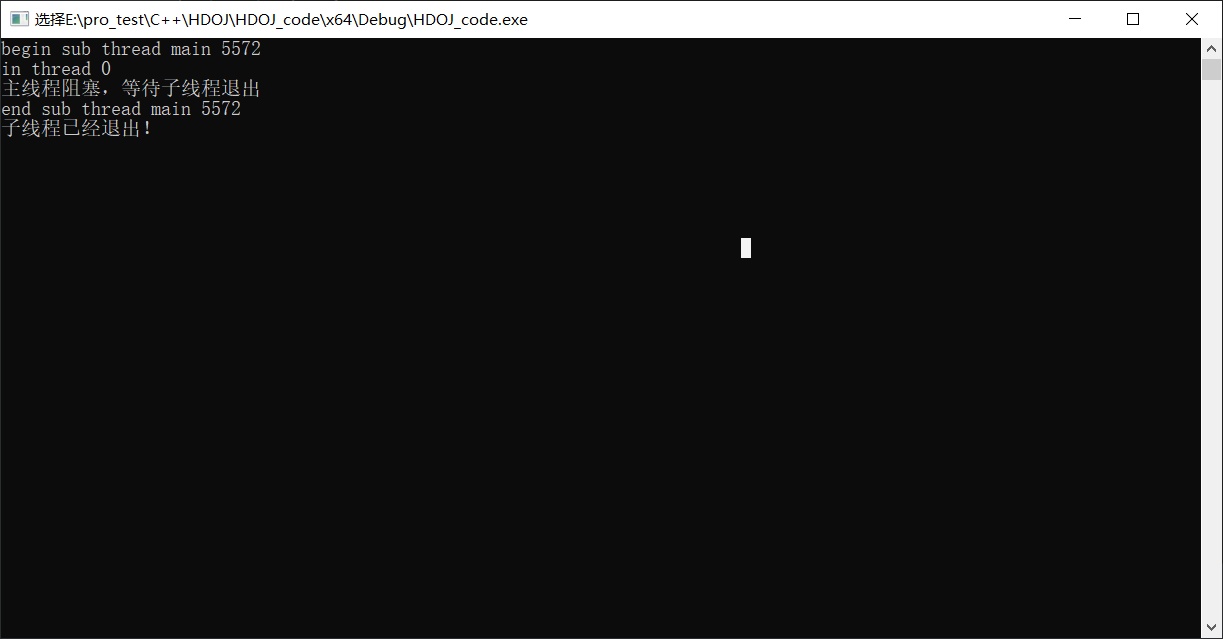
-
总结
- thread在把构造函数传进去的时候,线程就已经启动了。
- join是为了等待子线程完成,所以阻塞主线程,一般可以在对象的析构函数里面启用join函数。
- detach分离了子线程和主线程,当子线程不需要主线程的变量运算时,可以采用这种方法。
- 可以添加结束标志来优雅的结束子线程。
1.2 线程的参数传递过程
-
例子参考
1 2 3 4 5 6 7 8 9 10 11 12 13 14 15 16 17 18 19 20 21 22 23 24 25 26 27 28 29 30 31 32 33 34 35 36 37 38#include <thread> #include <iostream> #include <string> using namespace std; class Para { public: Para() { cout << "Create Para" << endl; } Para(const Para& p) { cout << "Copy Para" << endl; } ~Para() { cout << "Drop Para" << endl; } string name; }; void ThreadMain(int p1, float p2, string str, Para p4) { this_thread::sleep_for(100ms); cout << "p1 add=" << &p1 << endl; cout << "p2 add=" << &p2 << endl; cout << "str add=" << &str << endl; cout << "p4 add=" << &p4 << endl; cout << "ThreadMain " << p1 << " " << p2 << " " << str << " " << p4.name << endl; } int main(int argc, char* argv[]) { thread th; { float f1 = 12.1f; Para p; p.name = "test Para class"; cout << "p2 add=" << &f1 << endl; cout << "p4 add=" << &p << endl; //所有的参数做复制,地址改变 th = thread(ThreadMain, 101, f1, "test string para", p); } th.join(); return 0; }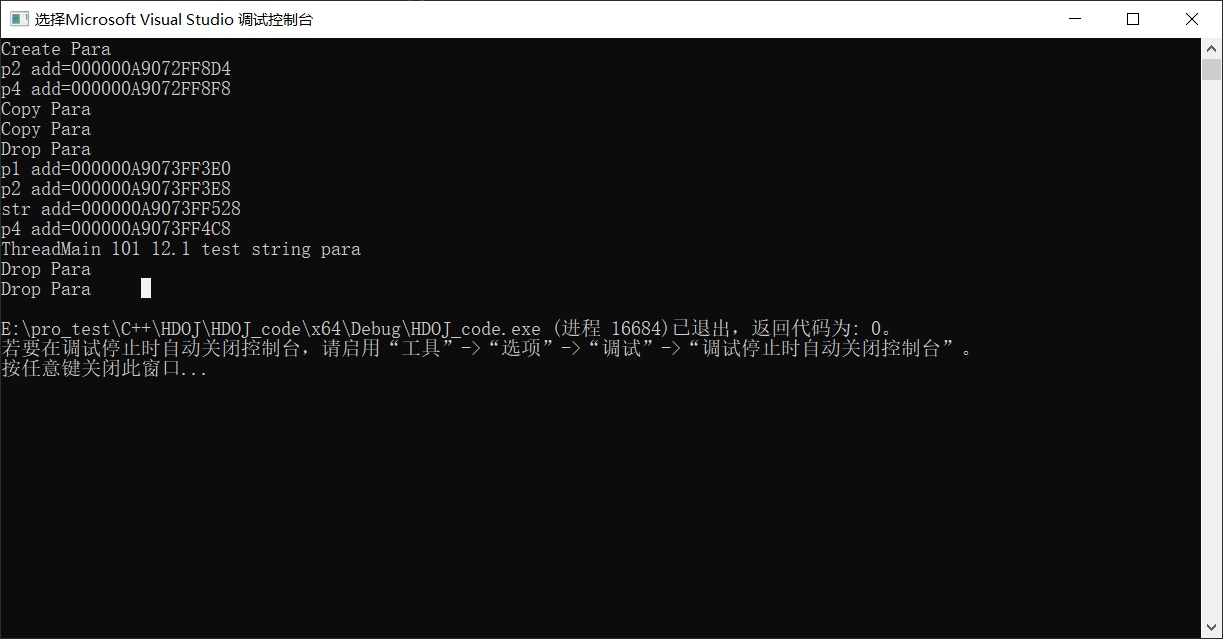
-
注意以上代码是把 类拷贝函数重写了,所以破坏了原来的参数传递,当把拷贝函数重写注释后,还有以下结果,明显是把类复制传进去了
1 2 3 4 5 6 7 8 9 10 11 12 13 14 15 16 17 18 19 20 21 22 23 24 25 26 27 28 29 30 31 32 33 34 35 36 37 38 39#include <thread> #include <iostream> #include <string> using namespace std; class Para { public: Para() { cout << "Create Para" << endl; } //重写拷贝构造函数 //Para(const Para& p) { cout << "Copy Para" << endl; } ~Para() { cout << "Drop Para" << endl; } string name; }; void ThreadMain(int p1, float p2, string str, Para p4) { this_thread::sleep_for(100ms); cout << "p1 add=" << &p1 << endl; cout << "p2 add=" << &p2 << endl; cout << "str add=" << &str << endl; cout << "p4 add=" << &p4 << endl; cout << "ThreadMain " << p1 << " " << p2 << " " << str << " " << p4.name << endl; } int main(int argc, char* argv[]) { thread th; { float f1 = 12.1f; Para p; p.name = "test Para class"; cout << "p2 add=" << &f1 << endl; cout << "p4 add=" << &p << endl; //所有的参数做复制,地址改变 th = thread(ThreadMain, 101, f1, "test string para", p); } th.join(); return 0; }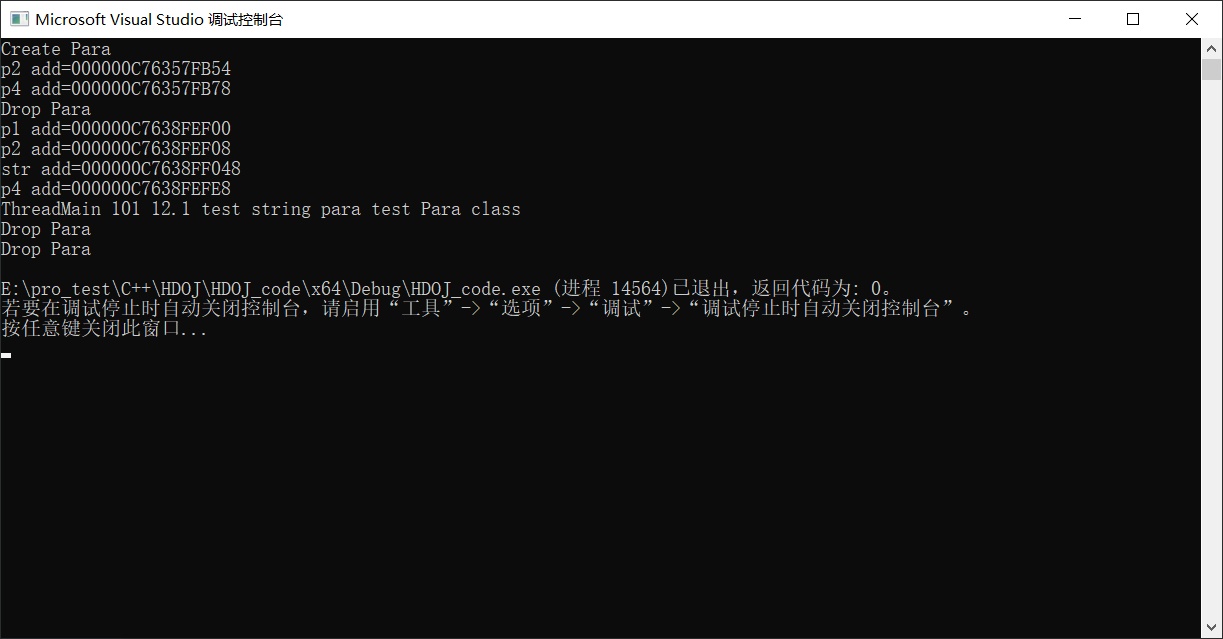
-
可以看到,参数传递采用拷贝方式,对于类对象而言,以上例子,一次创建,两次拷贝,三次析构。其中的创建和一次析构是本身类的创建和析构,其他两次是传进线程产生的。
1.3 线程函数传递指针和引用
-
传递指针
1 2 3 4 5 6 7 8 9 10 11 12 13 14 15 16 17 18 19 20 21 22 23 24 25 26 27 28 29 30 31#include <thread> #include <iostream> #include <string> using namespace std; class Para { public: Para() { cout << "Create Para" << endl; } Para(const Para& p) { cout << "Copy Para" << endl; } ~Para() { cout << "Drop Para" << endl; } string name; }; void ThreadMainPtr(Para* p) { this_thread::sleep_for(100ms); cout << "ThreadMainPtr name = " << p->name << endl; } int main(int argc, char* argv[]) { { //传递线程指针 Para p; p.name = "test ThreadMainPtr name"; thread th(ThreadMainPtr, &p); th.join();//等待线程结束 getchar(); } return 0; }
-
当指针生命周期小于线程,比如一个函数执行完,指针随之释放,此时线程访问会造成访问错误,得不到内容
1 2 3 4 5 6 7 8 9 10 11 12 13 14 15 16 17 18 19 20 21 22 23 24 25 26 27 28 29 30 31#include <thread> #include <iostream> #include <string> using namespace std; class Para { public: Para() { cout << "Create Para" << endl; } Para(const Para& p) { cout << "Copy Para" << endl; } ~Para() { cout << "Drop Para" << endl; } string name; }; void ThreadMainPtr(Para* p) { this_thread::sleep_for(100ms); cout << "ThreadMainPtr name = " << p->name << endl;//执行不到 } int main(int argc, char* argv[]) { { //传递线程指针 Para p; p.name = "test ThreadMainPtr name"; thread th(ThreadMainPtr, &p); //错误 ,线程访问的p空间会提前释放 th.detach(); } // Para 释放 return 0; }
-
传递引用
-
和传递指针是一个道理
-
1 2 3 4 5 6 7 8 9 10 11 12 13 14 15 16 17 18 19 20 21 22 23 24 25 26 27 28 29 30 31 32#include <thread> #include <iostream> #include <string> using namespace std; class Para { public: Para() { cout << "Create Para" << endl; } Para(const Para& p) { cout << "Copy Para" << endl; } ~Para() { cout << "Drop Para" << endl; } string name; }; void ThreadMainRef(Para& p) { this_thread::sleep_for(100ms); cout << "ThreadMainPtr name = " << p.name << endl; } int main(int argc, char* argv[]) { { //传递引用 Para p; p.name = "test ref"; //ref表明这个类是引用,线程的引用一般都加ref //用std::ref来传递参数,那么即使主线程超出scope,在子线程中仍然能调用原来参数的地址 thread th(ThreadMainRef, ref(p)); th.detach(); } getchar(); return 0; }
-
std::ref只是尝试模拟引用传递,并不能真正变成引用,在非模板情况下,std::ref根本没法实现引用传递,只有模板自动推导类型时,ref能用包装类型reference_wrapper来代替原本会被识别的值类型,而reference_wrapper能隐式转换为被引用的值的引用类型。主要用于以下两个方面
-
bind std::ref主要是考虑函数式编程(如std::bind)在使用时,是对参数直接拷贝,而不是引用。
-
thread 其中代表的例子是thread多线程 比如thread的方法传递引用的时候,必须外层用ref来进行引用传递,否则就是浅拷贝。
-
-
1.4 使用成员函数作为线程入口并封装线程基类接口
-
使用成员函数作为入口
- 注意传入类的指针
1 2 3 4 5 6 7 8 9 10 11 12 13 14 15 16 17 18 19 20 21 22 23 24 25 26 27 28 29 30 31 32 33 34 35 36 37#include <iostream> #include <thread> #include <string> using namespace std; class MyThread { public: MyThread(); ~MyThread(); //线程入口函数 void Main() { cout << "thread begin " << age << name << endl; } public: string name; int age = 10; }; MyThread::MyThread() { } MyThread::~MyThread() { } int main() { MyThread mythred; mythred.name = "tyc"; mythred.age = 20; thread th_(&MyThread::Main, &mythred);//传入类的成员函数,传入类的指针 th_.join();//尝试等待子线程 getchar(); return 0; }
-
封装线程类
- 使用纯虚函数定义入口main函数,让派生类重写
- 使用虚函数定义基类的线程启动、停止、等待函数
1 2 3 4 5 6 7 8 9 10 11 12 13 14 15 16 17 18 19 20 21 22 23 24 25 26 27 28 29 30 31 32 33 34 35 36 37 38 39 40 41 42 43 44 45 46 47 48 49 50 51 52 53 54 55 56 57 58#include <thread> #include <iostream> #include <string> using namespace std; class XThread { public: virtual void Start() { is_exit_ = false; th_ = std::thread(&XThread::Main, this); } virtual void Stop() { is_exit_ = true; Wait(); } virtual void Wait() { if (th_.joinable()) th_.join(); } bool is_exit() { return is_exit_; } private: virtual void Main() = 0; std::thread th_; bool is_exit_ = false; }; class TestXThread :public XThread { public: void Main() override { cout << "TestXThread Main begin" << endl; while (!is_exit()) { this_thread::sleep_for(100ms); cout << "*"; } cout <<endl << "TestXThread Main end" << endl; } string name; }; int main(int argc, char* argv[]) { TestXThread testth; testth.name = "TestXThread name "; //开启子线程 testth.Start(); //等待3s结束子线程 this_thread::sleep_for(3s); //结束子线程 testth.Stop(); //缓冲屏幕 getchar(); return 0; }
1.5 lambda临时函数作为线程入口函数
-
lambda函数是一个匿名函数
-
1 2 3[捕获列表](输入参数) mutable->返回值类型{ 函数体 } -
注意捕获列表应传入this指针,对于类成员函数而言
|
|
1.6 call_once 多线程调用函数只进入一次
-
背景:例如对于socket编程,当封装tcp或udp类的时候,socket初始化只需一次,但是你调用类会调用多次。一个朴素的想法是加入一个互斥量flag标志,这样就不会多次调用,但是这样就会牵涉到效率的问题。
-
c++11支持call_once
-
要添加#include < mutex>,同时添加一个flag变量才可以
-
当不使用call_once时
1 2 3 4 5 6 7 8 9 10 11 12 13 14 15 16 17 18 19 20 21 22 23#include <thread> #include <iostream> #include <string> #include <mutex> using namespace std; void SystemInit() { cout << "Call SystemInit" << endl; } int main(int argc, char* argv[]) { SystemInit(); SystemInit(); for (int i = 0; i < 3; i++) { thread th(SystemInit); th.detach(); } getchar(); return 0; }可以看到结果会调用5次函数
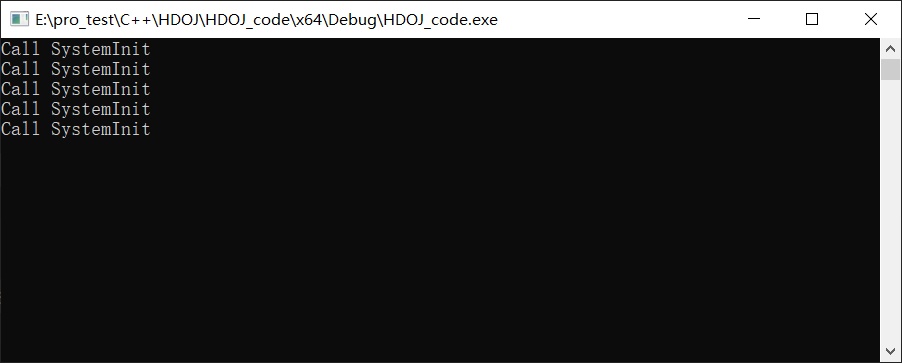
-
当使用call_once时
1 2 3 4 5 6 7 8 9 10 11 12 13 14 15 16 17 18 19 20 21 22 23 24 25 26 27 28 29#include <thread> #include <iostream> #include <string> #include <mutex> using namespace std; void SystemInit() { cout << "Call SystemInit" << endl; } void SystemInitOne() { static std::once_flag flag; std::call_once(flag, SystemInit); } int main(int argc, char* argv[]) { SystemInitOne(); SystemInitOne(); for (int i = 0; i < 3; i++) { thread th(SystemInitOne); th.detach(); } getchar(); return 0; }可以看到结果只调用了一次函数
2. 多线程通信和锁
2.1 多线程的状态及其切换流程分析
-
初始化(Init):该线程正在被创建
-
就绪(Ready):该线程在就绪列表中,等待CPU调度
-
运行(Running):该线程正在运行,以及调度到了。
-
阻塞(Blocked):该线程被阻塞挂起。此时没有占用CPU资源,放弃CPU的调度。
Blocked状态包括
- pend:锁、事件、信号量等阻塞
- suspend:主动pend
- delay:延时阻塞
- pendtime:因为锁、事件、信号量时间等超时等待
-
退出(Exit):该线程运行结束,等待父线程回收其控制块资源。
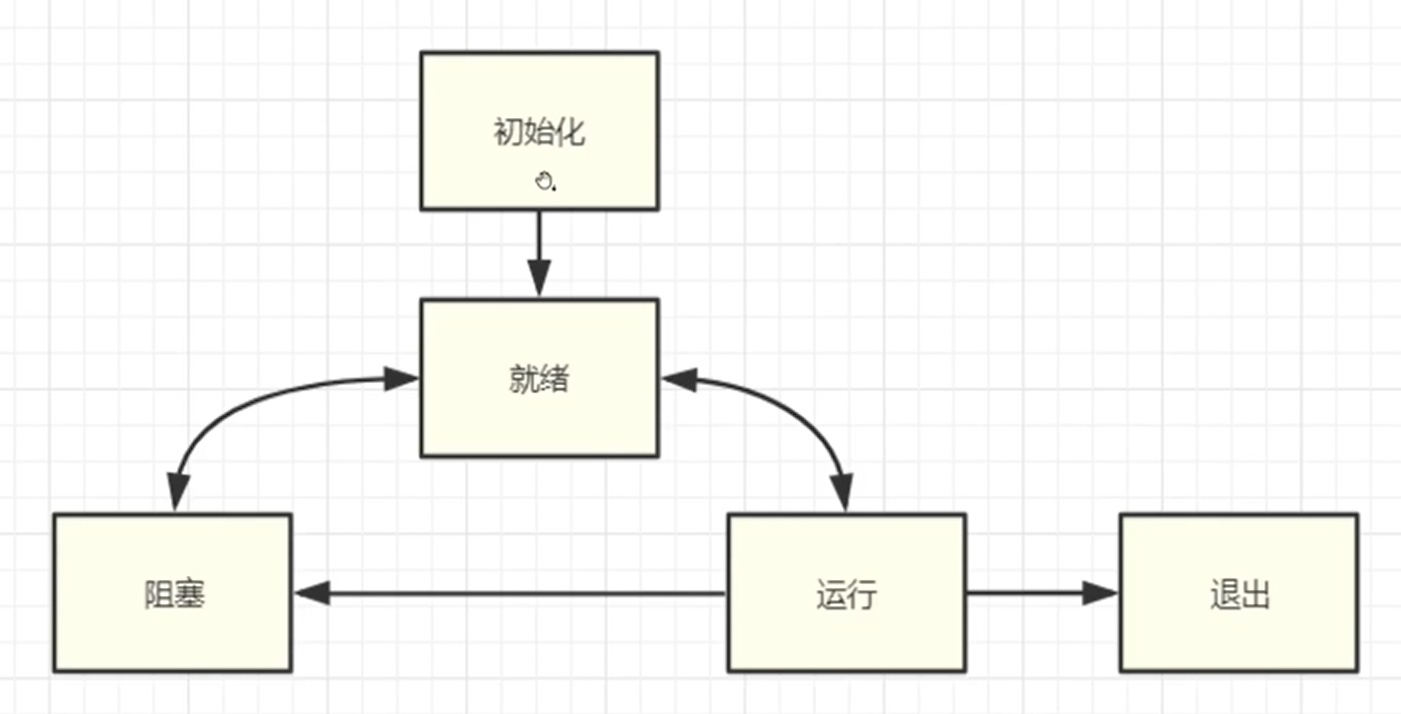
2.2 竞争状态和临界区介绍以及互斥锁mutex
-
竞争状态——Race Condition
多线程同时读写的共享数据
-
临界区——Critical Section
读写共享数据的代码片段
-
避免竞争状态策略——对临界区进行保护,同时只能有一个线程进入临界区
-
c++11的mutex互斥锁
-
1 2 3 4 5 6 7 8 9 10mutex.lock(); mutex.unlock(); mutex.try_lock();//这是会耗费资源的,一定要在之后sleep_for一段时间,释放部分资源,因此这个是会带来性能开销的 //例如定义一个静态全局变量 static mutex mux; if(!mux.try_lock()){ //操作 this_thread::sleep_fpr(100ms); continue; }
-
-
1 2 3 4 5 6 7 8 9 10 11 12 13 14 15 16 17 18 19 20 21 22 23 24 25 26 27 28 29 30 31 32 33 34 35 36 37 38//例子 #include <thread> #include <iostream> #include <string> #include <mutex> using namespace std; static mutex mux; void TestThread() { for(;;) { //获取锁资源,如果没有则阻塞等待 //mux.lock(); // if (!mux.try_lock()) { cout << "." << flush; this_thread::sleep_for(100ms); continue; } cout << "==============================" << endl; cout << "test 001" << endl; cout << "test 002" << endl; cout << "test 003" << endl; cout << "==============================" << endl; mux.unlock(); this_thread::sleep_for(1000ms); } } int main(int argc, char* argv[]) { for (int i = 0; i < 10; i++) { thread th(TestThread); th.detach(); } getchar(); return 0; }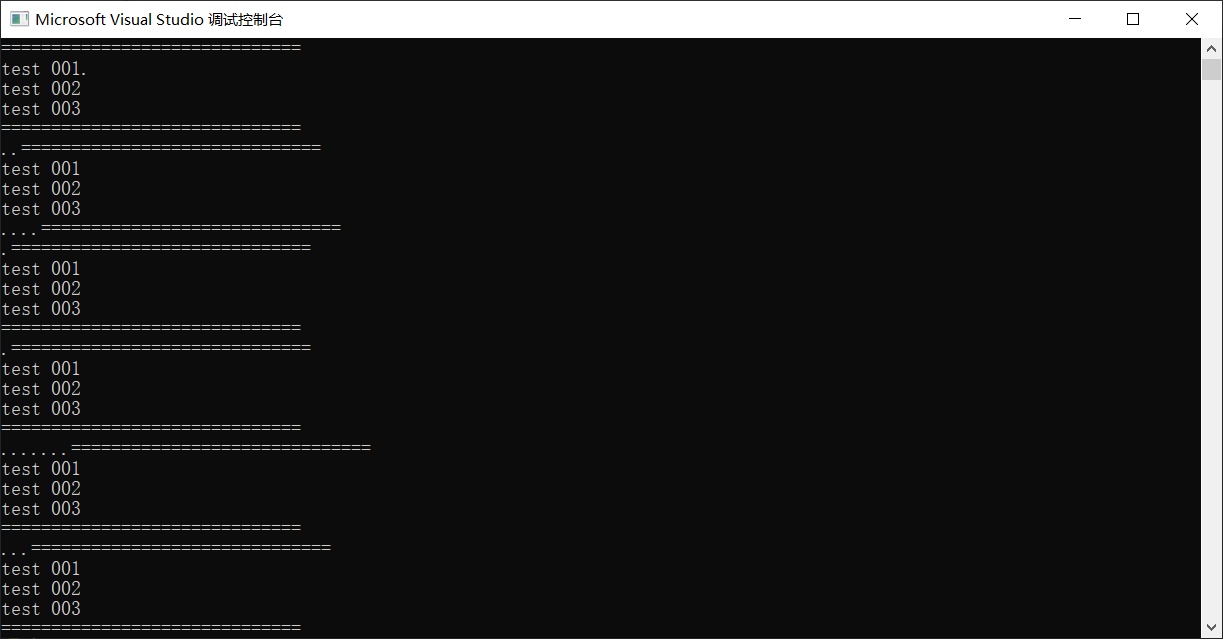
2.3 互斥锁的坑_线程抢占不到资源
-
mutex的unlock之后不用马上lock,要留给CPU一定的轮询时间
-
当不加等待时间时的例子,可以看到结果一直是in_2或者in_1等,不是一直123123循环
1 2 3 4 5 6 7 8 9 10 11 12 13 14 15 16 17 18 19 20 21 22 23 24 25#include <thread> #include <iostream> #include <string> #include <mutex> using namespace std; static mutex mux; void TestThread(int i) { for (;;) { mux.lock(); cout << "in__" << i << endl; mux.unlock(); } } int main(int argc, char* argv[]) { for (int i = 0; i < 3; i++) { thread th(TestThread,i); th.detach(); } getchar(); return 0; }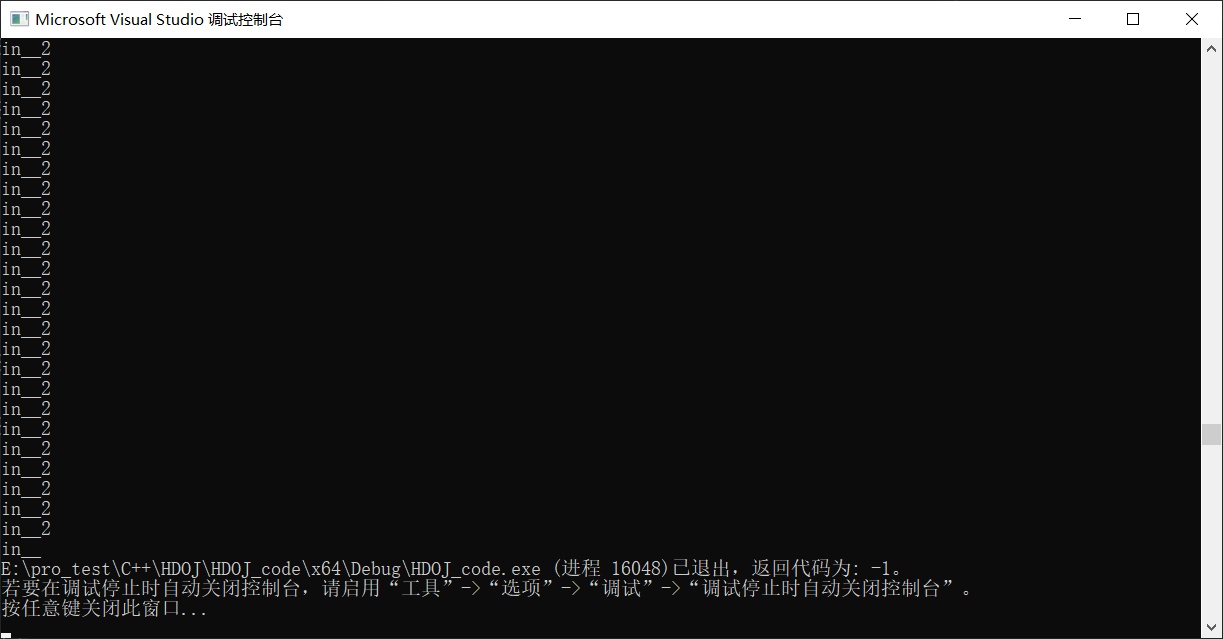
-
当加入等待时间之后——可以看到是依次有序的排队输出
1 2 3 4 5 6 7 8 9 10 11 12 13 14 15 16 17 18 19 20 21 22 23 24 25 26#include <thread> #include <iostream> #include <string> #include <mutex> using namespace std; static mutex mux; void TestThread(int i) { for (;;) { mux.lock(); cout << "in__" << i << endl; mux.unlock(); this_thread::sleep_for(10ms); } } int main(int argc, char* argv[]) { for (int i = 0; i < 3; i++) { thread th(TestThread,i); th.detach(); } getchar(); return 0; }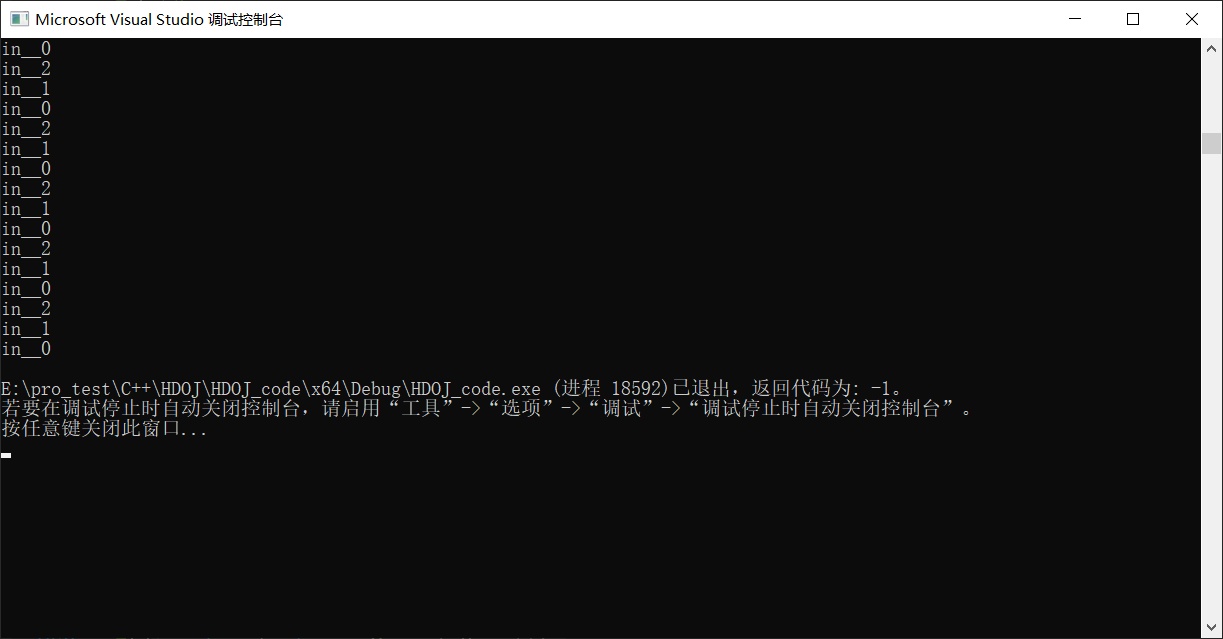
2.4 超时锁timed_mutex
-
作用:避免长时间死锁。
-
可以记录锁获取情况,多次超时,可以记录日志,获取错误情况。
-
timed_mutex和try_lock_for的使用。 -
1 2 3 4 5 6 7 8 9 10 11 12 13 14 15 16 17 18 19 20 21 22 23 24 25 26 27 28 29 30 31 32 33 34#include <thread> #include <iostream> #include <string> #include <mutex> #include <chrono> using namespace std; timed_mutex tmux; void ThreadMainTime(int i) { for (;;) { if (!tmux.try_lock_for(chrono::milliseconds(500))) { //记录日志 cout << i << " try lock for timeout" << endl; continue; } cout << i << " in thread" << endl; this_thread::sleep_for(1000ms); tmux.unlock(); this_thread::sleep_for(10ms); } } int main(int argc, char* argv[]) { for (int i = 0; i < 3; i++) { thread th(ThreadMainTime, i + 1); th.detach(); } getchar(); return 0; } -
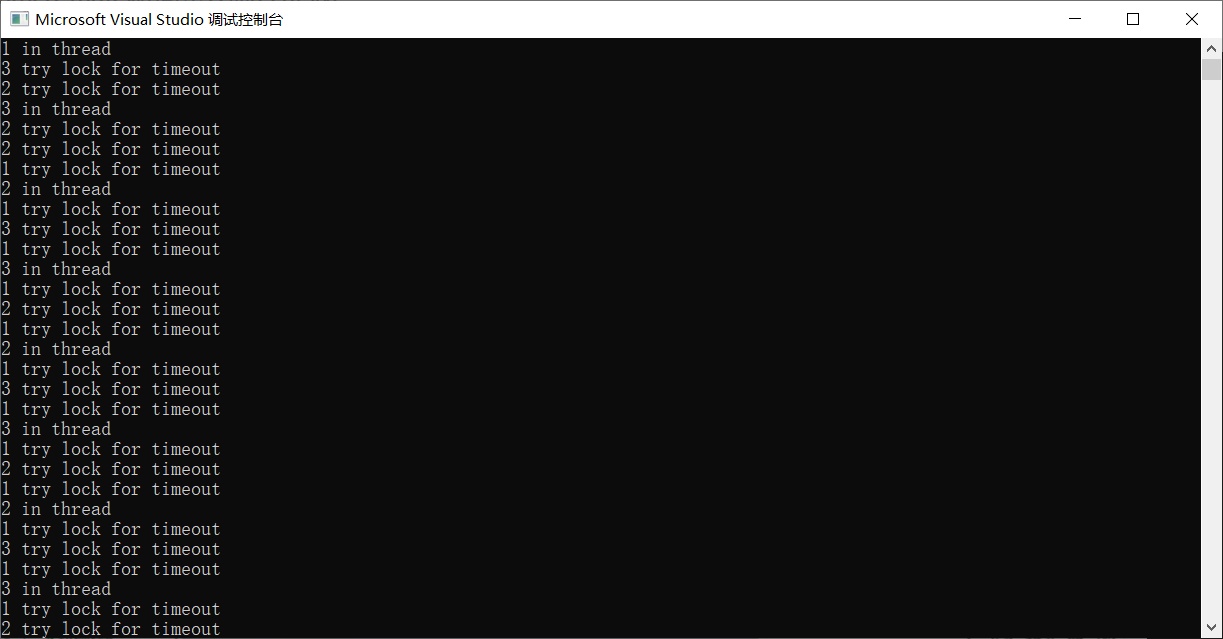
2.5 递归锁(可重入) recursive_mutex
-
recursive_mutex递归锁。 -
同一个线程中的同一把锁可以锁多次。避免了一些不必要的死锁,因为一些组合逻辑为了方便简洁,需要在锁里面加锁。
-
1 2 3 4 5 6 7 8 9 10 11 12 13 14 15 16 17 18 19 20 21 22 23 24 25 26 27 28 29 30 31 32 33 34 35 36 37 38 39 40 41 42 43 44 45 46 47#include <thread> #include <iostream> #include <string> #include <mutex> #include <chrono> using namespace std; recursive_mutex rtex; void Task1() { rtex.lock(); cout << "this is task1" << endl; rtex.unlock(); } void Task2() { rtex.lock(); cout << "this is task2" << endl; rtex.unlock(); } //如果不用递归锁,这里会报错,因为锁中锁 void ThreadMainRec(int i) { while (1) { rtex.lock(); Task1(); this_thread::sleep_for(1ms); Task2(); cout << i << " threadMain " << endl; rtex.unlock(); this_thread::sleep_for(1000ms); } } int main(int argc, char* argv[]) { for (int i = 0; i < 3; i++) { thread th(ThreadMainRec, i + 1); th.detach(); } getchar(); return 0; } -
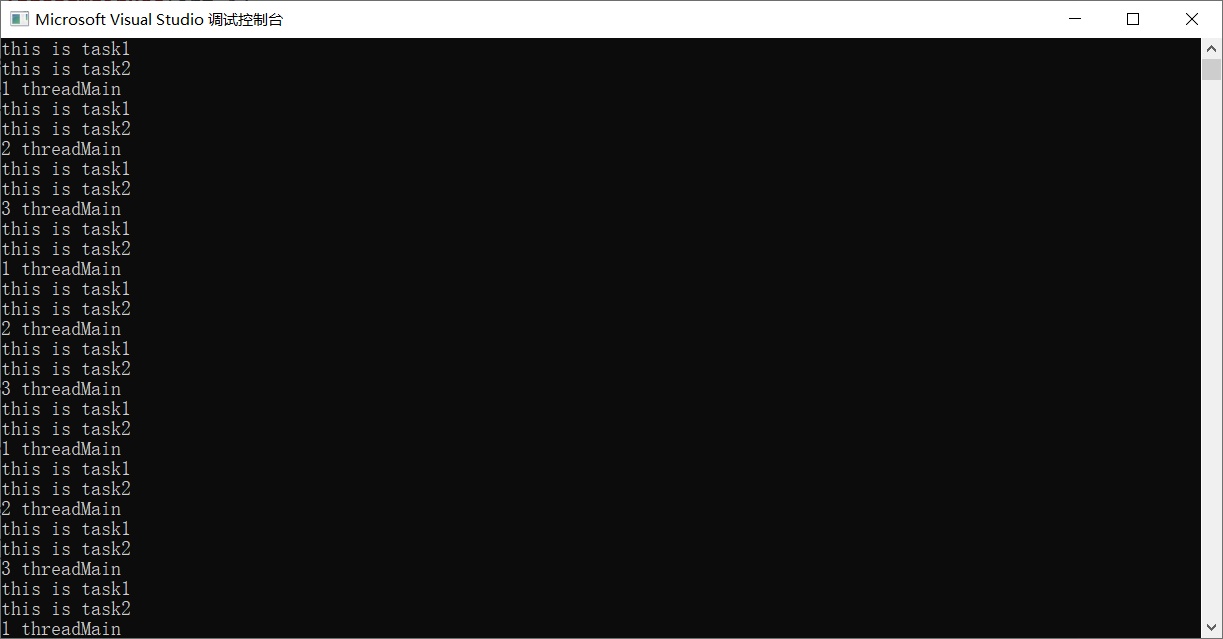
2.6 共享锁 shared_mutex
-
在C++ 17 中,
shared_mutex类是一个同步原语,可用于保护共享数据不被多个线程同时访问。与便于独占访问的其他互斥类型不同,shared_mutex 拥有二个访问级别:-
共享 - 多个线程能共享同一互斥的所有权。
-
独占性 - 仅一个线程能占有互斥。
-
-
c++14使用的是共享超时互斥锁
shared_timed_mutex。 -
又称为读写锁。
-
相比互斥锁,读写锁允许更高的并行性,而互斥锁要么锁住状态要么不加锁,而且一次只有一个线程可以加锁。
-
1)当读写锁处于写加锁状态时,在其解锁之前,所有尝试对其加锁的线程都会被阻塞; 2)当读写锁处于读加锁状态时,所有试图以读模式对其加锁的线程都可以得到访问权,但是如果想以写模式对其加锁,线程将阻塞。
-
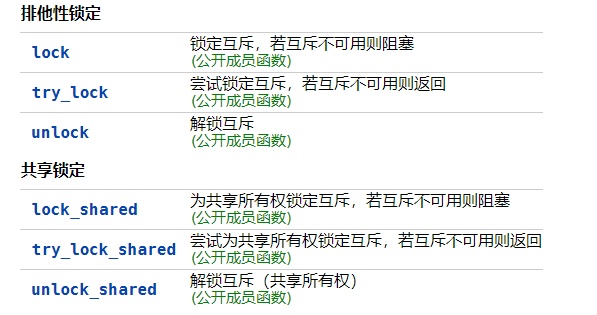
-
1 2 3 4 5 6 7 8 9 10 11 12 13 14 15 16 17 18 19 20 21 22 23 24 25 26 27 28 29 30 31 32 33 34 35 36 37 38 39 40 41 42 43 44 45 46 47 48 49 50 51#include <thread> #include <iostream> #include <string> #include <mutex> #include <shared_mutex> #include <chrono> using namespace std; shared_mutex smux; void ReadTask(int i) { while (1) { //读数据允许共享 smux.lock_shared(); cout << "read in task " << i << endl; this_thread::sleep_for(500ms); smux.unlock_shared(); this_thread::sleep_for(10ms); } } void WriteTask(int i) { for (;;) { smux.lock_shared(); //读取数据 smux.unlock_shared(); //互斥锁,写入 smux.lock(); cout << "write in task " << i << endl; this_thread::sleep_for(300ms); smux.unlock(); this_thread::sleep_for(1ms); } } int main(int argc, char* argv[]) { for (int i = 0; i < 3; i++) { thread th(ReadTask, i + 1); th.detach(); } for (int i = 0; i < 3; i++) { thread th(WriteTask, i + 1); th.detach(); } getchar(); return 0; } -
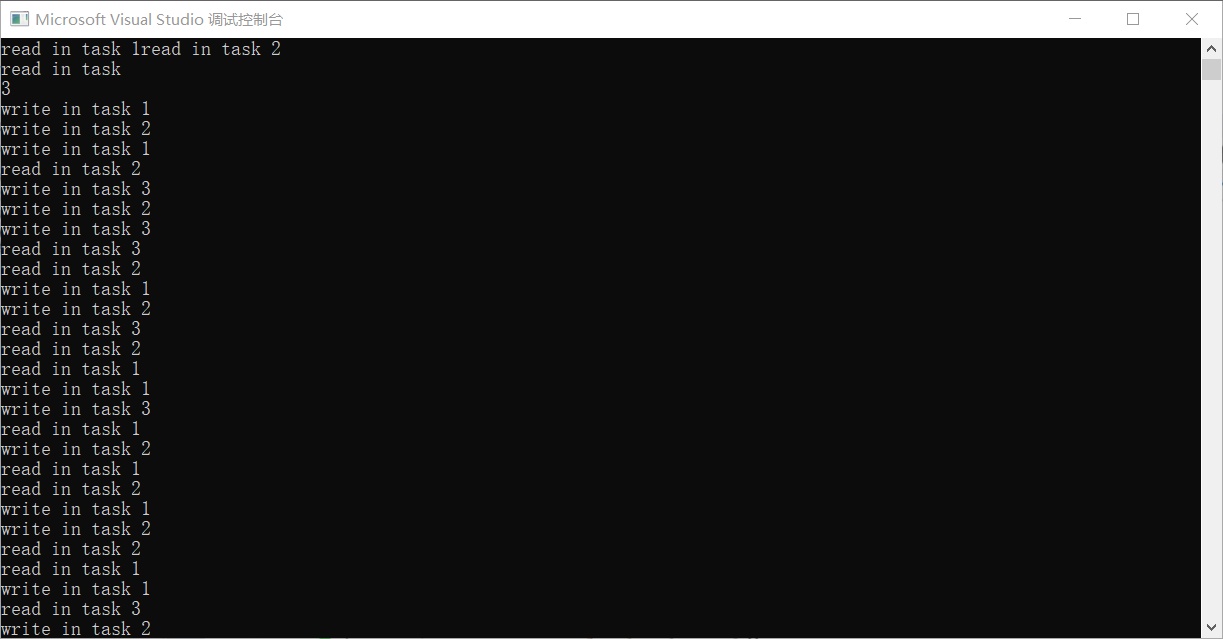
3. 锁资源管理和条件变量
3.1 手动实现RAII管理mutex资源和锁的自动释放
-
RAII是Resource Acquisition Is Initialization的简称,其翻译过来就是“资源获取即初始化”,即在构造函数中申请分配资源,在析构函数中释放资源,它是C++语言中的一种管理资源、避免泄漏的良好方法。 -
C++语言的机制保证了,当创建一个类对象时,会自动调用构造函数,当对象超出作用域时会自动调用析构函数。RAII正是利用这种机制,利用类来管理资源,将资源与类对象的生命周期绑定,即在对象创建时获取对应的资源,在对象生命周期内控制对资源的访问,使之始终保持有效,最后在对象析构时,释放所获取的资源。 -
RAII技术被认为是C++中管理资源的最佳方法,更进一步来说,使用RAII技术也可以实现安全、简洁的状态管理。 -
手动实现RAII管理mutex资源,不使用模板类,仅实现一个简单版本供参考。
-
1 2 3 4 5 6 7 8 9 10 11 12 13 14 15 16 17 18 19 20 21 22 23 24 25 26 27 28 29 30 31 32 33 34 35 36 37#include <thread> #include <iostream> #include <string> #include <mutex> #include <chrono> using namespace std; mutex mux; //RAII实现 class XMutex { public: XMutex(mutex &mux) :m_tex(mux) { cout << "lock" << endl; m_tex.lock(); }; ~XMutex() { cout << "unlock" << endl; m_tex.unlock(); }; private: mutex& m_tex; }; void Task(int i) { XMutex currmutex(mux); if (i == 1) { cout << "status equal 1" << endl;; } else { cout << "status equal 2" << endl;; } //不用释放锁了,会自动释放锁。 } -
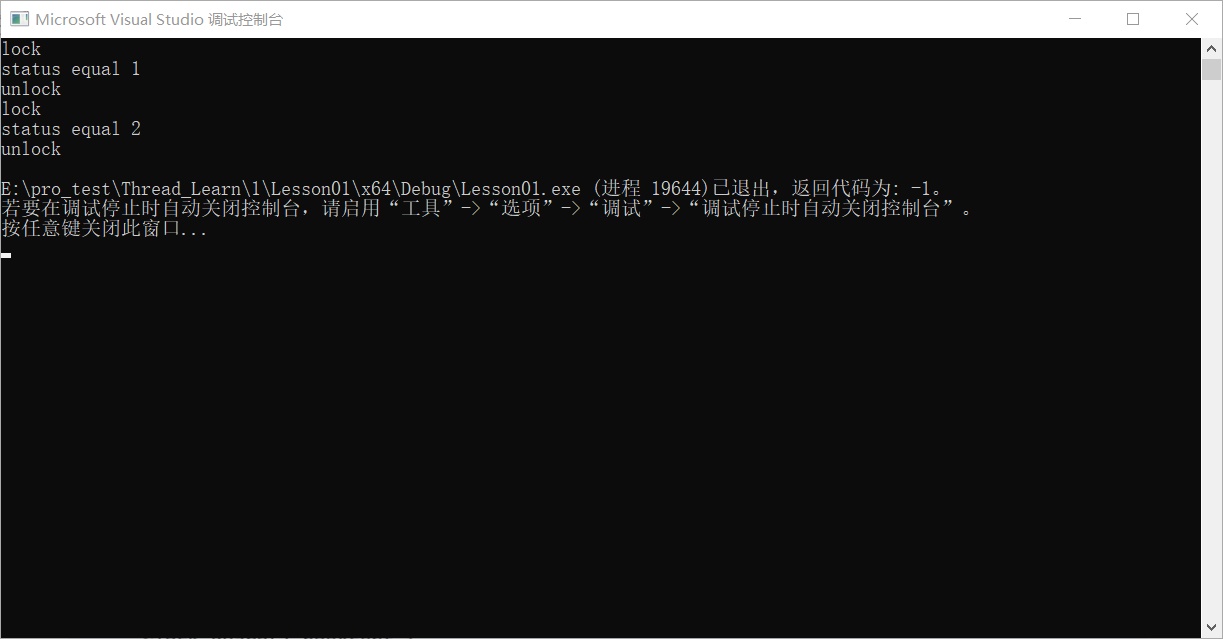
3.2 c++11的RAII控制锁lock_guard
-
C++11 实现严格基于作用域的互斥体所有权包装器。
-
adopt_lock C++11 类型为adopt_lock_t,假设调用方已拥有互斥的所有权,即类构造的时候不加锁。
-
通过{} 控制锁的临界区。
-
注意,不可用于move移动语义。
-
1 2 3 4 5 6 7 8 9 10 11 12 13 14 15template <class _Mutex> class lock_guard { // class with destructor that unlocks a mutex public: using mutex_type = _Mutex; explicit lock_guard(_Mutex& _Mtx) : _MyMutex(_Mtx) { // construct and lock _MyMutex.lock(); } lock_guard(_Mutex& _Mtx, adopt_lock_t) : _MyMutex(_Mtx) { // construct but don't lock } ~lock_guard() noexcept { _MyMutex.unlock(); } lock_guard(const lock_guard&) = delete; lock_guard& operator=(const lock_guard&) = delete; }; -
示例
-
1 2 3 4 5 6 7 8 9 10 11 12 13 14 15 16 17 18 19 20 21 22 23 24 25 26 27 28 29 30 31 32#include <thread> #include <iostream> #include <string> #include <mutex> #include <chrono> using namespace std; static mutex mux; void testLockGuard(int i) { //临界区范围 for (;;) { { lock_guard<mutex> lock(mux); cout << "begin thread in " << i << endl; this_thread::sleep_for(500ms); } //退出会释放锁 this_thread::sleep_for(1ms); } } int main(int argc, char* argv[]) { for (int i = 0; i < 3; ++i) { thread th(testLockGuard, i + 1); th.detach(); } getchar(); return 0; } -
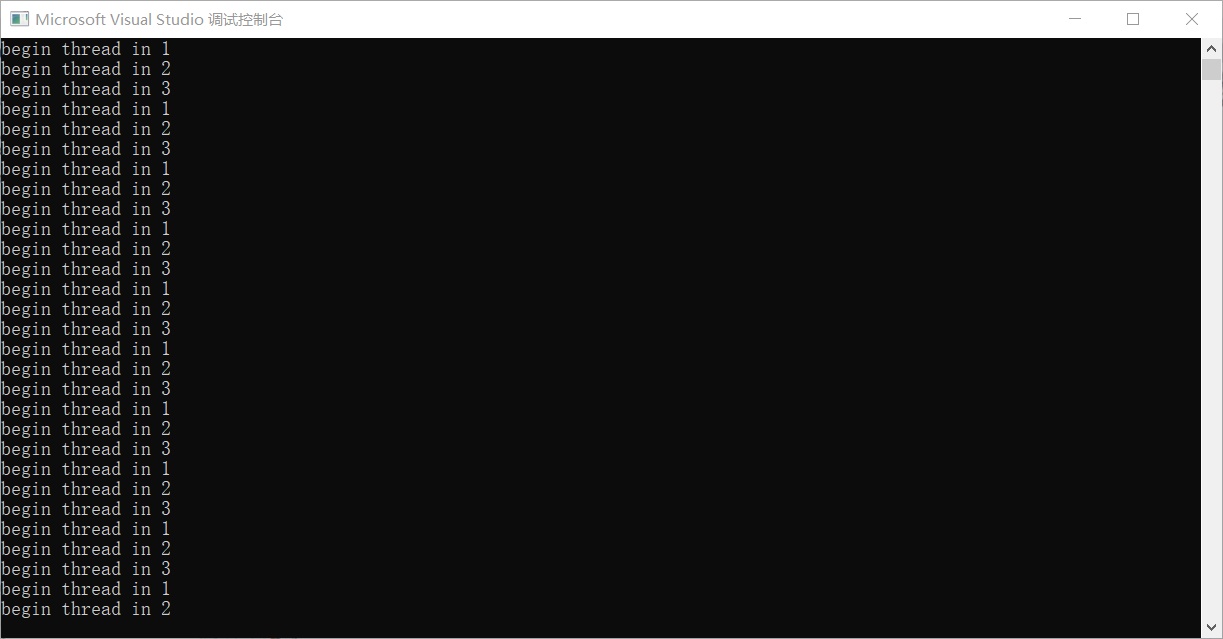
3.3. C++11 unique_lock可临时解锁、控制超时的互斥体包装器
-
虽然lock_guard挺好用的,但是有个很大的缺陷,在定义lock_guard的地方会调用构造函数加锁,在离开定义域的话lock_guard就会被销毁,调用析构函数解锁。这就产生了一个问题,如果这个定义域范围很大的话,那么锁的粒度就很大,很大程序上会影响效率。
-
所以为了解决lock_guard锁的粒度过大的原因,unique_lock就出现了。
-
当然,方便肯定是有代价的,unique_lock内部会维护一个锁的状态,所以在效率上肯定会比lock_guard慢。
-
unique_lock C++11 实现可移动语义(move)的互斥体所有权包装器,支持move移动构造。
-
支持临时释放锁 unlock。
-
支持 adopt_lock(即已经拥有锁,可以不加锁,出栈区会释放)。
-
支持 defer_lock (即延后拥有锁,如果不加锁,出栈区不释放;如果加锁,出栈区会释放)。可以在创建unique_lock时设置std::defer_lock参数,这样就不会在构造时加锁,后续加锁的时机我们可以通过.lock()函数自行设置。
-
支持 try_to_lock 尝试获得互斥的所有权而不阻塞 ,获取失败退出栈区不会释放,通过owns_lock()函数判断是否获取互斥体所有权。
-
支持超时参数,超时不拥有锁。
-
针对
adopt_lock和lock()和try_to_lock的例子。 -
1 2 3 4 5 6 7 8 9 10 11 12 13 14 15 16 17 18 19 20 21 22 23 24 25 26 27 28 29 30 31 32 33 34 35 36 37 38 39 40 41 42 43 44 45 46 47 48 49 50 51 52 53 54 55 56 57 58 59 60 61 62 63 64 65 66 67 68 69 70 71 72 73 74 75 76 77 78 79 80 81 82 83 84 85 86 87 88 89 90 91 92 93 94 95 96 97#include<iostream> #include<thread> #include<string> #include<vector> #include<list> #include<mutex> using namespace std; class A { public: //插入消息队列 void inMsgRecvQueue() { for (int i = 0; i < 10000; i++) { { std::unique_lock<std::mutex> sbguard(my_mutex, std::try_to_lock); if (sbguard.owns_lock()) { //拿到了锁 msgRecvQueue.push_back(i); cout << "inMsgRecvQueue()执行,插入一个元素" << i << endl; //... //其他处理代码 } else { //没拿到锁 cout << "inMsgRecvQueue()执行,但没拿到锁头,只能干点别的事" << i << endl; } } this_thread::sleep_for(1ms); } } bool outMsgLULProc(int &command) { my_mutex.lock();//要先lock(),后续才能用unique_lock的std::adopt_lock参数 std::unique_lock<std::mutex> sbguard(my_mutex, std::adopt_lock); if (!msgRecvQueue.empty()) { //消息不为空 int command1 = msgRecvQueue.front();//返回第一个元素,但不检查元素是否存在 msgRecvQueue.pop_front();//移除第一个元素。但不返回; std::this_thread::sleep_for(10ms); return true; } else { return false; } } //把数据从消息队列取出的线程 void outMsgRecvQueue() { int command = 0; for (int i = 0; i < 10000; i++) { bool result = outMsgLULProc(command); if (result) { cout << "outMsgRecvQueue()执行,取出一个元素" << endl; //处理数据 } else { //消息队列为空 cout << "inMsgRecvQueue()执行,但目前消息队列中为空!" << i << endl; } } } private: std::list<int> msgRecvQueue;//容器(消息队列),代表玩家发送过来的命令。 std::mutex my_mutex;//创建一个互斥量(一把锁) }; int main() { A myobja; //一个提取信息 std::thread myOutMsgObj(&A::outMsgRecvQueue, &myobja); //一个加入消息队列 std::thread myInMsgObj(&A::inMsgRecvQueue, &myobja); myOutMsgObj.join(); myInMsgObj.join(); cout << "主线程执行!" << endl; return 0; } -
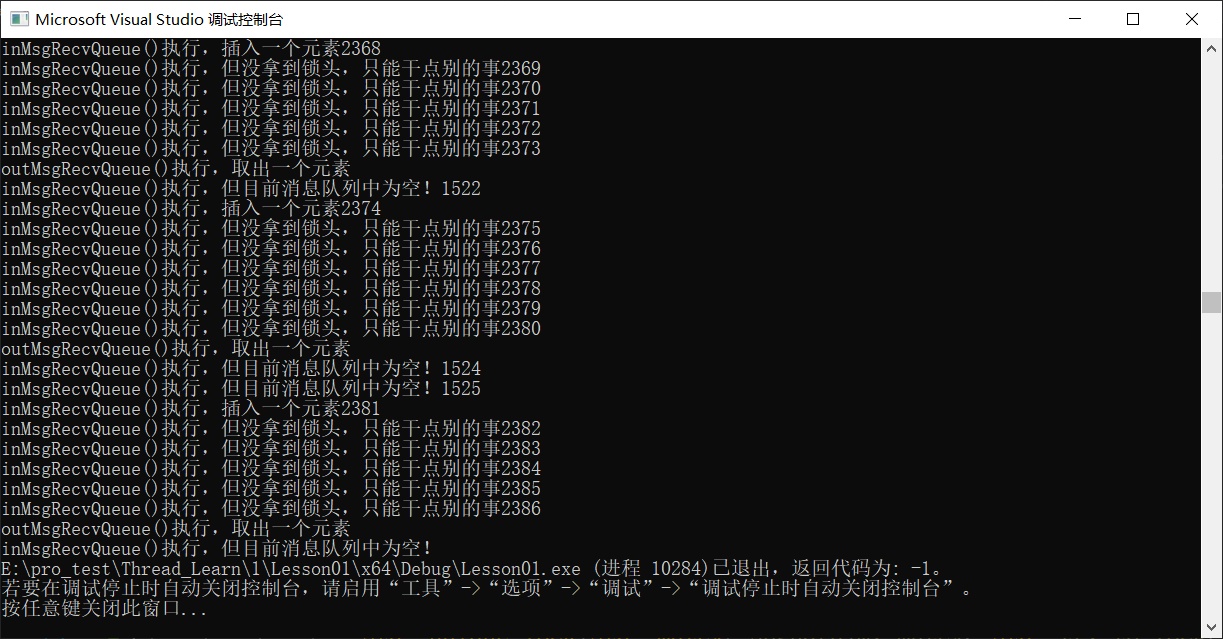
-
延时加锁
-
1 2 3 4 5 6 7static mutex tmux; { //延时加锁 std::unique_lock<std::mutex> sbguard(tmux, std::defer_lock); //加锁,出栈区后释放;如果不加锁,出栈区就不会释放 sbguard.lock(); } -
release()函数:返回它所管理的mutex对象指针,并释放所有权;也就是说,这个unique_lock和mutex不再有关系。
-
1 2 3 4 5 6 7 8 9 10 11 12void inMsgRecvQueue() { for (int i = 0; i < 10000; i++) { std::unique_lock<std::mutex> sbguard(my_mutex); std::mutex *ptx = sbguard.release(); //现在你有责任自己解锁了 msgRecvQueue.push_back(i); ptx->unlock(); //自己负责mutex的unlock了 } } -
unique_lock对象的mutex的所有权是可以转移的,但是不能复制。转移方法有以下两种:
std::move()return std:: unique_lock<std::mutex>
-
1 2 3 4 5 6std::unique_lock<std::mutex> sbguard2(std::move(sbguard));//移动语义,现在sbguard1指向空,sbguard2指向了my_mute { std::unique_lock<std::mutex> tmpguard(my_mutex); return tmpguard; }
3.4 C++14 shared_lock共享锁包装器
-
使用方式,写的时候要和
unique_lock一起用。 -
1 2 3 4 5 6 7 8 9 10 11 12 13//共享锁 static shared_mutex smux; // 读取锁 { //调用共享锁 shared_lock<shared_mutex> lock(smux); cout << "read data" << endl; } //写入锁 { unique_lock<shared_mutex> lock(smux); cout << "write data" << endl; }
3.5 c++17 scoped_lock 解决互锁造成的死锁问题
-
std::scoped_lock (c++17): 多个std::mutex(或std::shared_mutex)
-
对多个mutex上锁可能会出现死锁,最常见的例子是ABBA死锁。假设存在两个线程(线程1和线程2)和两个锁(锁A和锁B),这两个线程的执行情况如下:
-
线程1 线程2 获得锁A 获得锁B 尝试获得锁B 尝试获得锁A 等待获得锁B 等待获得锁A ...... ...... -
线程1在等待线程2持有的锁B,线程2在等待线程1持有的锁A,两个线程都不会释放其获得的锁; 因此,两个锁都不可用,将陷入死锁。
-
死锁例子
-
1 2 3 4 5 6 7 8 9 10 11 12 13 14 15 16 17 18 19 20 21 22 23 24 25 26 27 28 29 30 31 32 33 34 35 36 37 38 39 40 41 42 43 44 45 46 47 48 49 50#include<iostream> #include<thread> #include<string> #include<vector> #include<list> #include<mutex> #include <shared_mutex> using namespace std; static mutex mtx1; static mutex mtx2; void testScope1() { //模拟死锁,等待另外一个线程锁mtx2 this_thread::sleep_for(100ms); mtx1.lock(); cout << this_thread::get_id() << " lock mutex1" << endl; mtx2.lock(); cout << this_thread::get_id() << " lock mutex2" << endl; cout << "testScope1" << endl; mtx1.unlock(); mtx2.unlock(); } void testScope2() { mtx2.lock(); cout << this_thread::get_id() << " lock mutex2" << endl; //模拟死锁,等待另外一个线程锁mtx1 this_thread::sleep_for(120ms); mtx1.lock(); cout << this_thread::get_id() << " lock mutex1" << endl; cout << "testScope2" << endl; mtx2.unlock(); mtx1.unlock(); } int main() { { thread th(testScope1); th.detach(); } { thread th(testScope2); th.detach(); } getchar(); return 0; } -
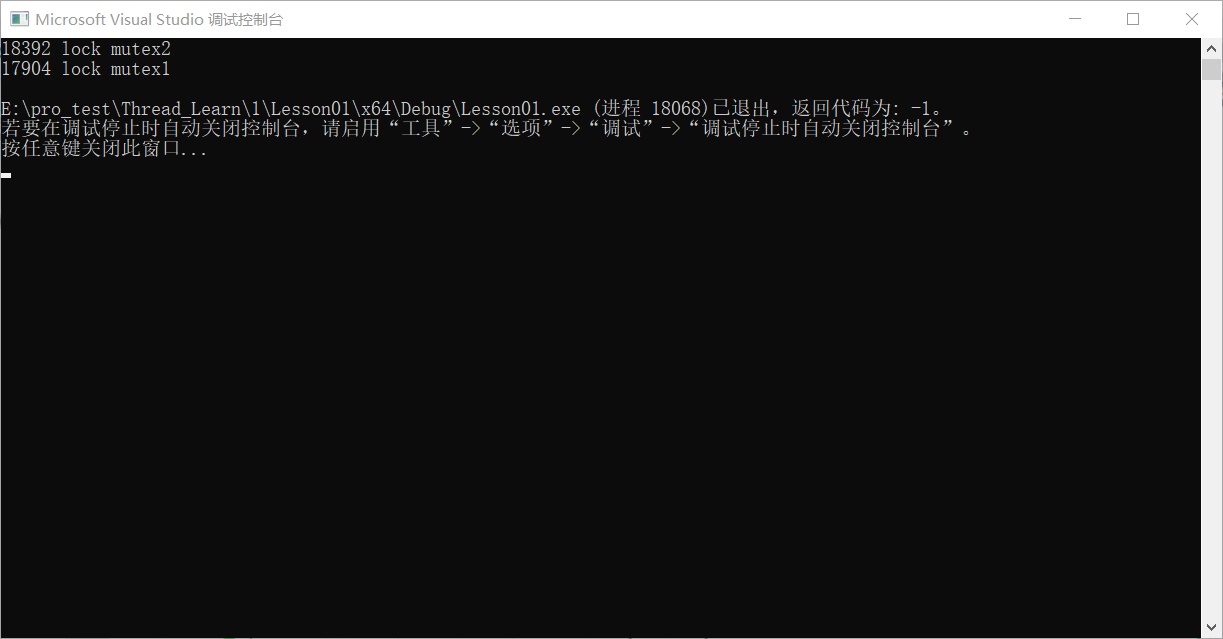
-
scoped_lock底层调用的是c++11的lock,同时锁住多个互斥锁才会进行,否则阻塞住。
-
互锁死锁解决方式1:使用C++11标准的lock函数,但要手动释放锁。
-
1 2 3 4 5 6 7 8 9 10 11 12 13 14 15 16 17 18 19 20 21 22 23 24 25 26 27 28 29 30 31 32 33 34 35 36 37 38 39 40 41 42 43 44 45 46 47 48 49 50 51#include<iostream> #include<thread> #include<string> #include<vector> #include<list> #include<mutex> #include <shared_mutex> using namespace std; static mutex mtx1; static mutex mtx2; //死锁解决方式1:使用C++11标准的lock函数 void testScope1() { //模拟死锁,等待另外一个线程锁mtx2 this_thread::sleep_for(100ms); lock(mtx1, mtx2); cout << this_thread::get_id() << " lock mutex1" << endl; cout << this_thread::get_id() << " lock mutex2" << endl; cout << "testScope1" << endl; mtx1.unlock(); mtx2.unlock(); } void testScope2() { mtx2.lock(); cout << this_thread::get_id() << " lock mutex2" << endl; //模拟死锁,等待另外一个线程锁mtx1 this_thread::sleep_for(120ms); mtx1.lock(); cout << this_thread::get_id() << " lock mutex1" << endl; cout << "testScope2" << endl; mtx2.unlock(); mtx1.unlock(); } int main() { { thread th(testScope1); th.detach(); } { thread th(testScope2); th.detach(); } getchar(); return 0; } -
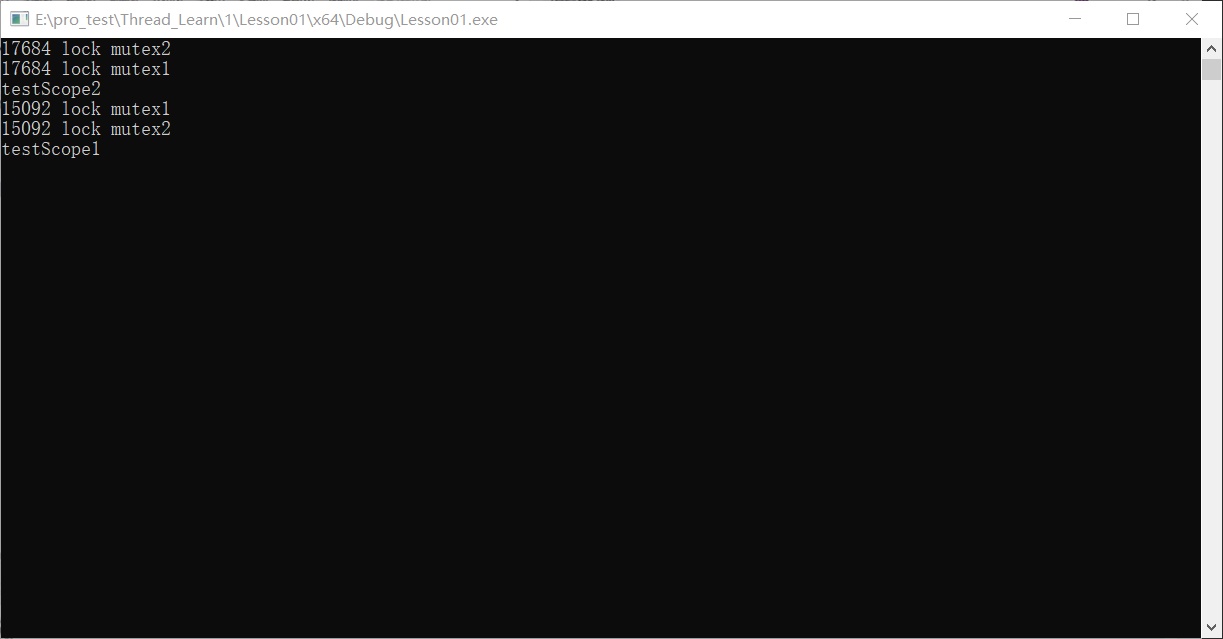
-
死锁互锁解决方式2:使用C++17标准的scoped_lock类,自动释放锁。
-
1 2 3 4 5 6 7 8 9 10 11 12 13 14 15 16 17 18 19 20 21 22 23 24 25 26 27 28 29 30 31 32 33 34 35 36 37 38 39 40 41 42 43 44 45 46 47 48 49#include<iostream> #include<thread> #include<string> #include<vector> #include<list> #include<mutex> #include <shared_mutex> using namespace std; static mutex mtx1; static mutex mtx2; //死锁解决方式2:使用C++17标准的scoped_lock类,自动释放锁。 void testScope1() { //模拟死锁,等待另外一个线程锁mtx2 this_thread::sleep_for(100ms); scoped_lock lock1(mtx1, mtx2); cout << this_thread::get_id() << " lock mutex1" << endl; cout << this_thread::get_id() << " lock mutex2" << endl; cout << "testScope1" << endl; } void testScope2() { mtx2.lock(); cout << this_thread::get_id() << " lock mutex2" << endl; //模拟死锁,等待另外一个线程锁mtx1 this_thread::sleep_for(120ms); mtx1.lock(); cout << this_thread::get_id() << " lock mutex1" << endl; cout << "testScope2" << endl; mtx2.unlock(); mtx1.unlock(); } int main() { { thread th(testScope1); th.detach(); } { thread th(testScope2); th.detach(); } getchar(); return 0; } -
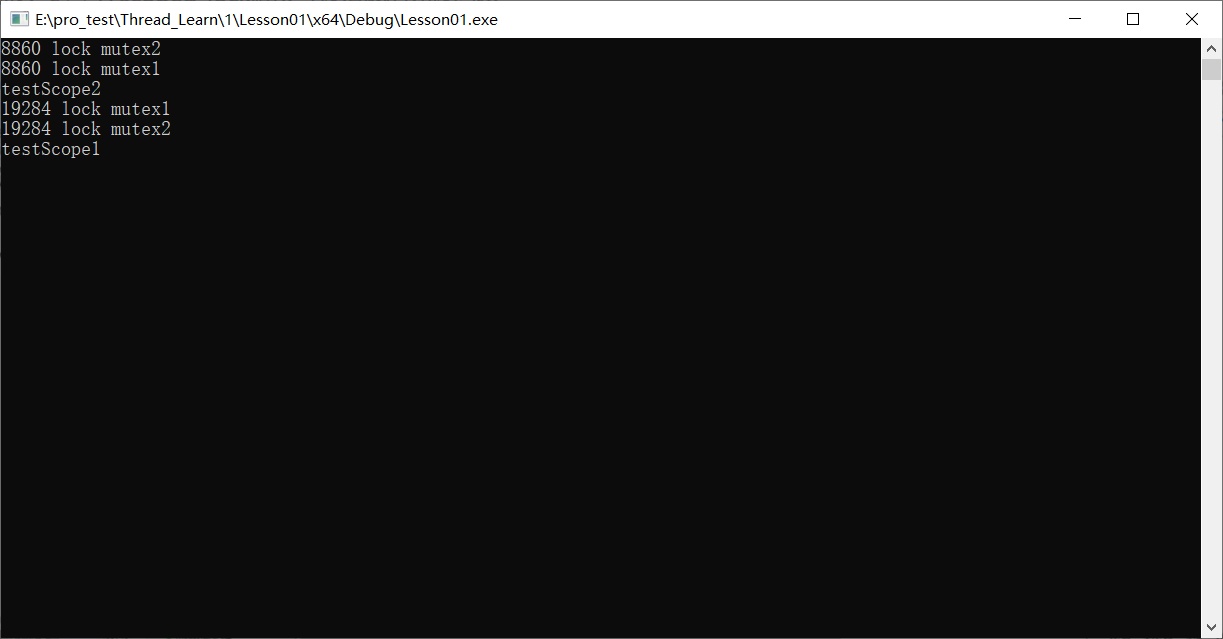
3.6 使用互斥锁+list模拟线程通信
-
最简单的一种多线程通信方式。主线程和子线程,子线程封装为一个类。
-
封装线程基类XThread 控制线程启动和停止;
-
模拟消息服务器线程 接收字符串消息,并处理消息;
-
通过unique_lock 和 mutex 互斥访问 list< string> 消息队列;
-
主线程定时发送消息给子线程。
-
基类定义
-
1 2 3 4 5 6 7 8 9 10 11 12 13 14 15 16 17 18 19 20//.h文件 #pragma once #include <thread> class XThread { public: // 启动线程 virtual void Start(); // 设置线程退出标志 virtual void Stop(); // 等待线程退出,阻塞 virtual void Wait(); // 判断线程释放退出 bool IsExit(); private: //线程入口函数 virtual void Main() = 0; bool is_exit = false; std::thread m_th; }; -
1 2 3 4 5 6 7 8 9 10 11 12 13 14 15 16 17 18 19 20 21 22 23#include "xthread.h" using namespace std; // 启动线程 void XThread::Start() { is_exit = false; m_th = thread(&XThread::Main, this); } // 设置线程退出标志 void XThread::Stop() { is_exit = true; Wait(); } // 等待线程退出,阻塞 void XThread::Wait() { if (m_th.joinable()) { m_th.join(); } } // 判断线程释放退出 bool XThread::IsExit() { return is_exit; } -
派生类定义
-
1 2 3 4 5 6 7 8 9 10 11 12 13 14 15 16 17 18 19 20//.h文件 #pragma once #include <mutex> #include "xthread.h" class XMsgServer : public XThread { public: //给当前线程发消息 void SendMsg(std::string msg); private: //处理消息的线程入口函数 void Main() override; //消息队列缓冲 std::list<std::string> msgList; //互斥访问消息队列 std::mutex mux_; }; -
1 2 3 4 5 6 7 8 9 10 11 12 13 14 15 16 17 18 19 20 21 22 23 24 25 26 27 28 29#include "xmsgserver.h" #include <iostream> #include <string> using namespace std; //处理消息的线程入口函数 void XMsgServer::Main() { while (!IsExit()) { this_thread::sleep_for(10ms);//处理消息的最大时延 unique_lock<mutex> lock(mux_); if (msgList.empty()) { cout << "msg is empty !" << endl; continue; } //处理所有消息,实际应该是弹一条消息解锁,处理完后再上锁 while (!msgList.empty()) { //消息处理业务逻辑 cout << "receive msg : " << msgList.front() << endl; msgList.pop_front(); } } } //给当前线程发送消息 void XMsgServer::SendMsg(std::string msg) { unique_lock<mutex> lock(mux_); msgList.push_back(msg); } -
主函数定义
-
1 2 3 4 5 6 7 8 9 10 11 12 13 14 15 16#include "xmsgserver.h" #include <sstream> using namespace std; int main() { XMsgServer server; server.Start(); for (int i = 0; i < 10; ++i) { stringstream ss; ss << "msg : " << i + 1; server.SendMsg(ss.str()); this_thread::sleep_for(500ms); } server.Stop(); return 0; } -
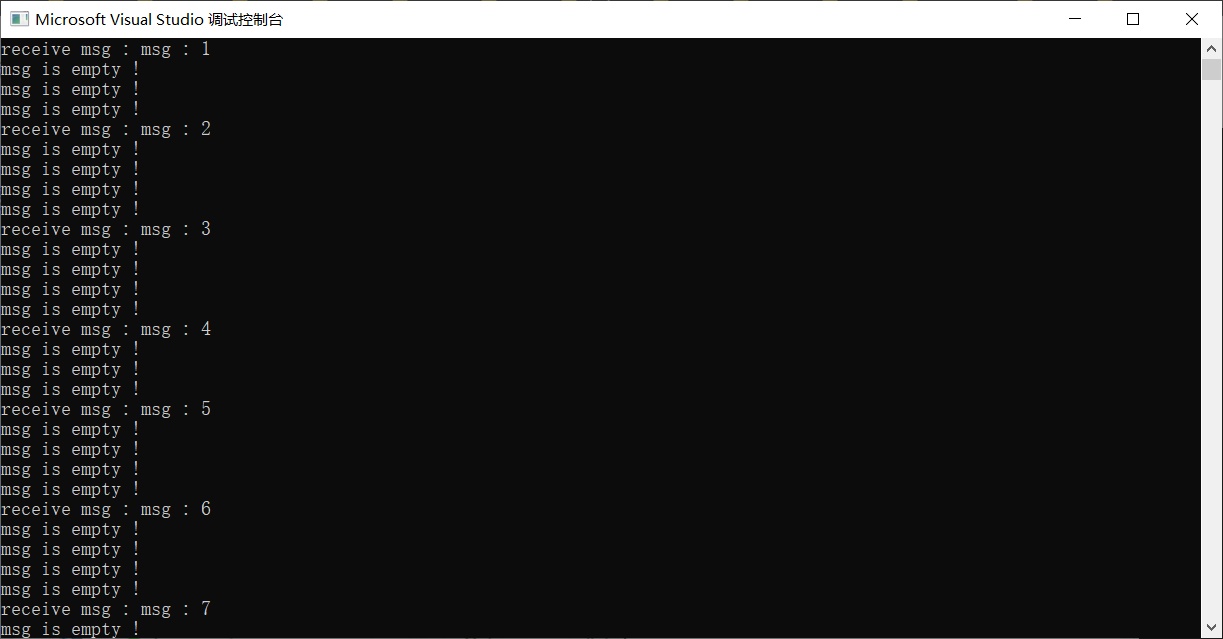
3.7 条件变量应用场景和生产者消费者信号处理步骤
-
生产者-消费者模型
- 生产者和消费者共享资源变量(list队列);
- 生产者生产一个产品,通知消费者消费;
- 消费者阻塞等待信号-获取信号后消费产品(取出list队列中的数据)。
-
实际业务中有很多生成消费的应用场景,比如多线程通信,音视频的数据获取和渲染等等。
-
在章节3.6的例子中,我们通过互斥锁保护共享数据,保证多线程对共享数据的访问同步有序。
-
但如果一个线程需要等待一个互斥锁的释放,该线程通常需要轮询该互斥锁是否已被释放,我们也很难找到适当的轮训周期,如果轮询周期太短则太浪费CPU资源,如果轮询周期太长则可能互斥锁已被释放而该线程还在睡眠导致发生延误。
-
针对典型的如CS架构,如果没有条件变量,你会怎么实现消费者呢?
-
一种方式是:让消费者线程一直轮询队列(需要加 mutex)。如果是队列里有值,就去消费;如果为空,要么是继续查( spin 策略),要么 sleep 一下,让系统过一会再唤醒你,你再次查。可以想到,无论哪种策略,都不通用,要么费 cpu,要么线程过分 sleep,影响该线程的性能。
-
第二种方式是使用条件变量:上面的消费者线程,发现队列为空,就告诉操作系统,我要 wait,一会肯定有其他线程发信号来唤醒我的。这个『其他线程』,实际上就是生产者线程。生产者线程 push 队列之后,则调用 signal,告诉操作系统,之前有个线程在 wait,你现在可以唤醒它了。
-
上述两种等待方式,前者是轮询(poll),后者是事件(event)。
-
一般来说,事件方式比较通用,性能不会太差(但存在切换上下文的开销)。轮询方式的性能,就非常依赖并发 pattern,也特别消耗 cpu。
-
常见步骤:
-
(一)改变共享变量的线程步骤,生产者
-
准备好信号量
1std::condition_variable cv; -
1.通过unique_lock 获取mutex
1unique_lock<mutex> slock(mux); -
2.在获取锁的时候修改数据
1msg.push_back(ss.str()); -
3.释放锁并通知读取线程
-
1 2 3slock.unlock(); cv.notify_one();//通知一个等待线程 //cv.notify_all();//通知所有等待线程 -
总的实例
-
1 2 3 4 5 6 7 8 9 10 11 12 13 14 15 16 17 18 19 20 21 22 23 24 25 26 27 28 29 30 31 32 33 34 35 36 37 38 39 40 41 42 43 44 45 46 47 48 49 50 51 52 53 54 55 56 57 58 59#include <iostream> #include <sstream> #include <thread> #include <mutex> #include <condition_variable> #include <list> #include <string> using namespace std; list<string> msg; mutex mux; condition_variable cv; //生产者线程 void writeThread() { for (int i = 0;; i++) { stringstream ss; ss << "write message" << i; unique_lock<mutex> slock(mux); msg.push_back(ss.str()); //释放锁并通知线程,不解锁会造成死锁的情况 slock.unlock(); cv.notify_one();//通知一个等待线程 //cv.notify_all();//通知所有等待线程 this_thread::sleep_for(1s); } } //消费者线程 void readThread(int i) { for (;;) { cout << "read message : " << i << endl; unique_lock<mutex> slock(mux); //wait的时候会自动解锁unlock,阻塞等待信号 cv.wait(slock); //获取等待信号之后会自动重新上锁lock, while (!msg.empty()) { cout << i << " read " << msg.front() << endl; msg.pop_front(); } } } int main() { thread th1(writeThread); th1.detach(); for (int i = 0; i < 3; ++i) { thread the(readThread, i + 1); the.detach(); } getchar(); return 0; } -
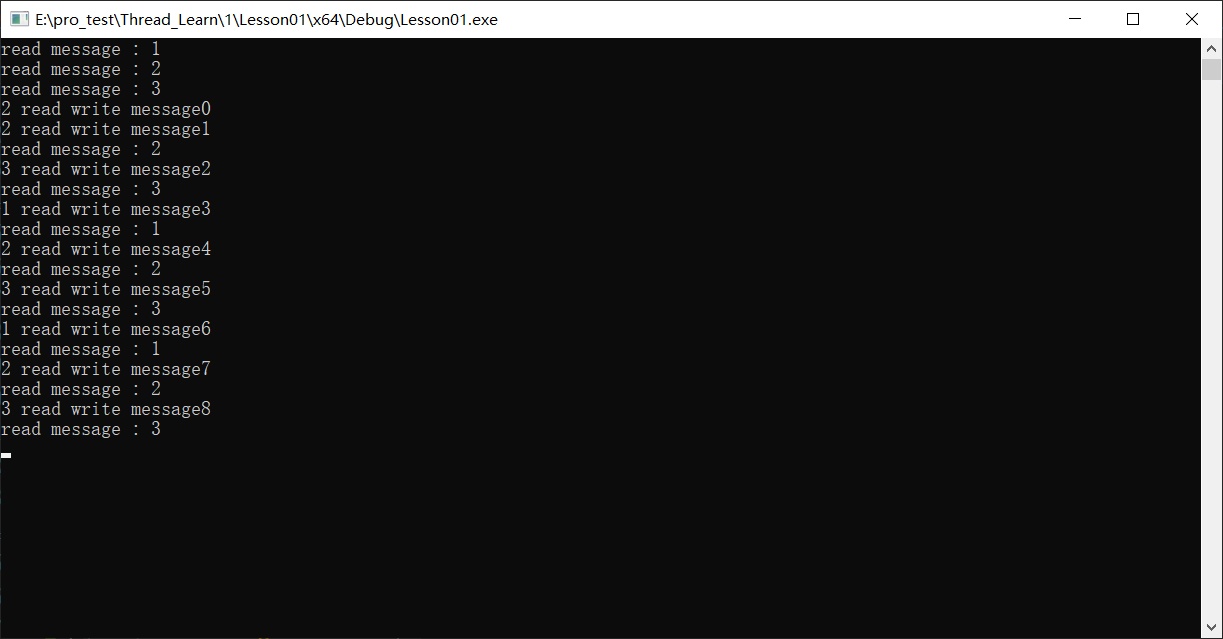
-
注意,其实消费者线程的条件变量的wait函数可以添加lambda函数表达式,若条件返回true的话不会进入wait阻塞。返回false的话会阻塞等待下一次通知的信号。
-
1 2 3 4while(condition) cv.wait(lock); cv.wait(lock,[](){return !condition;}) //两者效果一致 //含义是,但condition这个条件成立的时候,线程进入等待状态,等待操作系统唤醒。
3.8 使用条件变量改写3.6的多线程程序
-
派生类中添加条件变量
-
1 2 3 4 5 6 7 8 9 10 11 12 13 14 15 16 17 18 19 20 21 22#pragma once #include <mutex> #include "xthread.h" class XMsgServer : public XThread { public: //给当前线程发消息 void SendMsg(std::string msg); private: //处理消息的线程入口函数 void Main() override; //消息队列缓冲 std::list<std::string> msgList; //互斥访问消息队列 std::mutex mux_; //条件变量 std::condition_variable m_cv; }; -
派生类的线程处理函数用条件变量进行修改
-
1 2 3 4 5 6 7 8 9 10 11 12 13 14 15 16 17 18 19 20 21 22 23 24 25 26 27 28 29 30 31 32 33 34 35 36 37 38 39 40#include "xmsgserver.h" #include <iostream> #include <string> using namespace std; //处理消息的线程入口函数 void XMsgServer::Main() { while (!IsExit()) { //用条件变量替代时延 //this_thread::sleep_for(10ms);//处理消息的最大时延 unique_lock<mutex> lock(mux_); m_cv.wait(lock, [this]() { return !msgList.empty(); }); //if (msgList.empty()) { // cout << "msg is empty !" << endl; // continue; //} //处理所有消息,实际应该是弹一条消息解锁,处理完后再上锁 while (!msgList.empty()) { //消息处理业务逻辑 cout << this_thread::get_id() << endl; cout << "receive msg : " << msgList.front() << endl; msgList.pop_front(); } } } //给当前线程发送消息 void XMsgServer::SendMsg(std::string msg) { unique_lock<mutex> lock(mux_); cout << this_thread::get_id() << endl; cout << "send ok !" << endl; msgList.push_back(msg); //通知子线程处理消息 lock.unlock(); m_cv.notify_one(); } -
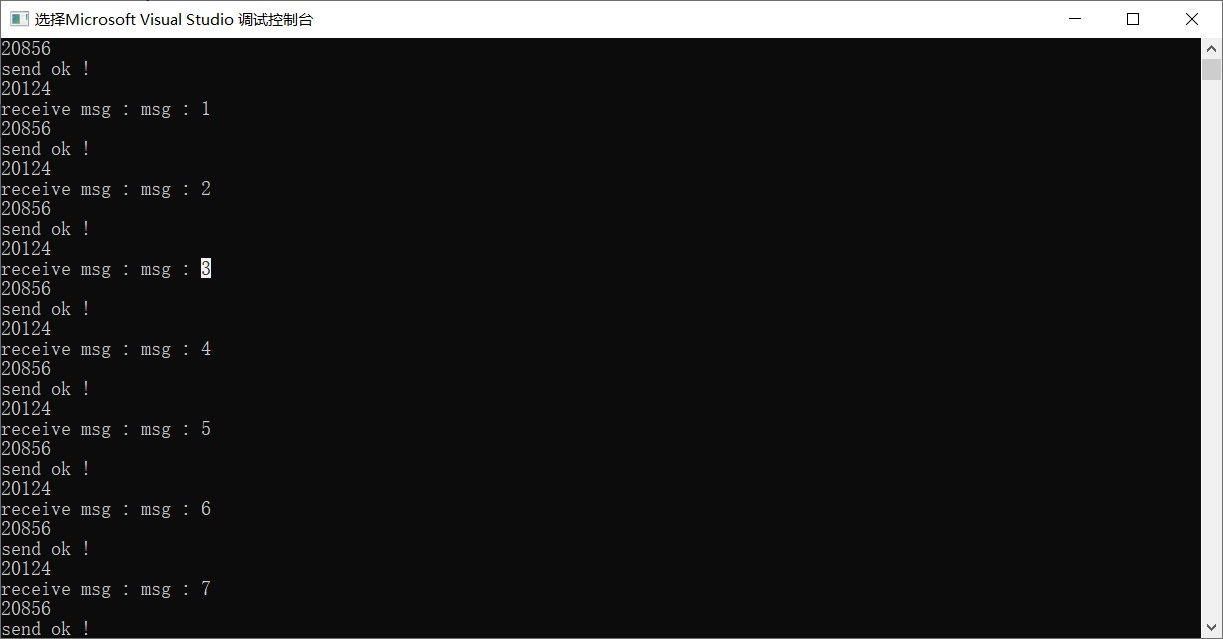
-
效果是实现了按时发送和接收处理,但是带来了一个新的问题,子线程接收完毕后没有退出,因为在wait里面阻塞住了,需要重写Stop函数以及在lambda函数里面增加一个判断。
-
最终修改后的完整代码为
-
基类定义
-
1 2 3 4 5 6 7 8 9 10 11 12 13 14 15 16 17 18 19 20 21 22 23//.h #pragma once #include <thread> class XThread { public: // 启动线程 virtual void Start(); // 设置线程退出标志 virtual void Stop(); // 等待线程退出,阻塞 virtual void Wait(); // 判断线程释放退出 bool IsExit(); protected: bool is_exit = false; private: //线程入口函数 virtual void Main() = 0; std::thread m_th; }; -
1 2 3 4 5 6 7 8 9 10 11 12 13 14 15 16 17 18 19 20 21 22 23 24#include "xthread.h" using namespace std; // 启动线程 void XThread::Start() { is_exit = false; m_th = thread(&XThread::Main, this); } // 设置线程退出标志 void XThread::Stop() { is_exit = true; Wait(); } // 等待线程退出,阻塞 void XThread::Wait() { if (m_th.joinable()) { m_th.join(); } } // 判断线程释放退出 bool XThread::IsExit() { return is_exit; } -
派生类定义
-
1 2 3 4 5 6 7 8 9 10 11 12 13 14 15 16 17 18 19 20 21 22 23 24 25#pragma once #include <mutex> #include "xthread.h" class XMsgServer : public XThread { public: //给当前线程发消息 void SendMsg(std::string msg); void Stop() override; private: //处理消息的线程入口函数 void Main() override; //消息队列缓冲 std::list<std::string> msgList; //互斥访问消息队列 std::mutex mux_; //条件变量 std::condition_variable m_cv; }; -
1 2 3 4 5 6 7 8 9 10 11 12 13 14 15 16 17 18 19 20 21 22 23 24 25 26 27 28 29 30 31 32 33 34 35 36 37 38 39 40 41 42 43 44 45 46 47 48 49 50 51 52 53 54#include "xmsgserver.h" #include <iostream> #include <string> using namespace std; void XMsgServer::Stop() { is_exit = true; //通知所有阻塞的子线程 m_cv.notify_all(); Wait(); } //处理消息的线程入口函数 void XMsgServer::Main() { while (!IsExit()) { //用条件变量替代时延 //this_thread::sleep_for(10ms);//处理消息的最大时延 unique_lock<mutex> lock(mux_); m_cv.wait(lock, [this]() { //判断线程退出了,就不阻塞 if (IsExit()) { return true; } return !msgList.empty(); }); //if (msgList.empty()) { // cout << "msg is empty !" << endl; // continue; //} //处理所有消息,实际应该是弹一条消息解锁,处理完后再上锁 while (!msgList.empty()) { //消息处理业务逻辑 cout << this_thread::get_id() << endl; cout << "receive msg : " << msgList.front() << endl; msgList.pop_front(); } } } //给当前线程发送消息 void XMsgServer::SendMsg(std::string msg) { unique_lock<mutex> lock(mux_); cout << this_thread::get_id() << endl; cout << "send ok !" << endl; msgList.push_back(msg); //通知子线程处理消息 lock.unlock(); m_cv.notify_one(); } -
主函数定义
-
1 2 3 4 5 6 7 8 9 10 11 12 13 14 15 16 17 18#include "xmsgserver.h" #include <sstream> #include <iostream> using namespace std; int main() { XMsgServer server; server.Start(); for (int i = 0; i < 10; ++i) { stringstream ss; ss << "msg : " << i + 1; server.SendMsg(ss.str()); this_thread::sleep_for(500ms); } server.Stop(); cout << "server Stop" << endl; return 0; } -
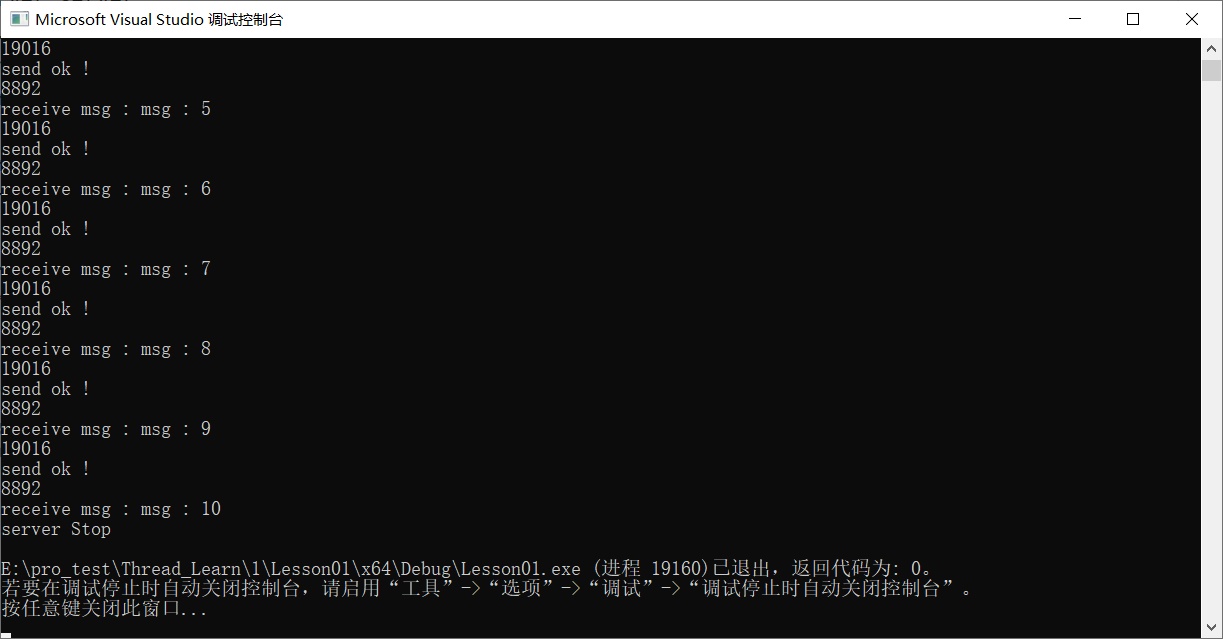
4. 多线程异步通信和并发计算
-
线程中的同步和异步的区别
一、同步 所谓同步,就是发出一个功能调用时,在没有得到结果之前,该调用就不返回或继续执行后续操作。是多个线程同时访问同一资源,等待资源访问结束,浪费时间,效率不高。
二、异步 当一个异步过程调用发出后,调用者在没有得到结果之前,就可以继续执行后续操作。当这个调用完成后,一般通过状态、通知和回调来通知调用者。问资源时,如果有空闲时间,则可在空闲等待同时访问其他资源,实现多线程机制。
三、同步和异步的区别 一个进程启动的多个不相干进程,他们之间的相互关系为异步;同步必须执行到底后才能执行其他操作,异步可同时执行。 多个线程在执行的过程中是不是使用同一把锁。如果是,就是同步;否则就是异步。
4.1 promise 和 future 异步传值
-
promise 用于异步传输变量
- std::promise 提供存储异步通信的值,再通过其对象创建的std::future异步获得结果。
- std::promise 只能使用一次。 void set_value(_Ty&& _Val) 设置传递值,只能掉用一次
-
std::future 提供访问异步操作结果的机制
- get() 阻塞等待promise set_value 的值
-
只有当promise使用了set_value之后,future才不会被阻塞,会被立即输出,所以异步。该阻塞不受子线程是否退出的影响。
-
注意因为promise只能用一次,因此子线程异步通信需要使用move移动语义。
-
1 2 3 4 5 6 7 8 9 10 11 12 13 14 15 16 17 18 19 20 21 22 23 24 25 26 27 28 29 30 31#include<thread> #include <iostream> #include <future> #include <string> using namespace std; void testFuture(promise<string> p) { cout << "begin test" << endl; this_thread::sleep_for(3s); cout << "set value" << endl; this_thread::sleep_for(1s); p.set_value("check future"); this_thread::sleep_for(3s); cout << "end test" << endl; } int main(int argc, char * argv[]) { //异步传输变量储存 promise<string> p1; //用来获取子线程的异步值 auto future1 = p1.get_future(); auto th = thread(testFuture, move(p1)); cout << "begin future.get" << endl; cout << "get asyc value =" << future1.get() << endl; cout << "end future.get" << endl; th.join(); return 0; } -
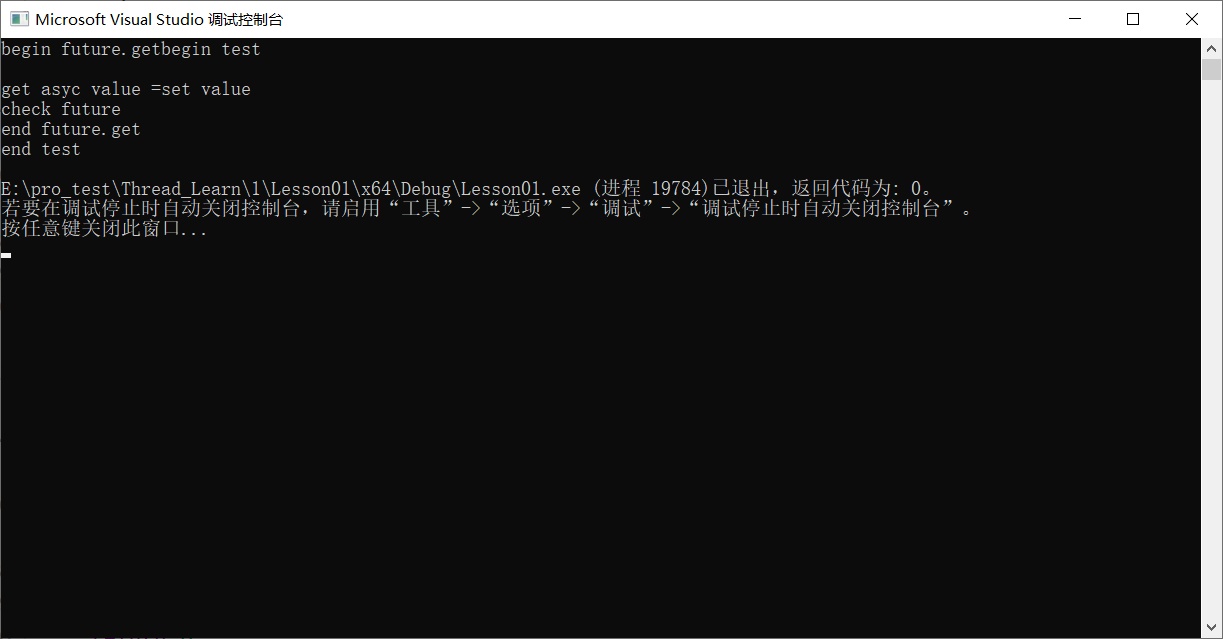
4.2 packaged_task 异步调用函数打包
-
packaged_task类模板也是定义于future头文件中,它包装任何可调用 (Callable) 目标,包括函数、 lambda 表达式、 bind 表达式或其他函数对象,使得能异步调用它,其返回值或所抛异常被存储于能通过 std::future 对象访问的共享状态中。简言之,将一个普通的可调用函数对象转换为异步执行的任务。
-
packaged_task<函数指针> 变量名称(函数名) -
函数指针的表示——
返回值(参数类型) -
1 2 3 4 5 6string TestPackagedTask(int index) { cout << "begin TestPackagedTask " << index << endl; return "TestPackagedTask return"; } std::packaged_task<string(int)> task(TestPackagedTask); -
1 2 3 4 5 6 7 8 9 10 11 12 13 14 15 16 17 18 19 20 21 22 23 24 25 26 27 28 29 30 31 32 33 34 35 36 37 38 39 40 41 42 43 44 45 46 47 48 49 50 51 52 53 54 55 56 57 58#include <iostream> // std::cout #include <thread> // std::thread #include <chrono> #include <future> using namespace std; //普通函数 int Add(int x, int y) { cout << "begin package" << endl; this_thread::sleep_for(3s); cout << "end package" << endl; return x + y; } void task_lambda() { //包装可调用目标时lambda packaged_task<int(int, int)> task([](int a, int b) { return a + b; }); //仿函数形式,启动任务 task(2, 10); //获取共享状态中的值,直到ready才能返回结果或者异常 future<int> result = task.get_future(); cout << "task_lambda :" << result.get() << "\n"; } void task_thread() { //包装普通函数 std::packaged_task<int(int, int)> task(Add); future<int> result = task.get_future(); //启动任务,非异步 task(4, 8); cout << "task_thread_no_async :" << result.get() << "\n"; //重置共享状态 task.reset(); result = task.get_future(); //通过线程启动任务,异步启动 thread td(move(task), 2, 10); cout << "begin task_thread_async " << endl; //只要打包函数一返回值,就可以输出,否则阻塞 cout << "task_thread_async :" << result.get() << "\n"; cout << "end task_thread_async " << endl; td.join(); } int main(int argc, char *argv[]) { task_lambda(); task_thread(); return 0; } -
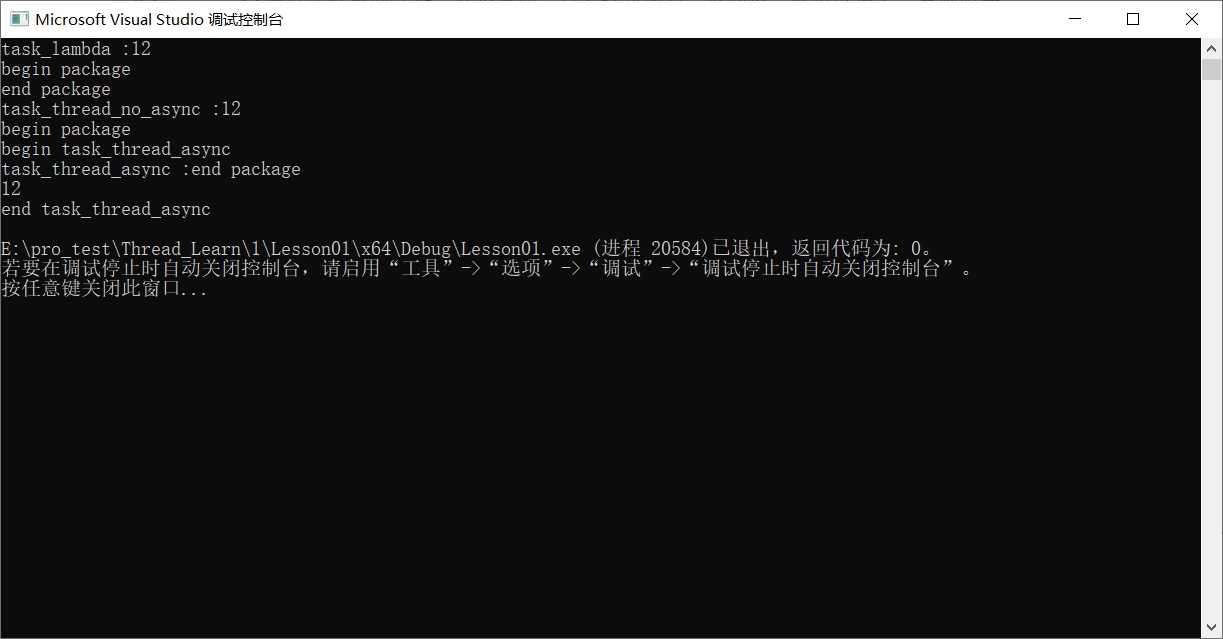
-
与promise类似,如果没有打包函数没有返回值,会一直阻塞在
get_result那里。注意当该packaged函数发送给多线程的时候,需要使用移动语义。
4.3 async 创建异步线程
-
std::async 是一个函数模板,用来启动一个异步任务。相对于 thread ,std::future 是更高级的抽象,异步返回结果保存在 std::future 中,使用者可以不必进行线程细节的管理。
-
std::async 有两种启动策略:
- ①.std::launch::async:函数必须以异步方式运行,即创建新的线程。这是默认策略。
- ②.std::launch::deferred:函数只有在 std:async 所返回的期值的 get 或 wait 得到调用时才执行、并且调用方会阻塞至运行结束,否则不执行。
- 若没有指定策略,则会执行默认策略,将会由操作系统决定是否启动新的线程。
-
re.get() 获取结果,会阻塞等待返回结果。
-
1 2 3 4 5 6 7 8 9 10 11 12 13 14 15 16 17 18 19 20 21 22 23 24 25 26 27 28 29 30 31 32 33 34 35 36 37 38#include <thread> #include <iostream> #include <future> #include <string> using namespace std; string TestAsync(int index) { cout << index << " begin in TestAsync " << this_thread::get_id() << endl; this_thread::sleep_for(2s); return "TestAsync string return"; } int main(int argc, char* argv[]) { //创建异步线程 cout << "main thread id " << this_thread::get_id() << endl; //不创建线程启动异步任务 auto future = async(launch::deferred, TestAsync, 100); this_thread::sleep_for(100ms); cout << "begin future get " << endl; cout << "future.get() = " << future.get() << endl; cout << "end future get" << endl; //创建异步线程 cout << "=====创建异步线程====" << endl; auto future2 = async(TestAsync, 101); //用来区分是进入子线程会不会阻塞等待放回结果 this_thread::sleep_for(100ms); cout << "begin future2 get " << endl; //get会阻塞等待返回结果 cout << "future2.get() = " << future2.get() << endl; cout << "end future2 get" << endl; getchar(); return 0; } -
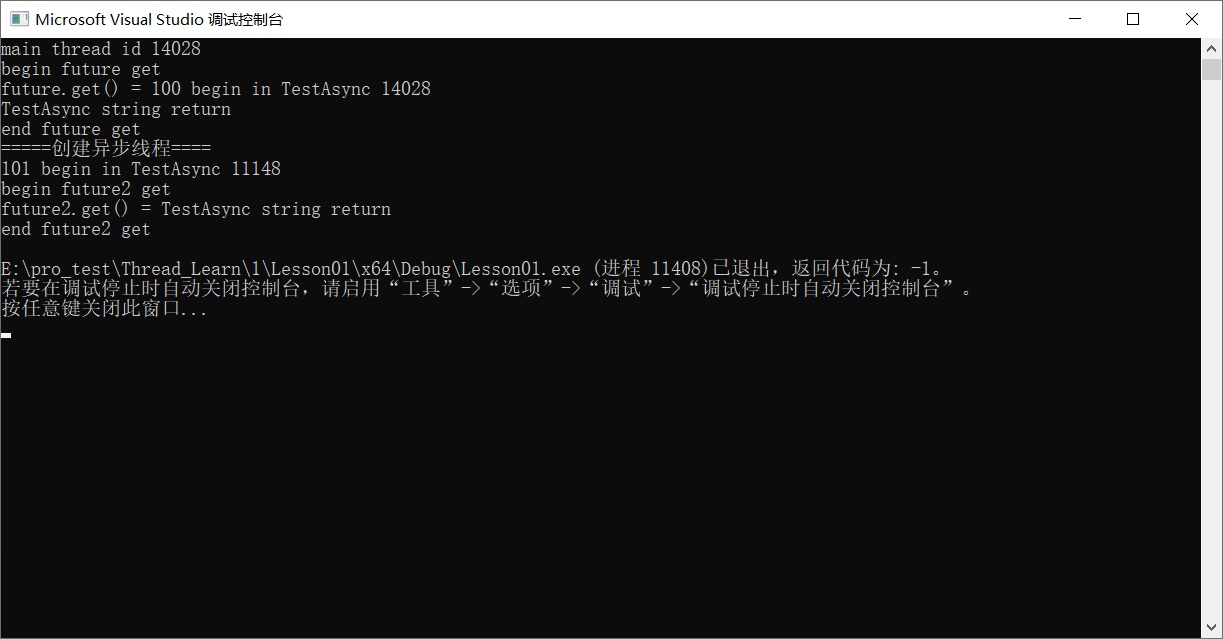
4.4 c++11 单核/多核计算分析并实现base16编码
-
要求:将二进制转为16进制字符串
-
二进制转换为字符串
-
一个字节8位 拆分为两个4位字节(最大值16)
-
拆分后的字节映射到 0123456789abcdef
-
1 2 3 4 5 6 7 8 9 10 11 12 13 14 15 16 17 18 19 20 21 22 23 24 25 26 27 28 29 30 31 32 33 34 35 36 37 38 39 40 41 42 43 44 45 46 47 48 49 50 51 52 53 54 55 56 57 58 59 60 61 62 63 64 65 66 67 68 69 70 71 72 73 74 75 76 77 78 79 80 81 82 83 84 85 86 87 88 89 90 91 92 93 94 95 96 97 98 99 100 101 102 103 104 105 106 107 108 109#include <thread> #include <iostream> #include <string> #include <vector> #include <chrono> using namespace std; using namespace chrono; static const char base16[] = "0123456789abcdef"; void Base16Encode(const unsigned char* data, int size, unsigned char* out) { for (int i = 0; i < size; i++) { unsigned char d = data[i]; // 0000 0000 // 1234 5678 >>4 0000 1234 // 1234 5678 & 0000 1111 0000 5678 char a = base16[d >> 4]; char b = base16[d & 0x0F]; out[i * 2] = a; out[i * 2 + 1] = b; } } //C++11 多核base16编码 void Base16EncodeThread(const vector<unsigned char>&data, vector<unsigned char>&out) { int size = data.size(); int th_count = thread::hardware_concurrency(); //系统支持的线程核心数 //切片数据 int slice_count = size / th_count; //余数丢弃 if (size < th_count) //只切一片,全部分给单核心,因为数据很少 { th_count = 1; slice_count = size; } //准备好线程 vector<thread> ths; ths.resize(th_count); //任务分配到各个线程 for (int i = 0; i < th_count; i++) { //1234 5678 9abc defg hi int offset = i * slice_count;//偏移位置 int count = slice_count;//切片大小,只有最后一片大小不一样 //最后一个线程 if (th_count > 1 && i == th_count - 1) { count = slice_count + size % th_count; } //cout << offset << ":" << count << endl; ths[i] = thread(Base16Encode, data.data() + offset, count, out.data()); } //等待所有线程处理结束 for (auto& th : ths) { th.join(); } } int main(int argc, char* argv[]) { string test_data = "测试base16编码"; unsigned char out[1024] = { 0 }; Base16Encode((unsigned char*)test_data.data(), test_data.size(), out); cout << "base16:" << out << endl; //初始化测试数据 vector<unsigned char> in_data; in_data.resize(1024 * 1024 * 20); //20M //in_data.data(); for (int i = 0; i < in_data.size(); i++) { //最大是255,所以取一个模 in_data[i] = i % 256; } vector<unsigned char > out_data; out_data.resize(in_data.size() * 2); //测试单线程base16编码效率 { cout << "单线程base16开始计算" << endl; auto start = system_clock::now(); Base16Encode(in_data.data(), in_data.size(), out_data.data()); auto end = system_clock::now(); auto duration = duration_cast<milliseconds>(end - start); cout << "编码:" << in_data.size() << "字节数据花费" << double(duration.count()) << "毫秒" << endl; //cout << out_data.data() << endl; } cout << "================================" << endl; //测试c++11 多线程Base16编码 { cout << "c++11 多线程Base16编码 开始计算" << endl; auto start = system_clock::now(); Base16EncodeThread(in_data, out_data); auto end = system_clock::now(); auto duration = duration_cast<milliseconds>(end - start); cout << "编码:" << in_data.size() << "字节数据花费" << double(duration.count()) << "毫秒" << endl; //cout << out_data.data() << endl; } getchar(); return 0; } -
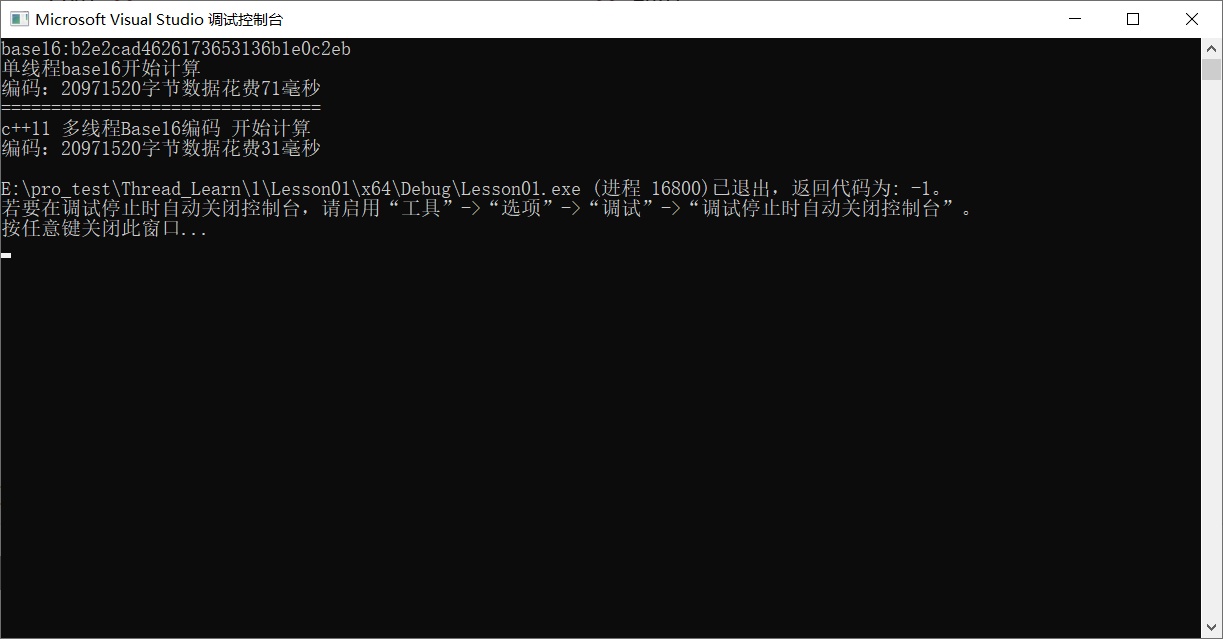
4.5 c++17 for_each实现多核并行计算base16编码
-
for_each源码
-
1 2 3 4 5template<typename InputIterator, typename Function> Function for_each(InputIterator beg, InputIterator end, Function f) { while(beg != end) f(*beg++); } -
1 2 3 4 5 6 7 8 9 10 11 12 13 14 15 16 17 18 19 20 21 22 23 24 25 26 27 28 29 30 31 32 33 34 35 36 37 38 39 40 41 42 43 44 45 46 47 48 49 50 51 52 53 54 55 56 57 58 59 60 61 62 63 64 65 66 67 68 69 70 71 72 73 74 75 76 77 78 79 80 81 82 83 84 85 86 87 88 89 90 91 92 93 94 95 96 97 98 99 100 101 102 103 104 105 106 107 108 109 110 111 112 113 114 115 116 117 118 119 120 121 122 123 124 125 126 127 128 129 130 131 132 133 134 135 136 137 138#include <thread> #include <iostream> #include <string> #include <vector> #include <chrono> #include <execution> using namespace std; using namespace chrono; static const char base16[] = "0123456789abcdef"; void Base16Encode(const unsigned char* data, int size, unsigned char* out) { for (int i = 0; i < size; i++) { unsigned char d = data[i]; // 0000 0000 // 1234 5678 >>4 0000 1234 // 1234 5678 & 0000 1111 0000 5678 char a = base16[d >> 4]; char b = base16[d & 0x0F]; out[i * 2] = a; out[i * 2 + 1] = b; } } //C++11 多核base16编码 void Base16EncodeThread(const vector<unsigned char>&data, vector<unsigned char>&out) { int size = data.size(); int th_count = thread::hardware_concurrency(); //系统支持的线程核心数 //切片数据 int slice_count = size / th_count; //余数丢弃 if (size < th_count) //只切一片,全部分给单核心,因为数据很少 { th_count = 1; slice_count = size; } //准备好线程 vector<thread> ths; ths.resize(th_count); //任务分配到各个线程 for (int i = 0; i < th_count; i++) { //1234 5678 9abc defg hi int offset = i * slice_count;//偏移位置 int count = slice_count;//切片大小,只有最后一片大小不一样 //最后一个线程 if (th_count > 1 && i == th_count - 1) { count = slice_count + size % th_count; } //cout << offset << ":" << count << endl; ths[i] = thread(Base16Encode, data.data() + offset, count, out.data()); } //等待所有线程处理结束 for (auto& th : ths) { th.join(); } } int main(int argc, char* argv[]) { string test_data = "测试base16编码"; unsigned char out[1024] = { 0 }; Base16Encode((unsigned char*)test_data.data(), test_data.size(), out); cout << "base16:" << out << endl; //初始化测试数据 vector<unsigned char> in_data; in_data.resize(1024 * 1024 * 20); //20M //in_data.data(); for (int i = 0; i < in_data.size(); i++) { //最大是255,所以取一个模 in_data[i] = i % 256; } vector<unsigned char > out_data; out_data.resize(in_data.size() * 2); //测试单线程base16编码效率 { cout << "单线程base16开始计算" << endl; auto start = system_clock::now(); Base16Encode(in_data.data(), in_data.size(), out_data.data()); auto end = system_clock::now(); auto duration = duration_cast<milliseconds>(end - start); cout << "编码:" << in_data.size() << "字节数据花费" << double(duration.count()) << "毫秒" << endl; //cout << out_data.data() << endl; } cout << "================================" << endl; //测试c++11 多线程Base16编码 { cout << "c++11 多线程Base16编码 开始计算" << endl; auto start = system_clock::now(); Base16EncodeThread(in_data, out_data); auto end = system_clock::now(); auto duration = duration_cast<milliseconds>(end - start); cout << "编码:" << in_data.size() << "字节数据花费" << double(duration.count()) << "毫秒" << endl; //cout << out_data.data() << endl; } //测试C++17 多线程base16编码,需要添加#include <execution> 头文件 { cout << "C++17 多线程base16编码 开始计算" << endl; auto start = system_clock::now(); unsigned char* idata = in_data.data();//起始地址,减少读取次数,优化性能 unsigned char* odata = out_data.data();//输出地址,减少读取次数 //#include <execution> c++17 ,for_each默认是单核的 std::for_each(std::execution::par, //并行计算 多核,每一个数据都出入栈带来开销。所以时间变长 in_data.begin(), in_data.end(), [&](auto& d) //多线程进入此函数 { char a = base16[(d >> 4)]; char b = base16[(d & 0x0F)]; int index = &d - idata;//位置 //cout << index << endl; odata[index * 2] = a; odata[index * 2 + 1] = b; } ); auto end = system_clock::now(); auto duration = duration_cast<milliseconds>(end - start); cout << "编码:" << in_data.size() << "字节数据花费" << double(duration.count()) << "毫秒" << endl; } getchar(); return 0; } -
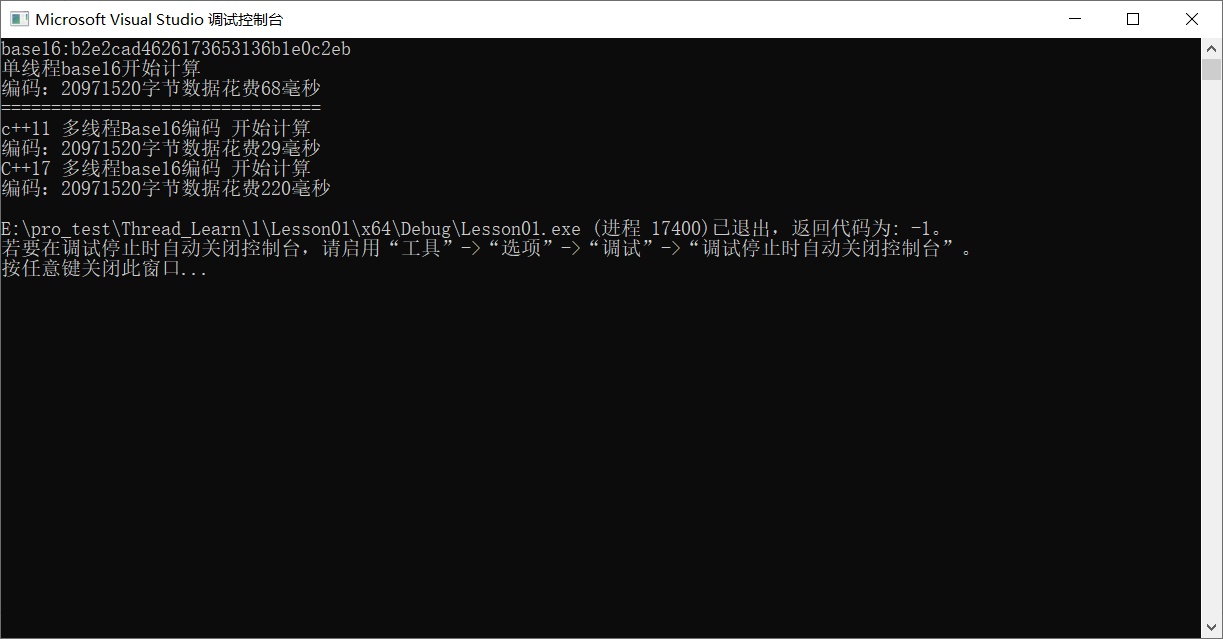
5. C++ 11 14 17 线程池实现
5.1 实现的五大步骤
-
1. 初始化线程池
-
确定线程数量,并做好互斥访问。
-
2. 启动所有线程
-
1 2 3 4 5 6 7 8std::vector<std::thread*> threads_; unique_lock<mutex> lock(mutex_); for (int i = 0; i < thread_num_; i++) { auto th = new thread(&XThreadPool::Run, this); threads_.push_back(th); } -
3. 准备好任务处理基类和插入任务
-
1 2 3 4 5 6 7/// 线程分配的任务类 class XTask { public: // 执 行 具 体 的 任 务 virtual int Run() = 0; }; -
存储任务的列表
-
1std::list<XTask*> tasks_; -
插入任务,通知线程池处理
-
1 2 3unique_lock<mutex> lock(mutex_); tasks_.push_back(task); condition_.notify_one(); -
4. 获取任务接口
-
通过条件变量阻塞等待任务
-
1 2 3 4 5 6 7 8 9 10 11 12 13 14 15 16 17 18/// 获取任务 XTaskType XThreadPool::GetTask() { unique_lock<mutex> lock(mutex_); if (tasks_.empty()) { condition_.wait(lock);// 阻塞 等待通知 } if (is_exit_) return nullptr; if (tasks_.empty()) { return nullptr; } auto task = tasks_.front(); tasks_.pop_front(); return task; } -
5. 执行任务线程入口函数
-
1 2 3 4 5 6 7 8 9 10 11 12 13 14 15 16 17 18void XThreadPool::Run() { while (!IsExit()) { // 获取任务 auto task = GetTask(); if (!task) continue; try { task-> Run(); } catch (...) { cerr << "XThreadPool::Run() exception" << endl; } } }
5.2 一个最简单的线程池实现
-
线程池设定为一个类。
-
任务设置为一个抽象类。
-
任务设置纯虚函数,必须继承重新run函数。
-
使用原子操作维护正在运行的线程数量。
-
线程池头文件
-
1 2 3 4 5 6 7 8 9 10 11 12 13 14 15 16 17 18 19 20 21 22 23 24 25 26 27 28 29 30 31 32 33 34 35 36 37 38 39 40 41 42 43 44 45 46 47 48 49 50 51#pragma once #include <thread> #include <mutex> #include <vector> #include <list> #include <functional> #include <atomic> class XTask { public: virtual int Run() = 0; std::function<bool()> is_exit = nullptr;//尚未使用,但是可以后期有改进的部分 }; class XThreadPool { public: ////////////////////////////////////////////// /// 初始化线程池 /// @para num 线程数量 void Init(int num); ////////////////////////////////////////////// /// 启动所有线程,必须先调用Init void Start(); ////////////////////////////////////////////// /// 线程池退出 void Stop(); void AddTask(XTask* task); XTask* GetTask(); //线程池是否退出 bool is_exit() { return is_exit_; } int task_run_count() { return task_run_count_; } private: //线程池线程的入口函数 void Run(); int thread_num_ = 0;//线程数量 std::mutex mux_; std::vector<std::thread*> threads_; std::list<XTask*> tasks_; std::condition_variable cv_; bool is_exit_ = false; //线程池退出 //正在运行的任务数量,线程安全 std::atomic<int> task_run_count_ = { 0 }; }; -
线程池cpp文件
-
1 2 3 4 5 6 7 8 9 10 11 12 13 14 15 16 17 18 19 20 21 22 23 24 25 26 27 28 29 30 31 32 33 34 35 36 37 38 39 40 41 42 43 44 45 46 47 48 49 50 51 52 53 54 55 56 57 58 59 60 61 62 63 64 65 66 67 68 69 70 71 72 73 74 75 76 77 78 79 80 81 82 83 84 85 86 87 88 89 90 91 92 93 94 95 96 97 98 99#include "xthread_pool.h" #include <iostream> using namespace std; ////////////////////////////////////////////// /// 初始化线程池 /// @para num 线程数量 void XThreadPool::Init(int num) { unique_lock<mutex> lock(mux_); this->thread_num_ = num; cout << "Thread pool Init " << num << endl; } ////////////////////////////////////////////// /// 启动所有线程,必须先调用Init void XThreadPool::Start() { unique_lock<mutex> lock(mux_); if (thread_num_ <= 0) { cerr << "Please Init XThreadPool" << endl; return; } if (!threads_.empty()) { cerr << "Thread pool has start!" << endl; return; } //启动线程 for (int i = 0; i < thread_num_; i++) { auto th = new thread(&XThreadPool::Run, this); threads_.push_back(th); } } ////////////////////////////////////////////// /// 线程池退出 void XThreadPool::Stop() { is_exit_ = true; cv_.notify_all(); for (auto& th : threads_) { th->join(); } unique_lock<mutex> lock(mux_); threads_.clear(); } //线程池线程的入口函数 void XThreadPool::Run() { cout << "begin XThreadPool Run " << this_thread::get_id() << endl; while (!is_exit()) { auto task = GetTask(); if (!task)continue; ++task_run_count_;//正在运行的线程数量 try { task->Run();//跑任务需求 } catch (...) { } --task_run_count_; } cout << "end XThreadPool Run " << this_thread::get_id() << endl; } void XThreadPool::AddTask(XTask* task) { unique_lock<mutex> lock(mux_); tasks_.push_back(task); //返回函数指针,共用一个函数。一个类调用另外一个类的成员函数 task->is_exit = [this] {return is_exit(); }; lock.unlock(); cv_.notify_one(); } XTask* XThreadPool::GetTask() { unique_lock<mutex> lock(mux_); if (tasks_.empty()) { cv_.wait(lock); } if (is_exit()) return nullptr; if (tasks_.empty()) return nullptr; auto task = tasks_.front(); tasks_.pop_front(); return task; } -
主函数,添加任务
-
1 2 3 4 5 6 7 8 9 10 11 12 13 14 15 16 17 18 19 20 21 22 23 24 25 26 27 28 29 30 31 32 33 34 35 36 37 38 39 40 41 42 43 44 45 46 47#include "xthread_pool.h" #include <iostream> #include <string> using namespace std; class MyTask :public XTask { public: int Run() { cout << "================================================" << endl; cout << this_thread::get_id() << " Mytask " << name << endl; cout << "================================================" << endl; for (int i = 0; i < 10; i++) { if (is_exit())break; cout << "." << flush; this_thread::sleep_for(500ms); } return 0; } std::string name = ""; }; int main(int argc, char* argv[]) { XThreadPool pool; pool.Init(16); pool.Start(); MyTask task1; task1.name = "test name 001"; pool.AddTask(&task1); MyTask task2; task2.name = "test name 002"; pool.AddTask(&task2); this_thread::sleep_for(100ms); cout << "task run count = " << pool.task_run_count() << endl; this_thread::sleep_for(10s); pool.Stop(); cout << "task run count = " << pool.task_run_count() << endl; getchar(); return 0; } -
5.3 使用智能指针维护任务类以及线程指针的生命周期
-
在5.2里面,任务的生命周期一定要比线程的执行时间长;同时线程的生命周期如何维护,如何收回,也是一个问题。
-
使用智能指针。
shared_ptr -
线程池头文件
-
1 2 3 4 5 6 7 8 9 10 11 12 13 14 15 16 17 18 19 20 21 22 23 24 25 26 27 28 29 30 31 32 33 34 35 36 37 38 39 40 41 42 43 44 45 46 47 48 49 50 51 52 53 54 55 56 57 58#pragma once #include <thread> #include <mutex> #include <vector> #include <list> #include <functional> #include <atomic> class XTask { public: virtual int Run() = 0; std::function<bool()> is_exit = nullptr;//尚未使用,但是可以后期有改进的部分 }; class XThreadPool { public: ////////////////////////////////////////////// /// 初始化线程池 /// @para num 线程数量 void Init(int num); ////////////////////////////////////////////// /// 启动所有线程,必须先调用Init void Start(); ////////////////////////////////////////////// /// 线程池退出 void Stop(); //void AddTask(XTask* task); void AddTask(std::shared_ptr<XTask> task); //XTask* GetTask(); std::shared_ptr<XTask> GetTask(); //线程池是否退出 bool is_exit() { return is_exit_; } int task_run_count() { return task_run_count_; } private: //线程池线程的入口函数 void Run(); int thread_num_ = 0;//线程数量 std::mutex mux_; //std::vector<std::thread*> threads_; //使用智能指针管理线程以及任务的生命周期 std::vector<std::shared_ptr<std::thread>> threads_; //std::list<XTask*> tasks_; std::list<std::shared_ptr<XTask>> tasks_; std::condition_variable cv_; bool is_exit_ = false; //线程池退出 //正在运行的任务数量,线程安全 std::atomic<int> task_run_count_ = { 0 }; }; -
线程池源文件
-
1 2 3 4 5 6 7 8 9 10 11 12 13 14 15 16 17 18 19 20 21 22 23 24 25 26 27 28 29 30 31 32 33 34 35 36 37 38 39 40 41 42 43 44 45 46 47 48 49 50 51 52 53 54 55 56 57 58 59 60 61 62 63 64 65 66 67 68 69 70 71 72 73 74 75 76 77 78 79 80 81 82 83 84 85 86 87 88 89 90 91 92 93 94 95 96 97 98 99 100 101 102 103#include "xthread_pool.h" #include <iostream> #include <memory> using namespace std; ////////////////////////////////////////////// /// 初始化线程池 /// @para num 线程数量 void XThreadPool::Init(int num) { unique_lock<mutex> lock(mux_); this->thread_num_ = num; cout << "Thread pool Init " << num << endl; } ////////////////////////////////////////////// /// 启动所有线程,必须先调用Init void XThreadPool::Start() { unique_lock<mutex> lock(mux_); if (thread_num_ <= 0) { cerr << "Please Init XThreadPool" << endl; return; } if (!threads_.empty()) { cerr << "Thread pool has start!" << endl; return; } //启动线程 for (int i = 0; i < thread_num_; i++) { /*auto th = new thread(&XThreadPool::Run, this); threads_.push_back(th);*/ //使用智能指针 auto th = make_shared<thread>(&XThreadPool::Run, this); threads_.push_back(th); } } ////////////////////////////////////////////// /// 线程池退出 void XThreadPool::Stop() { is_exit_ = true; cv_.notify_all(); for (auto& th : threads_) { th->join(); } unique_lock<mutex> lock(mux_); threads_.clear(); } //线程池线程的入口函数 void XThreadPool::Run() { cout << "begin XThreadPool Run " << this_thread::get_id() << endl; while (!is_exit()) { auto task = GetTask(); if (!task)continue; ++task_run_count_;//正在运行的线程数量 try { task->Run();//跑任务需求 } catch (...) { } --task_run_count_; } cout << "end XThreadPool Run " << this_thread::get_id() << endl; } void XThreadPool::AddTask(std::shared_ptr<XTask> task) { unique_lock<mutex> lock(mux_); tasks_.push_back(task); //返回函数指针,共用一个函数。一个类调用另外一个类的成员函数 task->is_exit = [this] {return is_exit(); }; lock.unlock(); cv_.notify_one(); } std::shared_ptr<XTask> XThreadPool::GetTask() { unique_lock<mutex> lock(mux_); if (tasks_.empty()) { cv_.wait(lock); } if (is_exit()) return nullptr; if (tasks_.empty()) return nullptr; auto task = tasks_.front(); tasks_.pop_front(); return task; } -
主函数
-
1 2 3 4 5 6 7 8 9 10 11 12 13 14 15 16 17 18 19 20 21 22 23 24 25 26 27 28 29 30 31 32 33 34 35 36 37 38 39 40 41 42 43 44 45 46 47 48 49 50 51 52 53 54 55 56#include "xthread_pool.h" #include <iostream> #include <string> using namespace std; class MyTask :public XTask { public: int Run() { cout << "================================================" << endl; cout << this_thread::get_id() << " Mytask " << name << endl; cout << "================================================" << endl; for (int i = 0; i < 10; i++) { if (is_exit())break; cout << "." << flush; this_thread::sleep_for(500ms); } return 0; } std::string name = ""; }; int main(int argc, char* argv[]) { XThreadPool pool; pool.Init(16); pool.Start(); //MyTask task1; //task1.name = "test name 001"; //pool.AddTask(&task1); //MyTask task2; //task2.name = "test name 002"; //pool.AddTask(&task2); auto task3 = make_shared<MyTask>(); task3->name = "Test name 003"; pool.AddTask(task3); auto task4 = make_shared<MyTask>(); task4->name = "Test name 004"; pool.AddTask(task4); this_thread::sleep_for(100ms); cout << "task run count = " << pool.task_run_count() << endl; this_thread::sleep_for(10s); pool.Stop(); cout << "task run count = " << pool.task_run_count() << endl; getchar(); return 0; } -
5.4 步获取线程池中的任务执行结果
-
使用promise异步获取执行结果
-
线程池头文件
-
1 2 3 4 5 6 7 8 9 10 11 12 13 14 15 16 17 18 19 20 21 22 23 24 25 26 27 28 29 30 31 32 33 34 35 36 37 38 39 40 41 42 43 44 45 46 47 48 49 50 51 52 53 54 55 56 57 58 59 60 61 62 63 64 65 66 67 68 69 70 71 72 73#pragma once #include <thread> #include <mutex> #include <vector> #include <list> #include <functional> #include <atomic> #include <future> class XTask { public: virtual int Run() = 0; std::function<bool()> is_exit = nullptr;//尚未使用,但是可以后期有改进的部分 auto GetReturn() { return p_.get_future().get(); } void SetValue(int v) { p_.set_value(v); } private: std::promise<int> p_; }; class XThreadPool { public: ////////////////////////////////////////////// /// 初始化线程池 /// @para num 线程数量 void Init(int num); ////////////////////////////////////////////// /// 启动所有线程,必须先调用Init void Start(); ////////////////////////////////////////////// /// 线程池退出 void Stop(); //void AddTask(XTask* task); void AddTask(std::shared_ptr<XTask> task); //XTask* GetTask(); std::shared_ptr<XTask> GetTask(); //线程池是否退出 bool is_exit() { return is_exit_; } int task_run_count() { return task_run_count_; } private: //线程池线程的入口函数 void Run(); int thread_num_ = 0;//线程数量 std::mutex mux_; //std::vector<std::thread*> threads_; //使用智能指针管理线程以及任务的生命周期 std::vector<std::shared_ptr<std::thread>> threads_; //std::list<XTask*> tasks_; std::list<std::shared_ptr<XTask>> tasks_; std::condition_variable cv_; bool is_exit_ = false; //线程池退出 //正在运行的任务数量,线程安全 std::atomic<int> task_run_count_ = { 0 }; }; -
线程池源文件
-
1 2 3 4 5 6 7 8 9 10 11 12 13 14 15 16 17 18 19 20 21 22 23 24 25 26 27 28 29 30 31 32 33 34 35 36 37 38 39 40 41 42 43 44 45 46 47 48 49 50 51 52 53 54 55 56 57 58 59 60 61 62 63 64 65 66 67 68 69 70 71 72 73 74 75 76 77 78 79 80 81 82 83 84 85 86 87 88 89 90 91 92 93 94 95 96 97 98 99 100 101 102 103 104#include "xthread_pool.h" #include <iostream> #include <memory> using namespace std; ////////////////////////////////////////////// /// 初始化线程池 /// @para num 线程数量 void XThreadPool::Init(int num) { unique_lock<mutex> lock(mux_); this->thread_num_ = num; cout << "Thread pool Init " << num << endl; } ////////////////////////////////////////////// /// 启动所有线程,必须先调用Init void XThreadPool::Start() { unique_lock<mutex> lock(mux_); if (thread_num_ <= 0) { cerr << "Please Init XThreadPool" << endl; return; } if (!threads_.empty()) { cerr << "Thread pool has start!" << endl; return; } //启动线程 for (int i = 0; i < thread_num_; i++) { /*auto th = new thread(&XThreadPool::Run, this); threads_.push_back(th);*/ //使用智能指针 auto th = make_shared<thread>(&XThreadPool::Run, this); threads_.push_back(th); } } ////////////////////////////////////////////// /// 线程池退出 void XThreadPool::Stop() { is_exit_ = true; cv_.notify_all(); for (auto& th : threads_) { th->join(); } unique_lock<mutex> lock(mux_); threads_.clear(); } //线程池线程的入口函数 void XThreadPool::Run() { cout << "begin XThreadPool Run " << this_thread::get_id() << endl; while (!is_exit()) { auto task = GetTask(); if (!task)continue; ++task_run_count_;//正在运行的线程数量 try { int re = task->Run();//跑任务需求 task->SetValue(re);//设置promise的值,异步获取返回值 } catch (...) { } --task_run_count_; } cout << "end XThreadPool Run " << this_thread::get_id() << endl; } void XThreadPool::AddTask(std::shared_ptr<XTask> task) { unique_lock<mutex> lock(mux_); tasks_.push_back(task); //返回函数指针,共用一个函数。一个类调用另外一个类的成员函数 task->is_exit = [this] {return is_exit(); }; lock.unlock(); cv_.notify_one(); } std::shared_ptr<XTask> XThreadPool::GetTask() { unique_lock<mutex> lock(mux_); if (tasks_.empty()) { cv_.wait(lock); } if (is_exit()) return nullptr; if (tasks_.empty()) return nullptr; auto task = tasks_.front(); tasks_.pop_front(); return task; } -
主函数
-
1 2 3 4 5 6 7 8 9 10 11 12 13 14 15 16 17 18 19 20 21 22 23 24 25 26 27 28 29 30 31 32 33 34 35 36 37 38 39 40 41 42 43 44 45 46 47 48 49 50 51 52 53 54 55 56 57 58 59#include "xthread_pool.h" #include <iostream> #include <string> using namespace std; class MyTask :public XTask { public: int Run() { cout << "================================================" << endl; cout << this_thread::get_id() << " Mytask " << name << endl; cout << "================================================" << endl; for (int i = 0; i < 6; i++) { if (is_exit())break; cout << "." << flush; this_thread::sleep_for(500ms); } return 100; } std::string name = ""; }; int main(int argc, char* argv[]) { XThreadPool pool; pool.Init(16); pool.Start(); //MyTask task1; //task1.name = "test name 001"; //pool.AddTask(&task1); //MyTask task2; //task2.name = "test name 002"; //pool.AddTask(&task2); auto task3 = make_shared<MyTask>(); task3->name = "Test name 003"; pool.AddTask(task3); auto task4 = make_shared<MyTask>(); task4->name = "Test name 004"; pool.AddTask(task4); cout << "task4 run result = " << endl; int ret = task4->GetReturn();//阻塞等待执行完毕 cout << "task4 run result = " << ret << endl; this_thread::sleep_for(100ms); cout << "task run count = " << pool.task_run_count() << endl; this_thread::sleep_for(10s); pool.Stop(); cout << "task run count = " << pool.task_run_count() << endl; getchar(); return 0; } -
6. c++20 的barrier
-
类模板
std::barrier提供允许至多为期待数量的线程阻塞直至期待数量的线程到达该屏障。不同于std::latch,屏障可重用:一旦到达的线程从屏障阶段的同步点除阻,则可重用同一屏障。屏障对象的生存期由屏障阶段的序列组成。每个阶段定义一个阶段同步点。在阶段中到达屏障的线程能通过调用
wait在阶段同步点上阻塞,而且将保持阻塞直至运行阶段完成步骤。屏障阶段由以下步骤组成:
-
每次调用
arrive或arrive_and_drop减少期待计数。 -
期待计数抵达零时,运行阶段完成步骤。完成步骤调用完成函数对象,并除阻所有在阶段同步点上阻塞的线程。完成步骤的结束
强先发生于所有从完成步骤所除阻的调用的返回。
- 对于特化
std::barrier<>(使用默认模板实参),完成步骤作为对arrive或arrive_and_drop的导致期待计数抵达零的调用的一部分运行。 - 对于其他特化,完成步骤在该阶段期间到达屏障的线程之一上运行。而若在完成步骤中调用屏障对象的
wait以外的成员函数,则行为未定义。
- 对于特化
-
完成步骤结束时,重置期待计数为构造中指定的值,可能为
arrive_and_drop调用所调整,并开始下一阶段。
同时调用
barrier的成员函数,除了析构函数,不引入数据竞争。 -
-
成员函数
| (构造函数) | 构造 barrier (公开成员函数) |
|---|---|
| (析构函数) | 销毁 barrier (公开成员函数) |
| operator=[被删除] | barrier 不可赋值 (公开成员函数) |
| arrive | 到达屏障并减少期待计数 (公开成员函数) |
| wait | 在阶段同步点阻塞,直至运行其阶段完成步骤 (公开成员函数) |
| arrive_and_wait | 到达屏障并把期待计数减少一,然后阻塞直至当前阶段完成 (公开成员函数) |
| arrive_and_drop | 将后继阶段的初始期待计数和当前阶段的期待计数均减少一 (公开成员函数) |
-
例子
-
1 2 3 4 5 6 7 8 9 10 11 12 13 14 15 16 17 18 19 20 21 22 23 24 25 26 27#include <thread> #include <iostream> #include <barrier> using namespace std; void TestBar(int i, barrier<>* bar) { this_thread::sleep_for(chrono::seconds(i)); cout << i << " begin wait" << endl; bar->wait(bar->arrive()); //期待数 -1 阻塞等待,期待为0是返回 cout << i << " end wait" << endl; } int main(int argc, char* argv[]) { int count = 3; barrier bar(count);//初始数量 for (int i = 0; i < count; i++) { thread th(TestBar, i, &bar); th.detach(); } getchar(); return 0; } //最终结果是end wait几乎一起打印,而begin wait依次等待1秒打印
十三、面向对象高级开发(上)-侯捷-笔记
1. 构造函数及传值的方式
-
单例模式——构造函数为private
-
友元函数的使用,可以访问private
-
相同class的各个实体互为友元
-
尽量传引用、返回引用
-
什么时候不能返回reference呢,注意,当函数内部创建的局部变量不能返回引用,只能返回已有的外部变量,因为函数结束local的生命周期已经结束了。
-
注意常量成员函数的使用
2. 操作符重载
-
使用this指针的成员函数的的操作符重载。传递者无需知道接受者是否以reference的形式接收。但如果是指针的话,需要两者一样。
-
非成员函数的操作符重载,没有用this
- 注意这里一定不能返回引用。
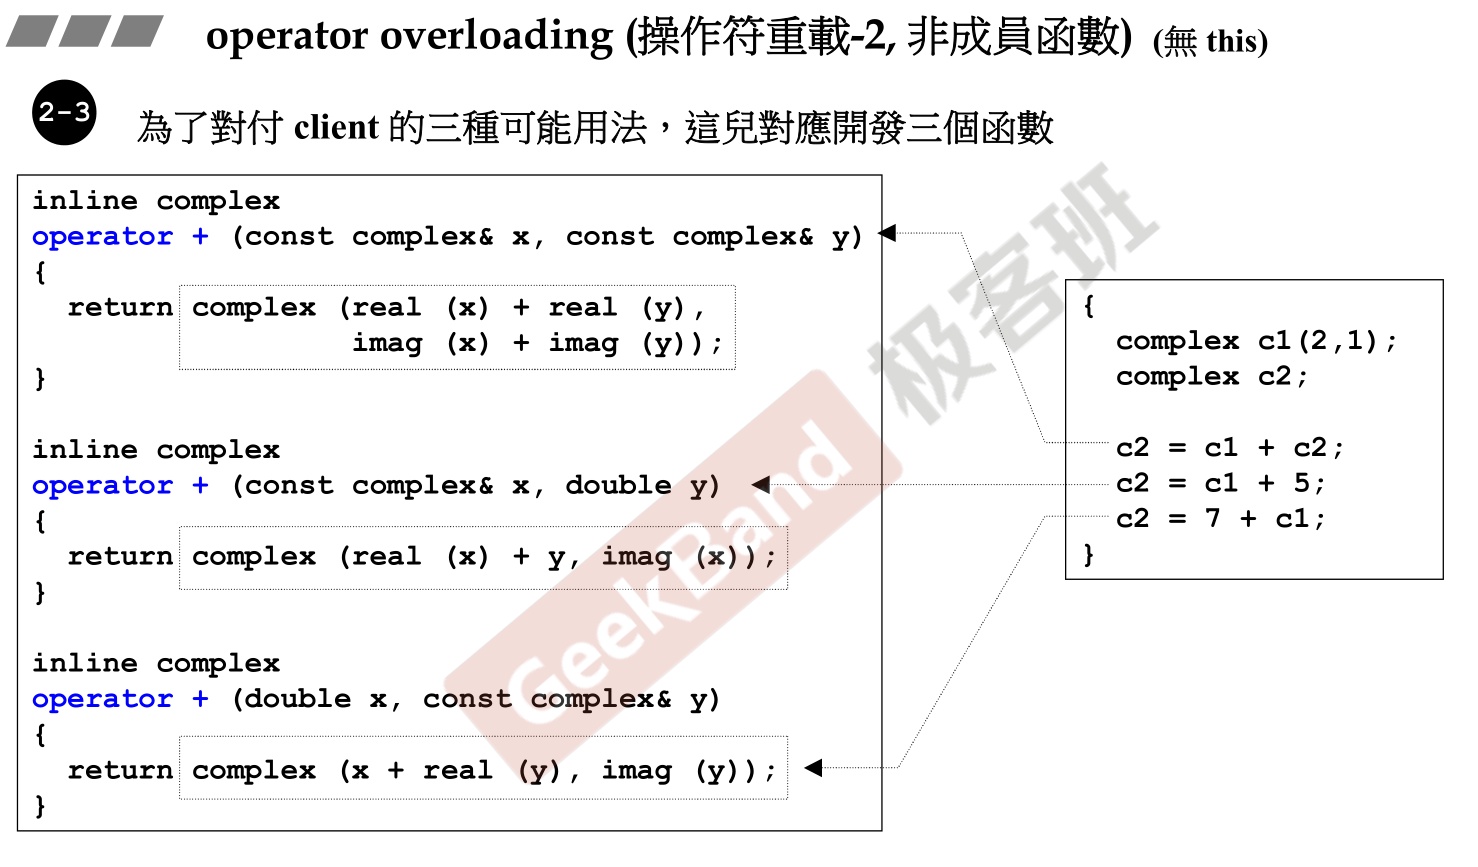
-
关于ostream,一般都有返回引用,因为为了可以后面继续添加
<<。一般不设置为成员函数。
3. 拷贝构造、拷贝赋值、析构函数
- 拥有指针同时动态开辟内存空间(堆空间)的类,一定要重写自身的拷贝构造(copy ctor)、拷贝赋值(copy op=)和析构函数(dtor)(big three)。
- 以string类为例子。
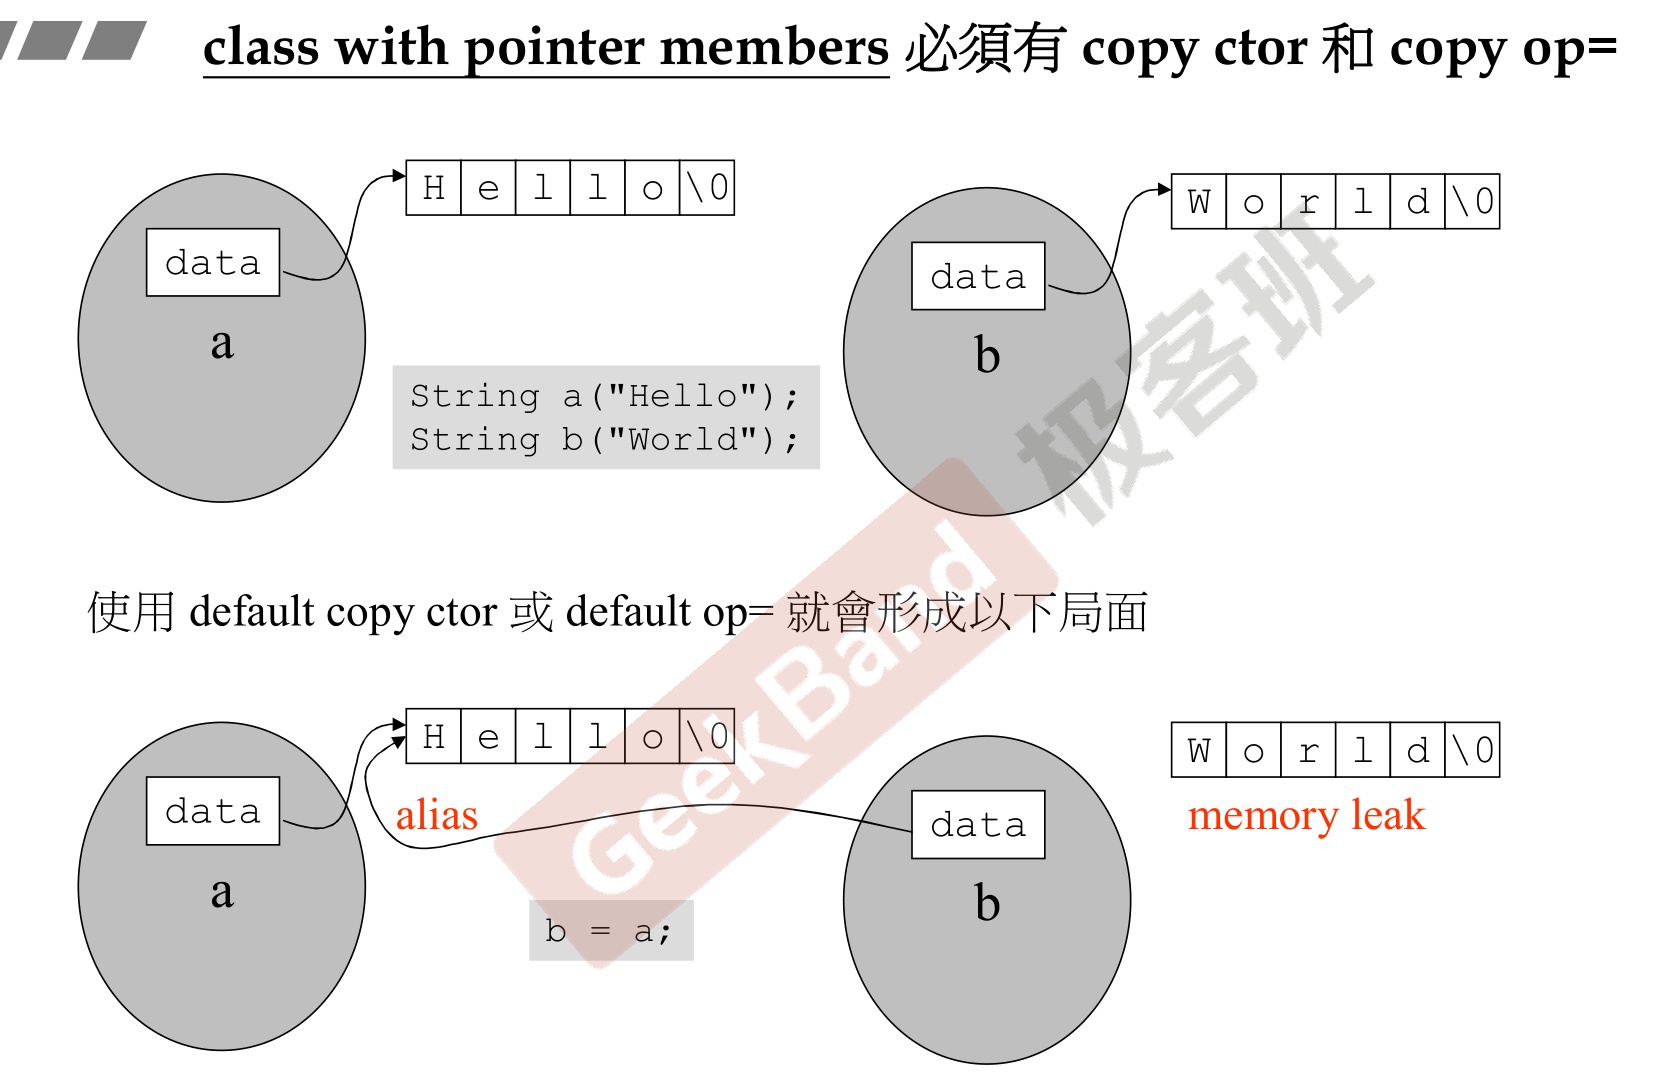
4. 关于new和delete
-
new先分配内存(调用malloc),再调用类的构造函数。
-
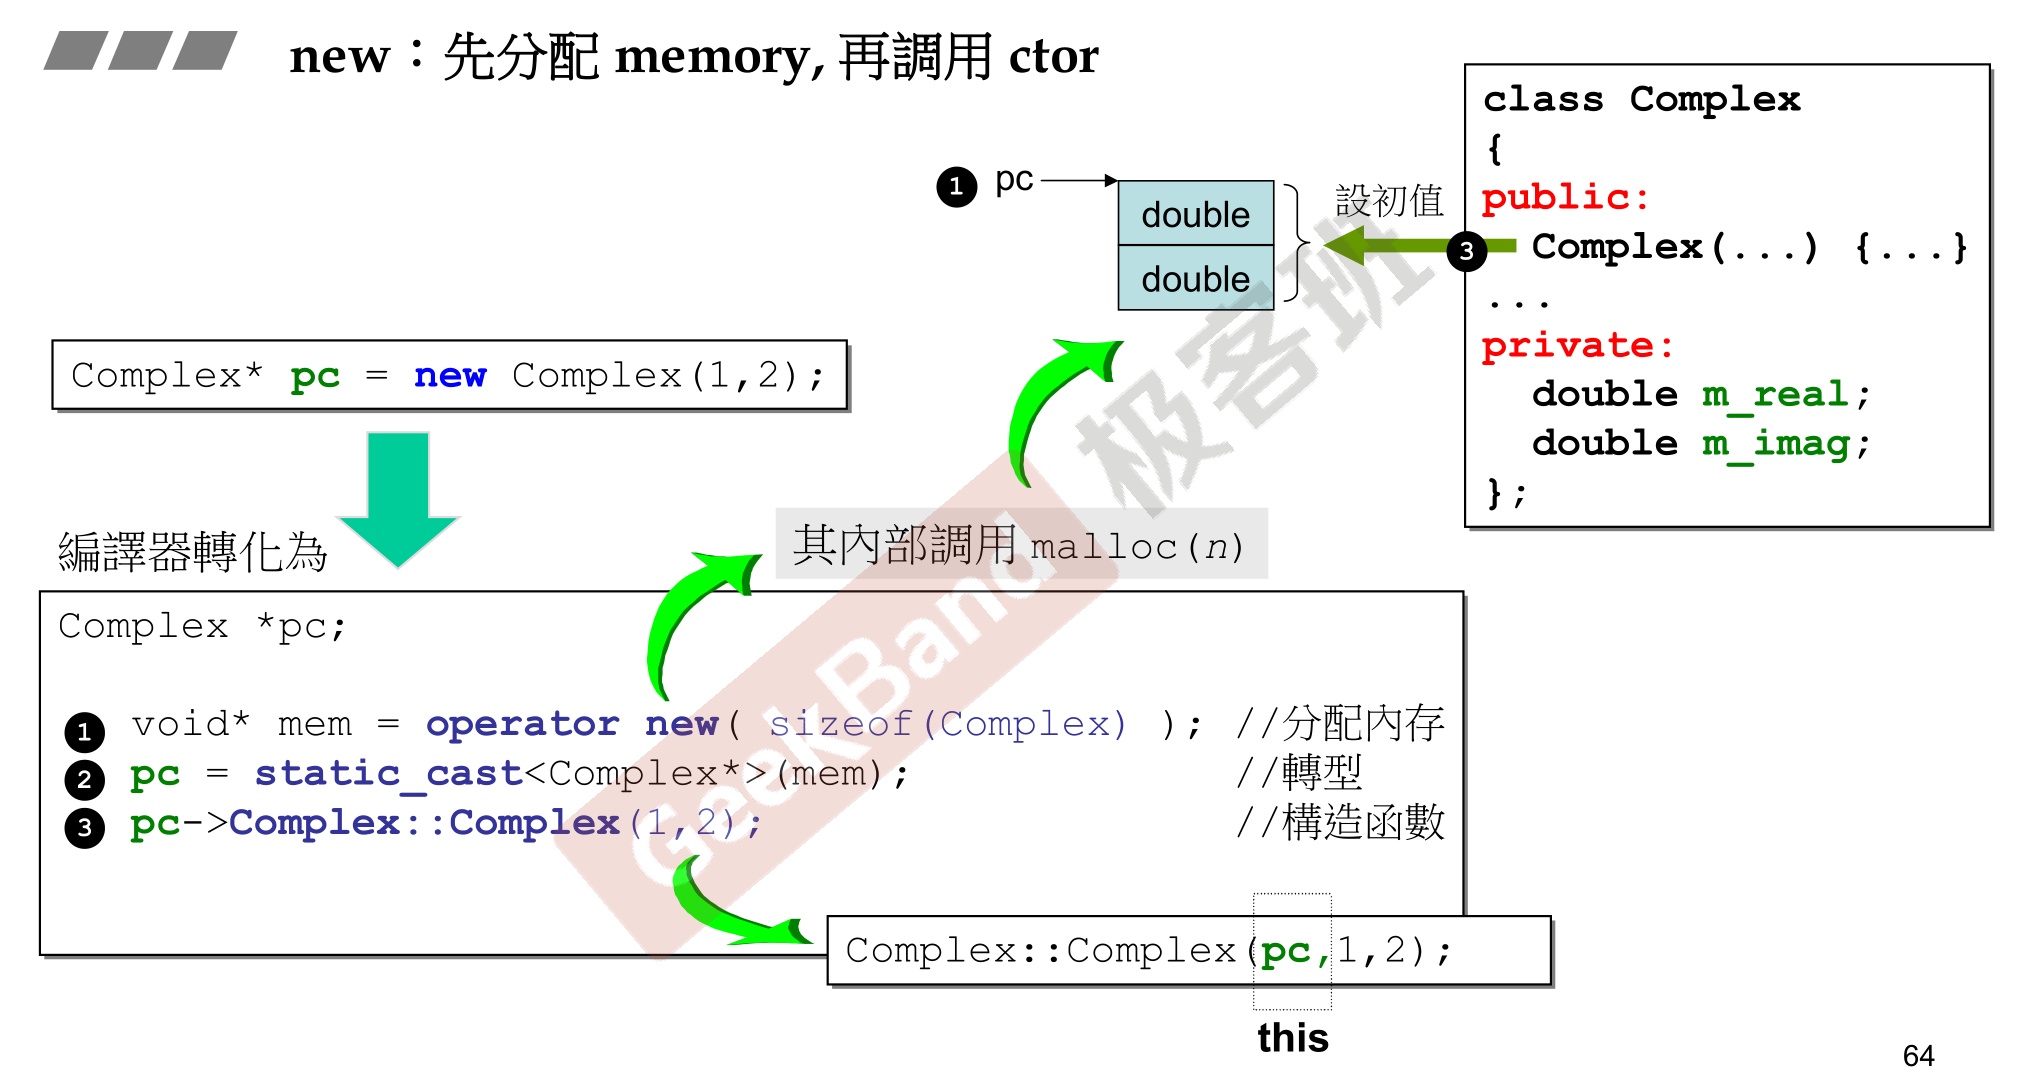
-
delete先调用类的析构函数,再释放内存(调用free)。
-

-
关于new了一个数组,但是delete没有加[]的内存泄漏问题的探讨。
- 确实是会内存泄漏,但是可能和自己想象的有所不同。
- new的时候每段动态内存首尾都会有一个cookie标记本次new的内存的大小,所以即使你delete没有加array的标志,这段动态内存仍然可以正常回收。但是,如果你不加[],而你动态创建的类里面又有指针,类里面又动态分配了内存,这一部分内存只有第一个类的动态分配的内存才会得以回收,其他内存都无法进行回收。究其原因,你创建了一个类的数组,但是删除默认只删除了第一个类,其他类的析构函数没有得到调用。
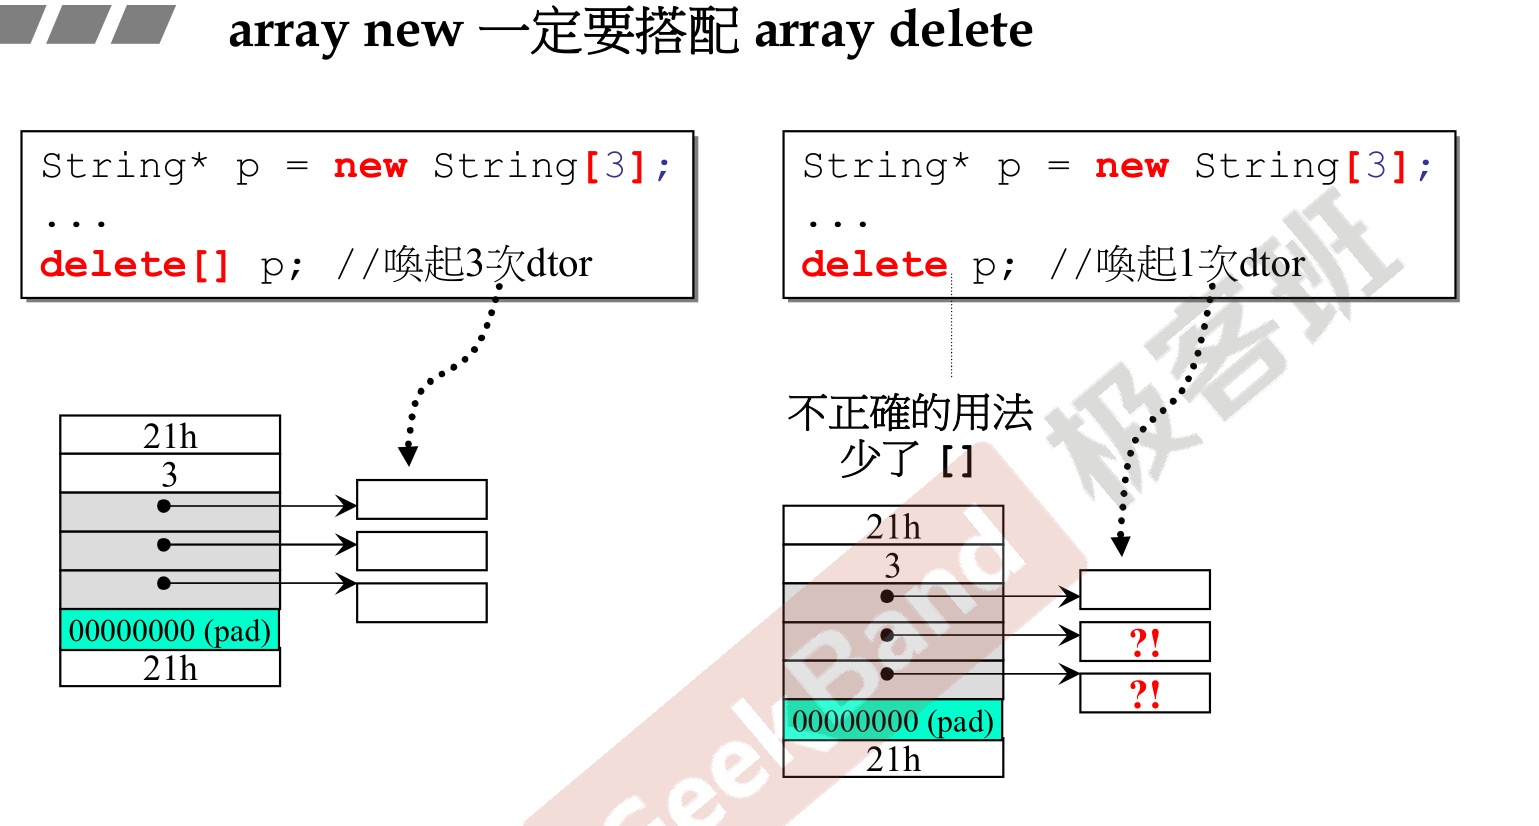
5. 类模板和函数模板
6. OOP/OOD
- 面向对象编程、面向对象设计。

6.1 Composition(复合)
-
具体来说,就是类中的数据成员是另外一个类。
-
注意拥有的是类的实体,不是拥有指针,类的数据大小即复合类的数据大小加其本身的size。
-
注意画图表示的菱形是一个实心的,表示拥有该类的一个实体。
-
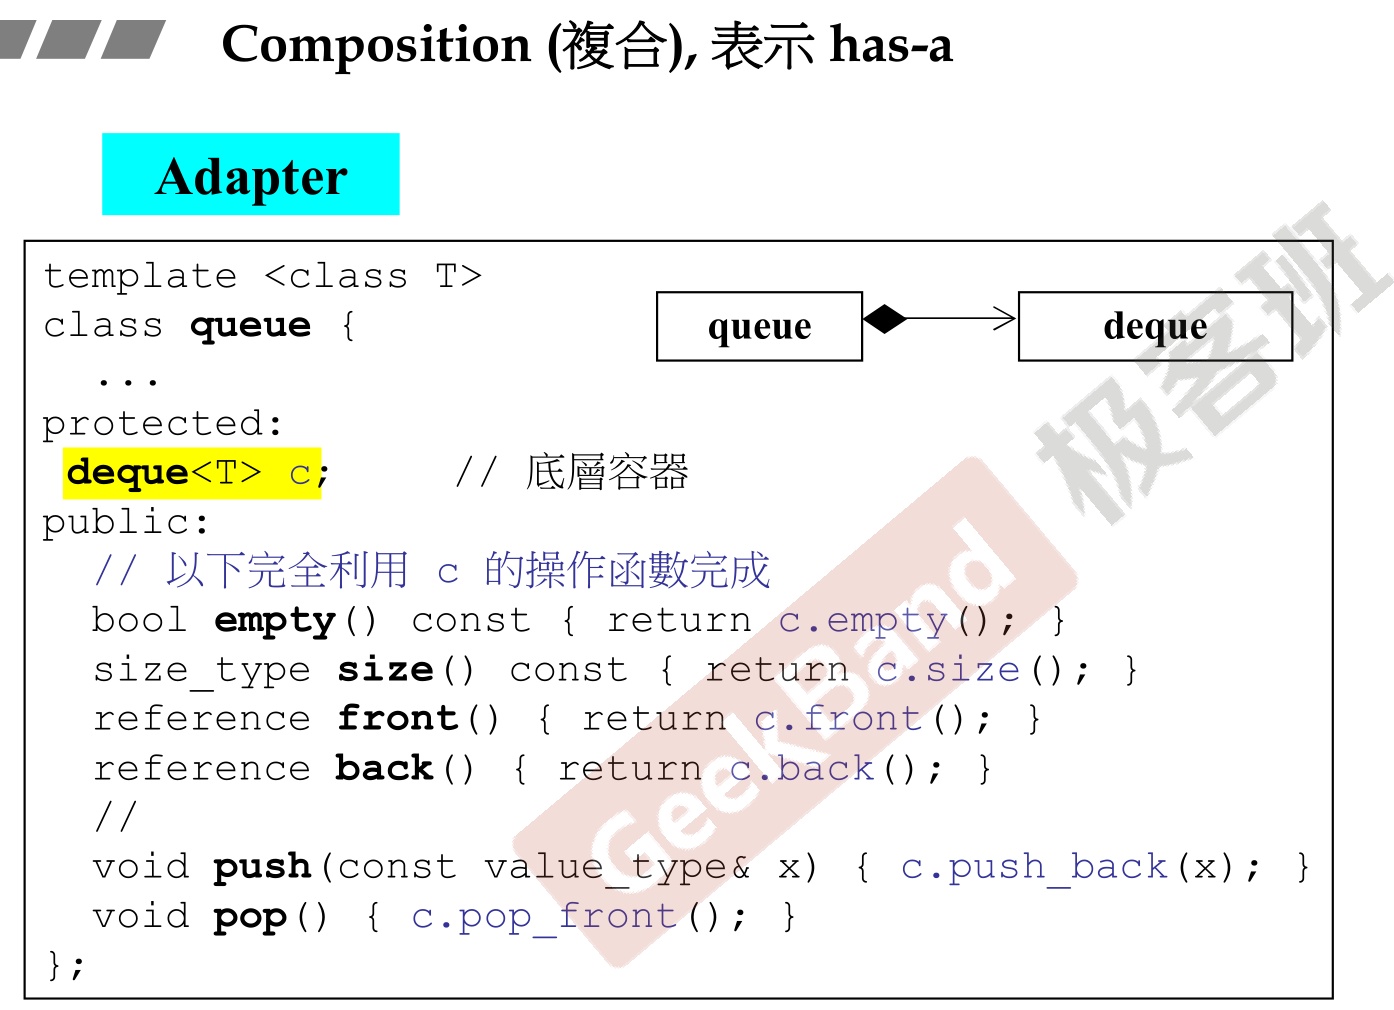
-

-
复合关系下的构造和析构
- 构造函数有内而外,先调用的类包含的构造函数,再调用自身的构造函数。
- 析构函数由外而内,先调用自身的析构函数,再调用包含的类的析构函数。
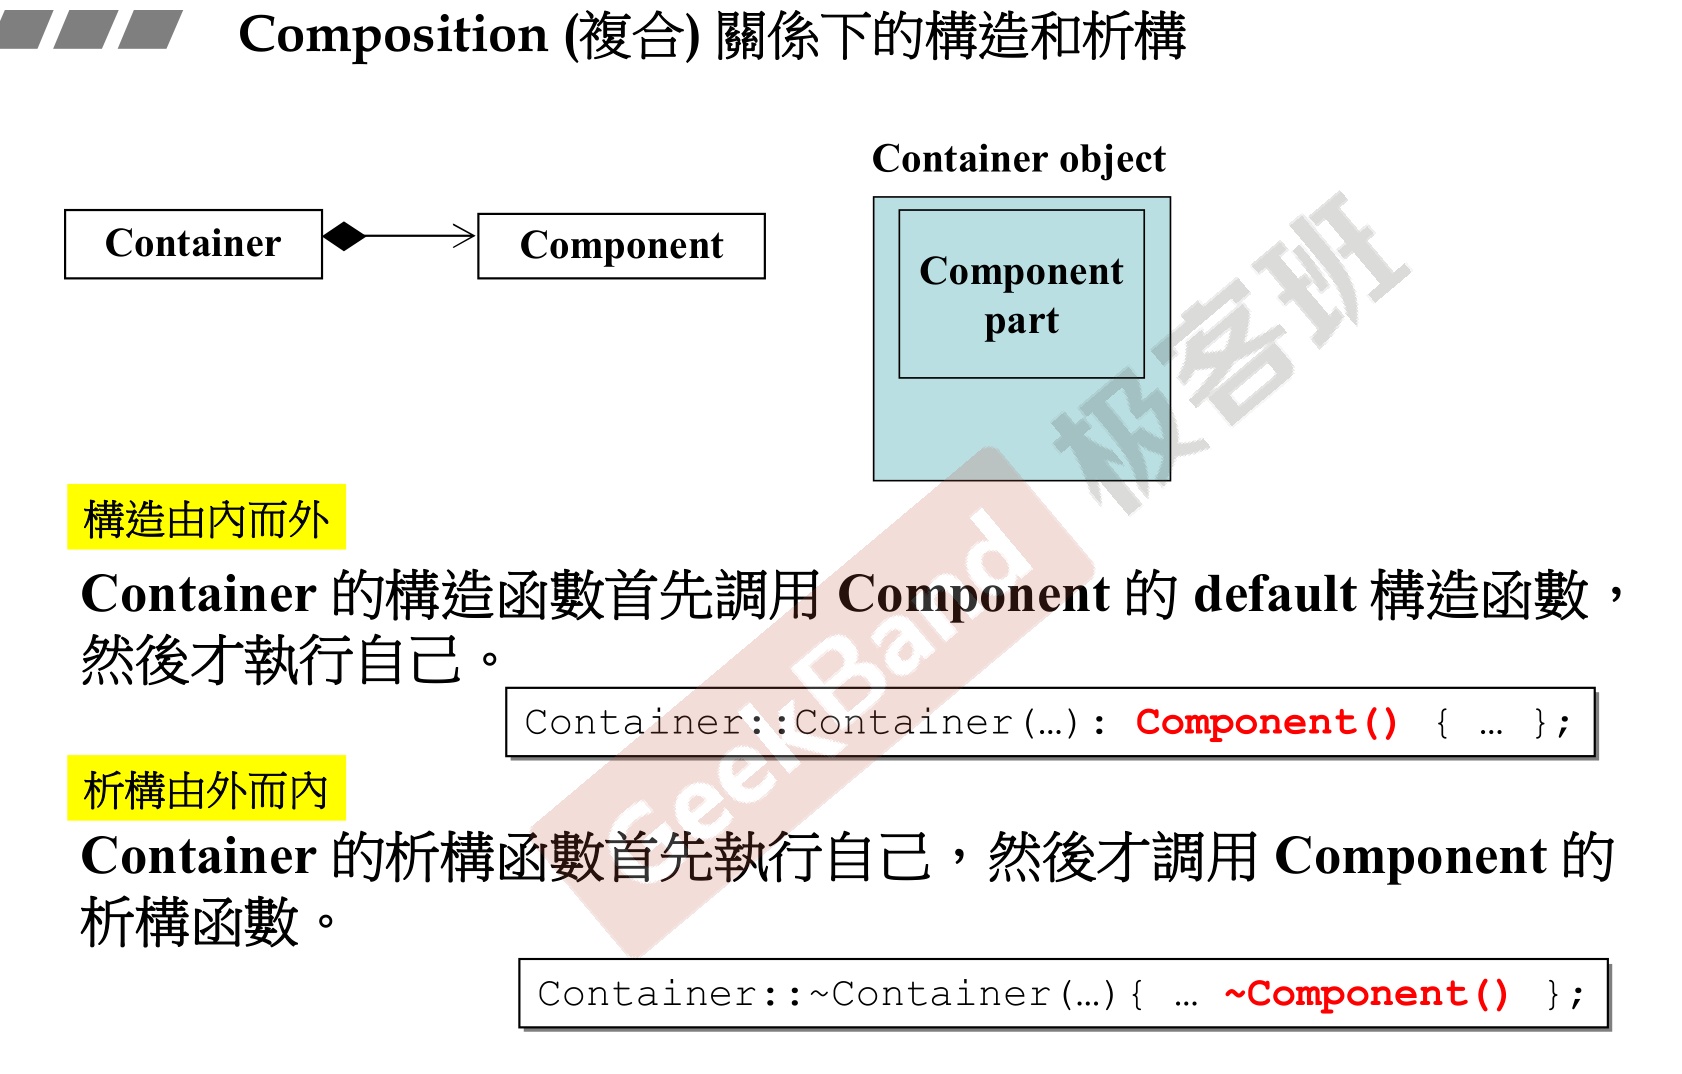
6.2 Delegation(委托)
-
和复合大同小异,可以具体来说就是composition by reference(一般不说by pointer,即使确实是传指针)。
-
说白了,就是没有类的实体,只有类的指针,空间得到节约,那什么时候具体化这个类呢,得看你具体什么时候构造。
-
Delegation涉及到一个重要的设计模式,PIMPL。
-
PIMPL(Private Implementation 或 Pointer to Implementation)是通过一个私有的成员指针,将指针所指向的类的内部实现数据进行隐藏。
-
1)降低模块的耦合。因为隐藏了类的实现,被隐藏的类相当于原类不可见,对隐藏的类进行修改,不需要重新编译原类。
-
2)降低编译依赖,提高编译速度。指针的大小为4(32位)或8(64位),x.h发生变化,指针大小却不会改变,文件c.h(包含x.h)也不需要重编译。
-
3)接口与实现分离,提高接口的稳定性。
-
-
注意画图表示的菱形是一个空心的,表示只是拥有这个类的指针。
-
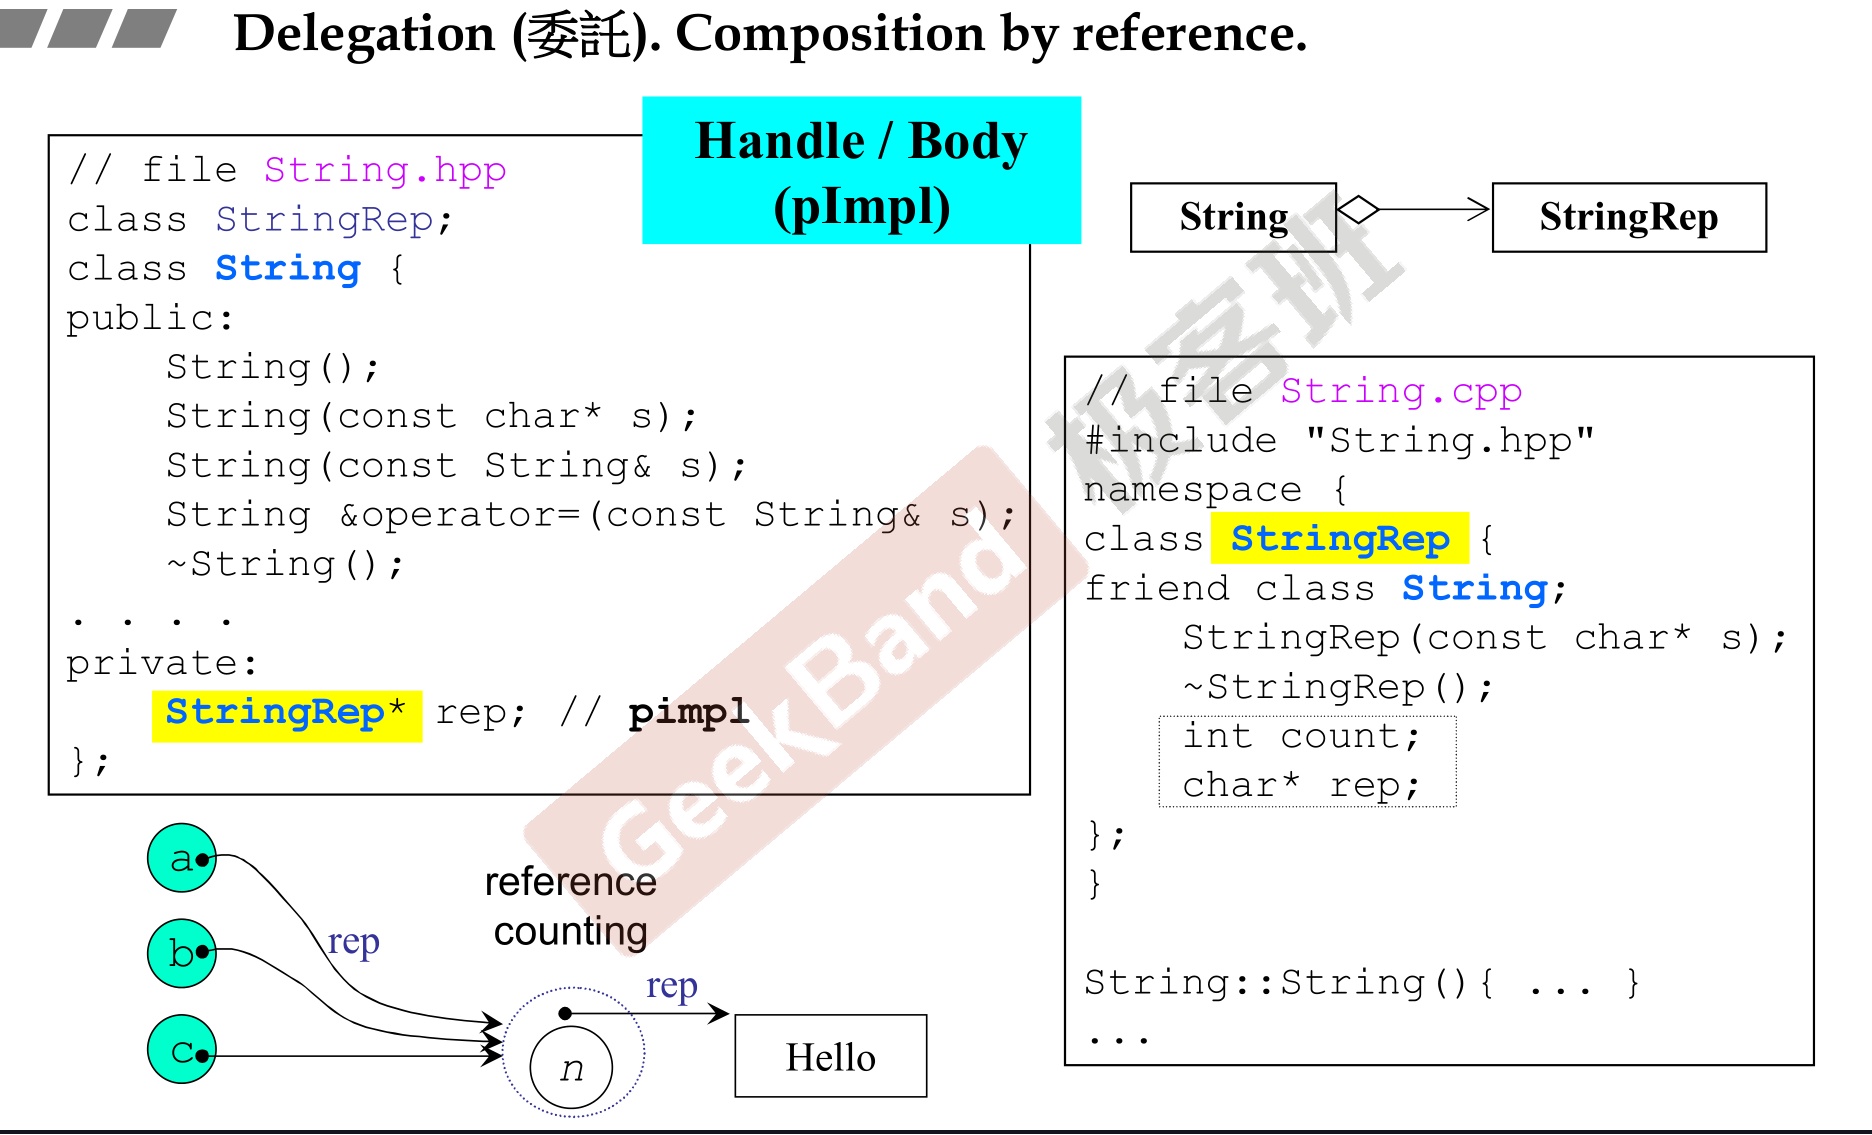
6.3 Inheritance(继承)
-
开发中最有用的是public公有继承。
-
基类的析构函数必须是虚函数virtual function。
-
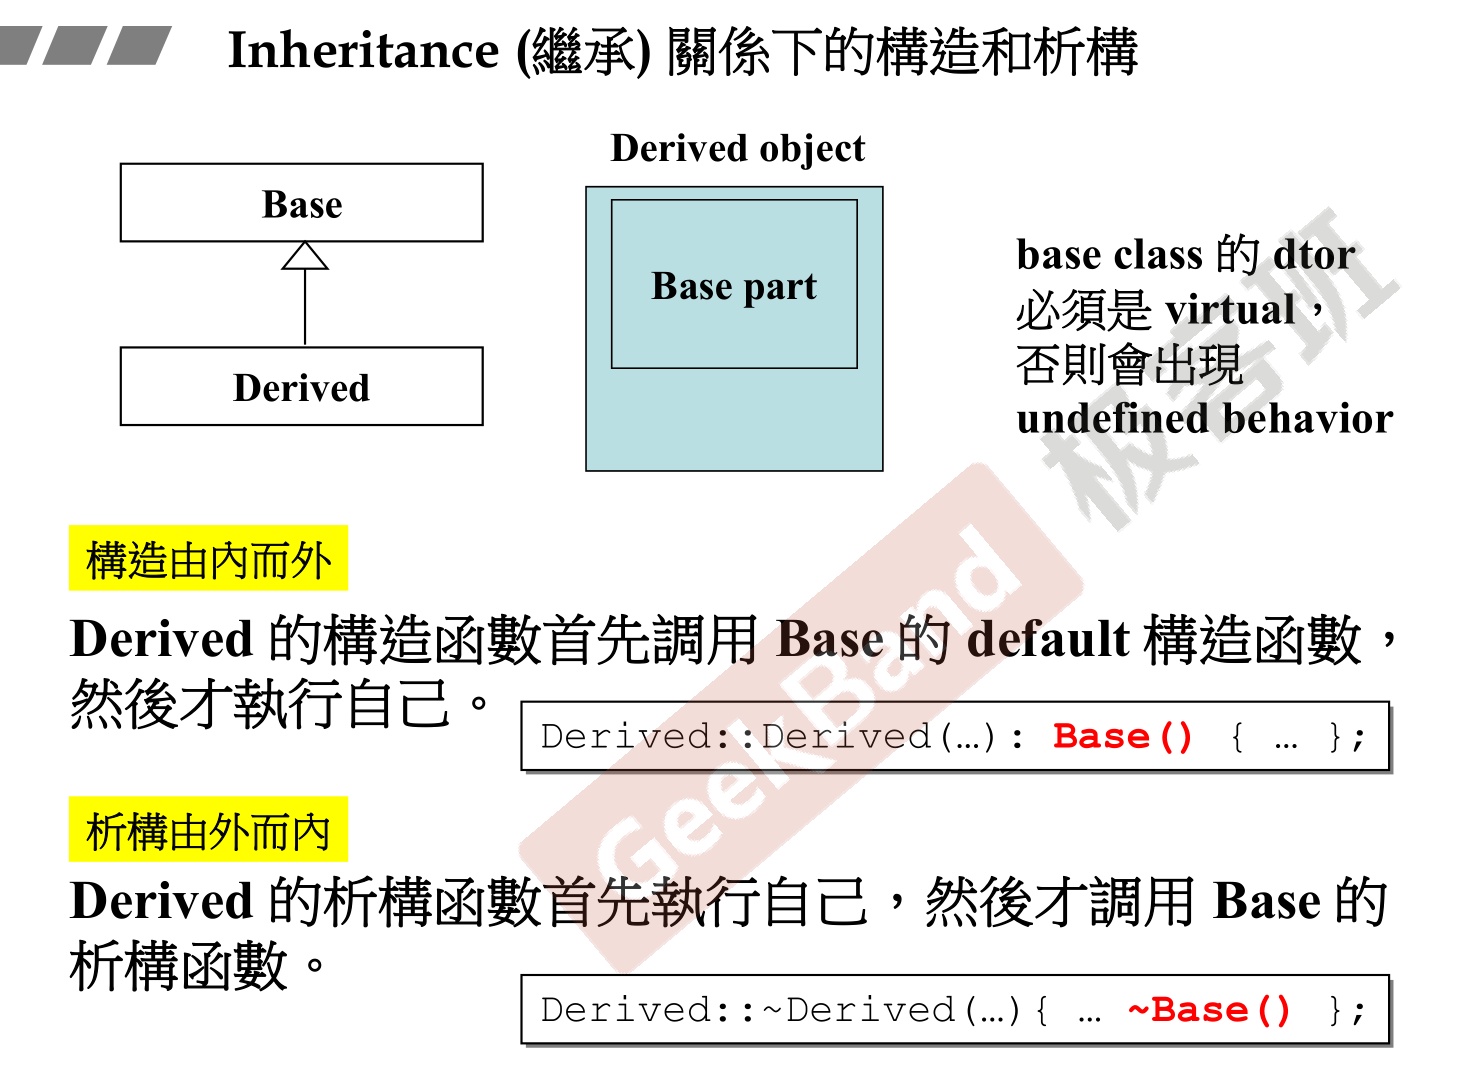
-
继承使用虚函数实现多态。
-
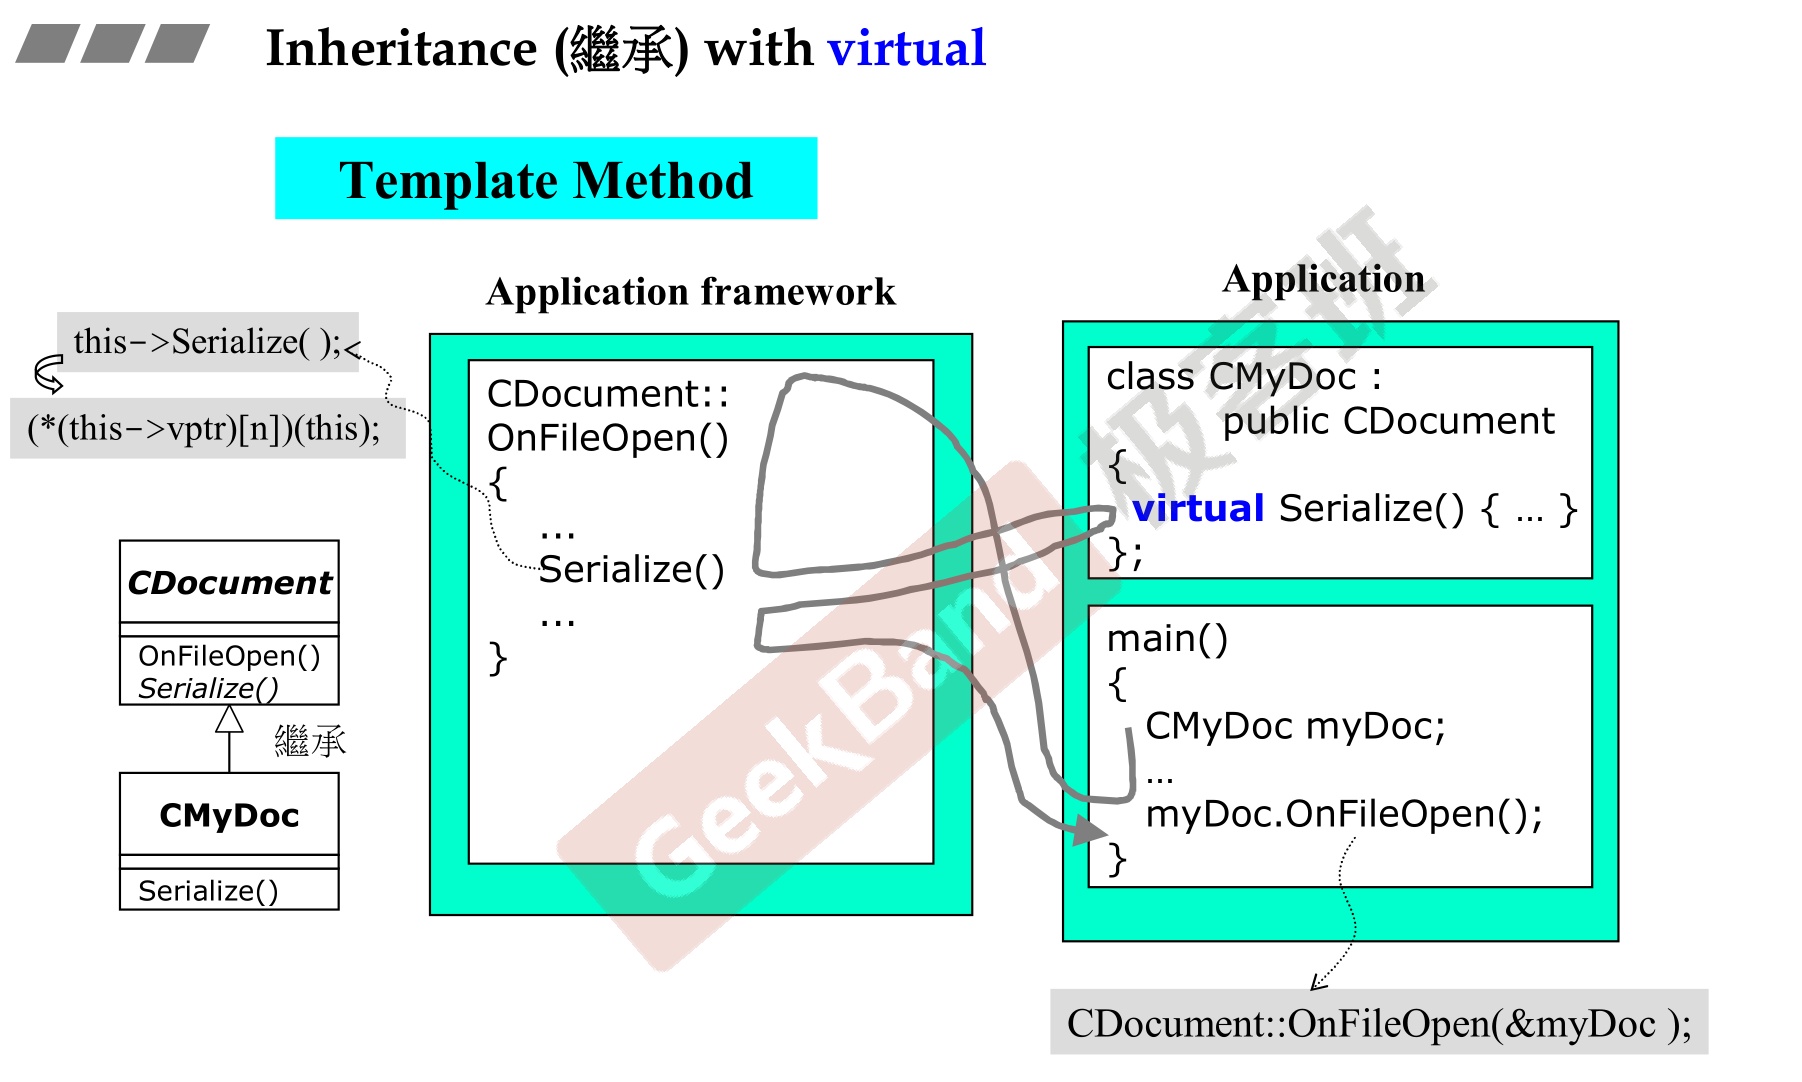
-
继承+复合情况下的构造和析构函数调用顺序
-
继承的基类本身有复合成员类的情况下构造和析构函数的调用顺序。
- 很明显,从内到外,先调用Component的构造函数,再调用Base的构造函数,最后调用继承类的构造函数。

6.4 Delegation + Inheritance(委托+继承)
-
例子,例如打开ppt多个窗口观察同步改变,如何设计呢?
-
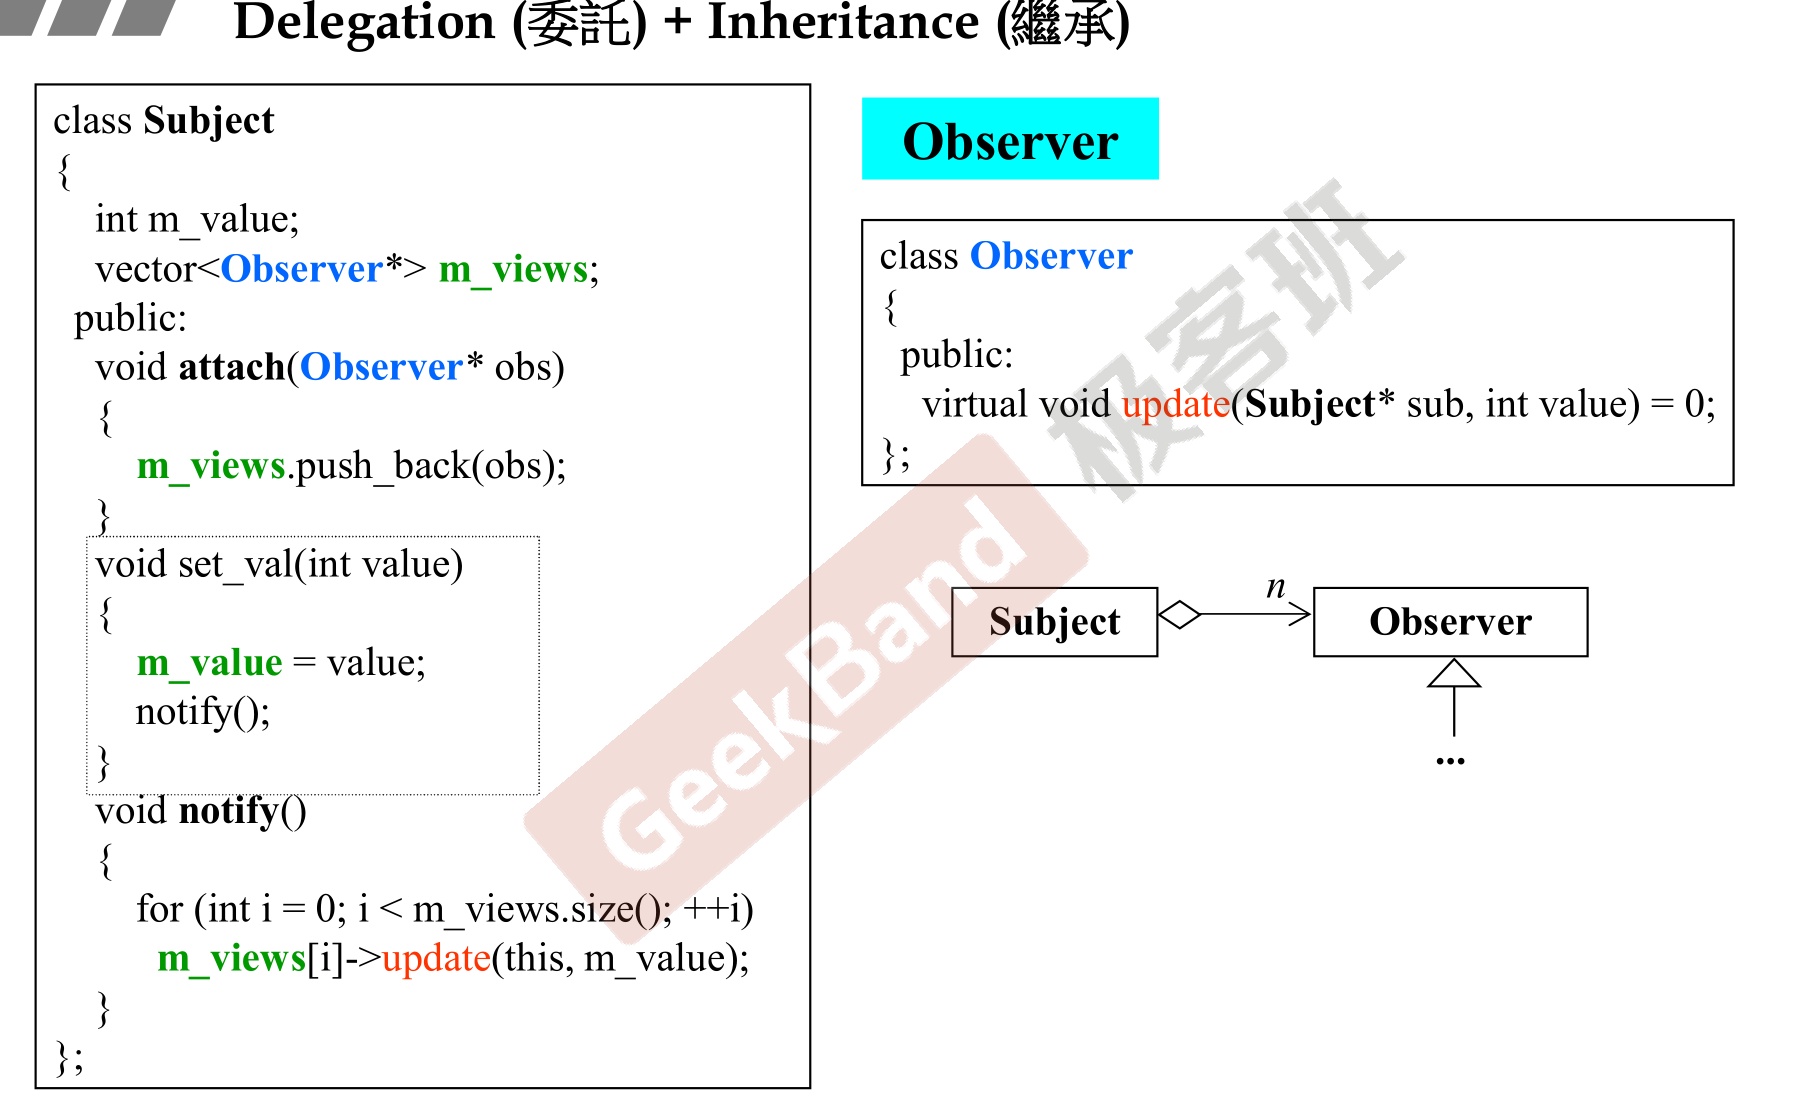
-
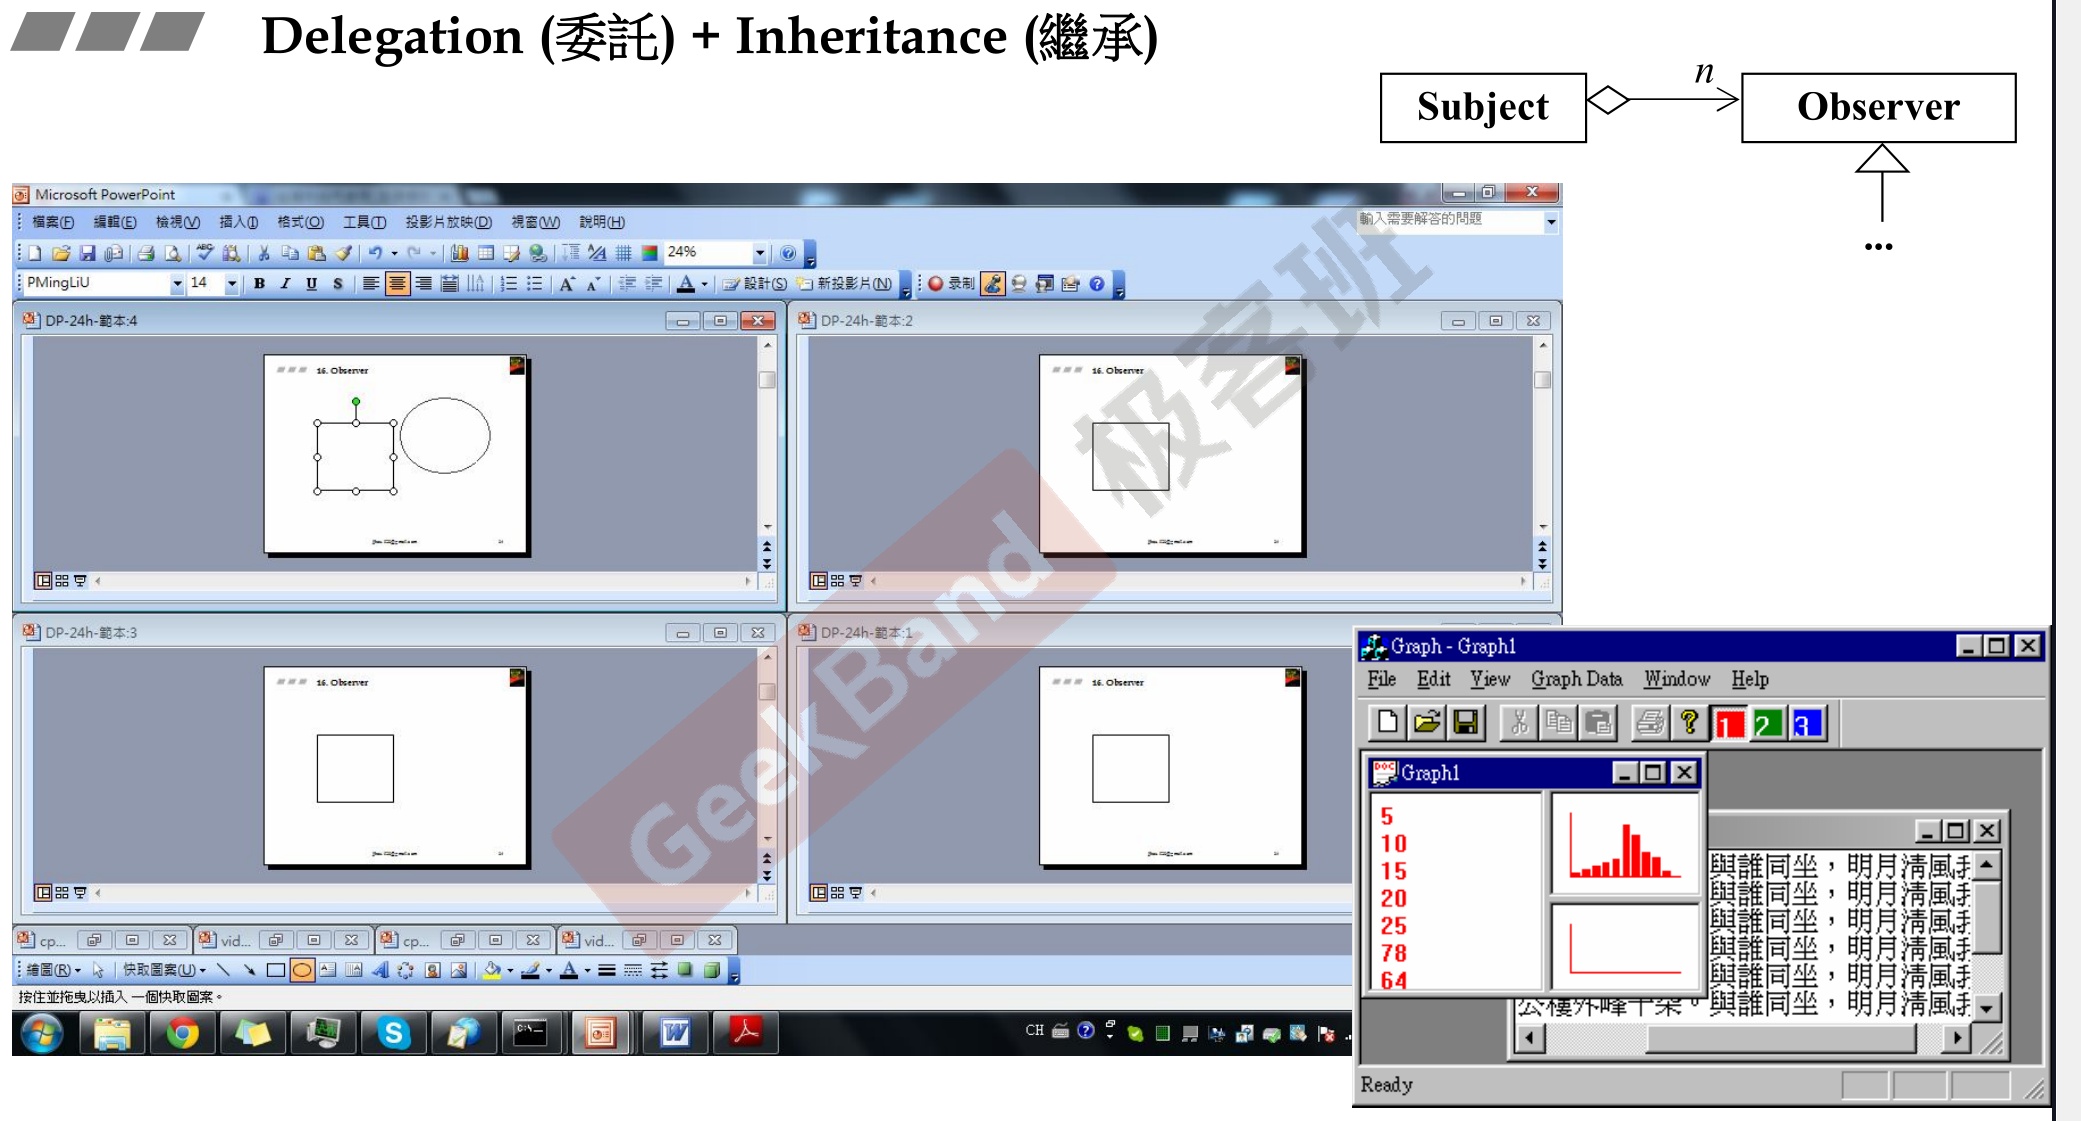
6.5 设计模式:组合(Composite)模式
-
关于Composite模式,其实就是组合模式,又叫部分整体模式,这个模式在我们的生活中也经常使用。
-
是一种结构性模式。即递归调用自身。
-
比如说如果读者有使用Java的GUI编写过程序的,肯定少不了定义一些组件,初始化之后,然后使用容器的add方法,将这些组件有顺序的组织成一个界面出来;或者读者如果编写过前端的页面,肯定使用过
<div>等标签定义一些格式,然后格式之间互相组合,通过一种递归的方式组织成相应的结构。 -
这种方式其实就是组合,将部分的组件镶嵌到整体之中。
-
在举个具体的例子,在文件和文件夹的组织关系里面,通过目录表项作为共同的特质(父类),一个文件夹可以包含多个文件夹和多个文件,一个文件容纳在一个文件夹之中。
-
那么凭什么可以这样做呢,需要满足以下两点,首先整体的结构应该是一棵树,第二,所有的组件应该有一个共同的父类(有共同的本质),这个父类使得组件中的共同的本质可以提取出来(有了共同语言(父类)),进行互融,其实就是父类使用add方法,这样子类就可以通过抽象的方式通过父类来表达了,可能有点绕口,让我们看一个例子。
-
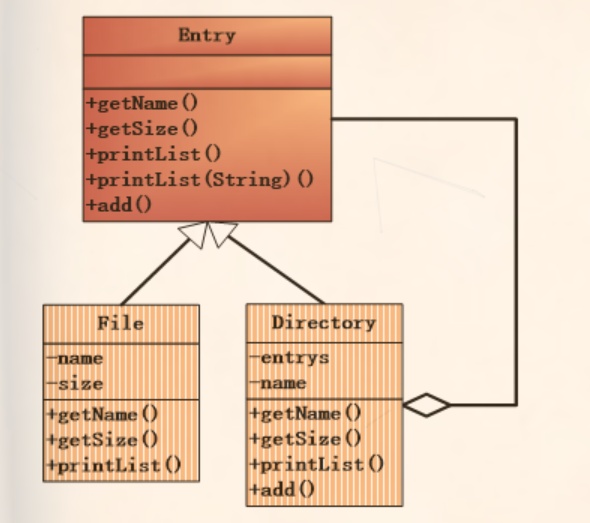
-
所谓的Composite模式,一般都是使用Delegation+Inheritance实现的。
-
具体来说,就是两个子类Primitive(文件)和Composite(文件夹)都有一个共同的基类Component,而Composite又通过委托,包含了基类Component的类的指针数组。
-
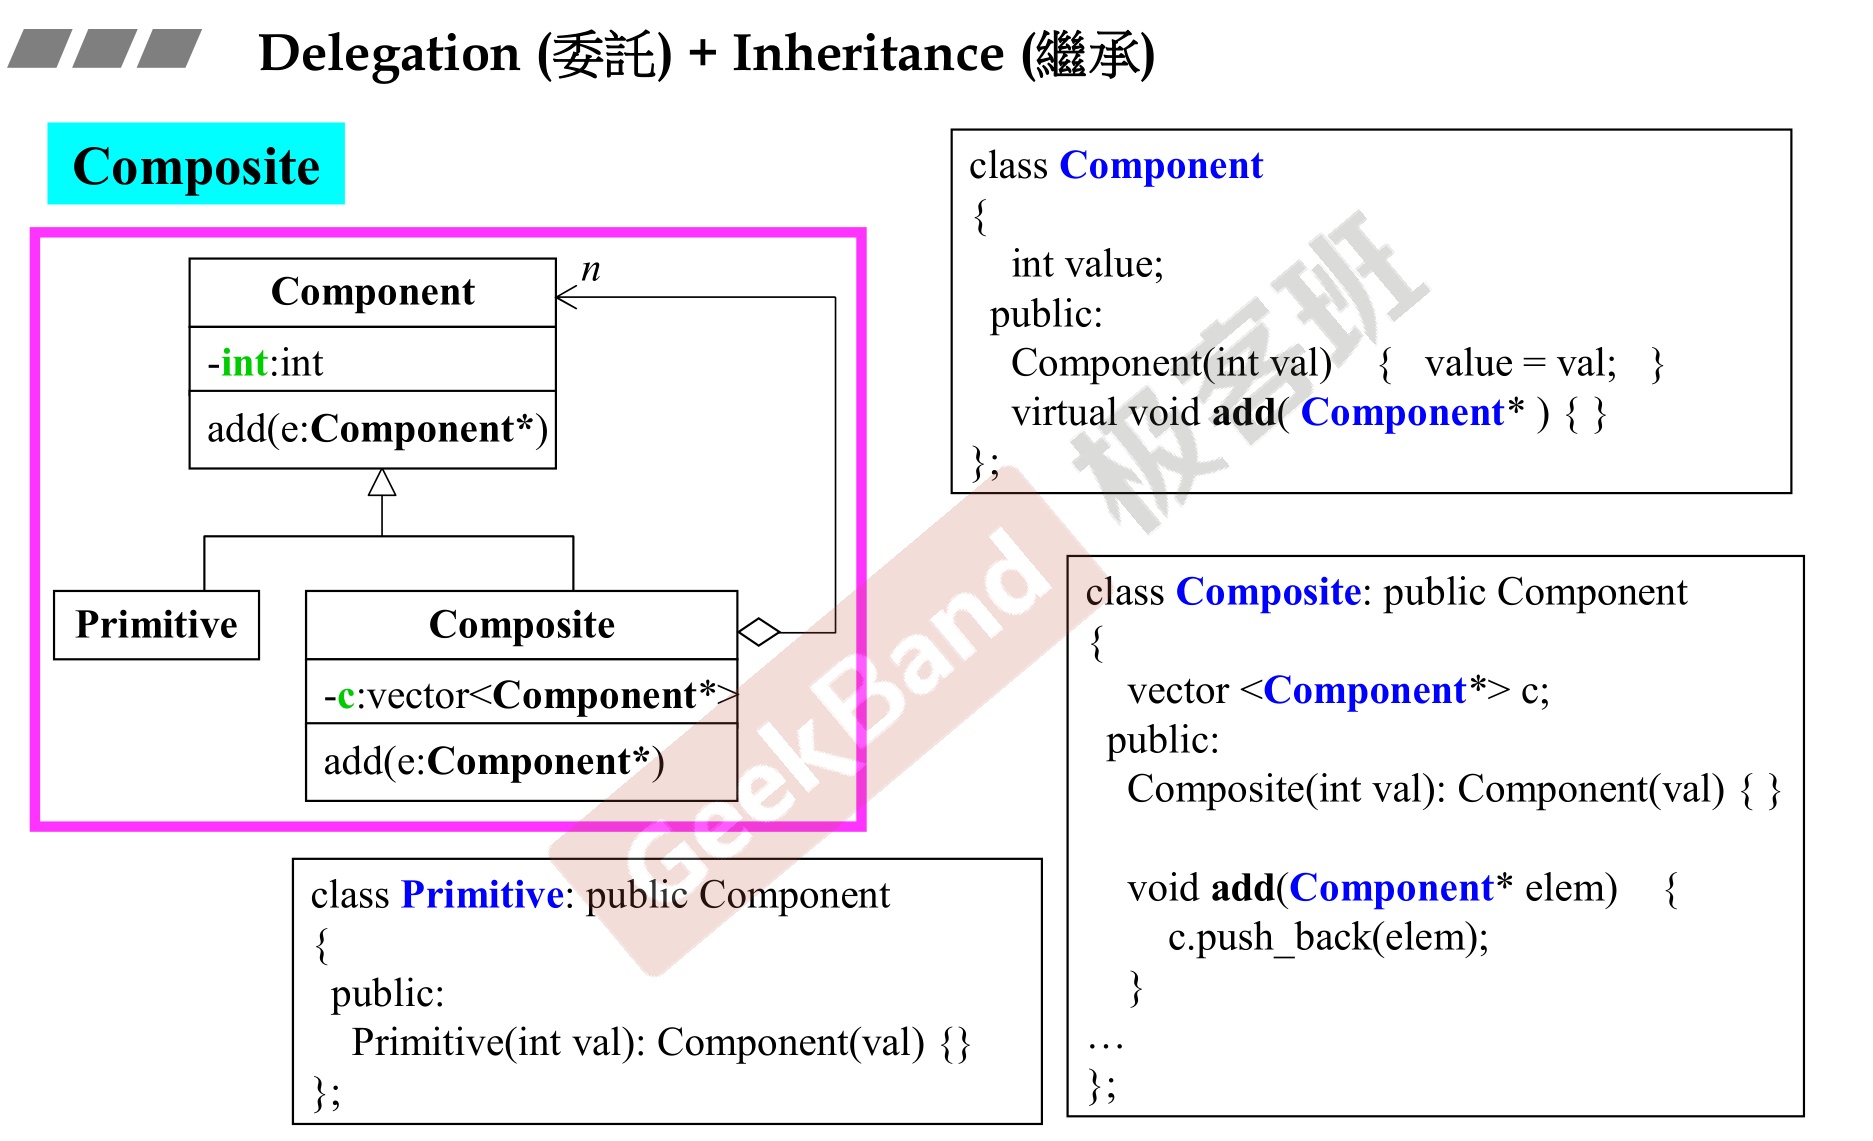
6.6 设计模式:原型(Prototype)模式
-
现在要去创建未来的子类class
-
Prototype(原型模式)属于创建型模式,既不是工厂也不是直接 New,而是以拷贝的方式创建对象。
-
创建型模式是提供创建对象的方式的。
-
意图:用原型实例指定创建对象的种类,并且通过拷贝这些原型创建新的对象。
-
设计模式的图符号的意义
- 带下划线的表示为静态变量
- 不同于代码,图的一般是[变量名:类型]
-表示私有变量#表示保护变量+或者不加表示公有变量。- 注意指针成员、实体类成员的菱形表示;
- 注意继承的箭头表示
-
你有一个对象,并希望生产和他一样的对象,再在上面做修改。
-
原型模式是解决对象复制的问题,提供clone的方法。
-
设计图如下。
-
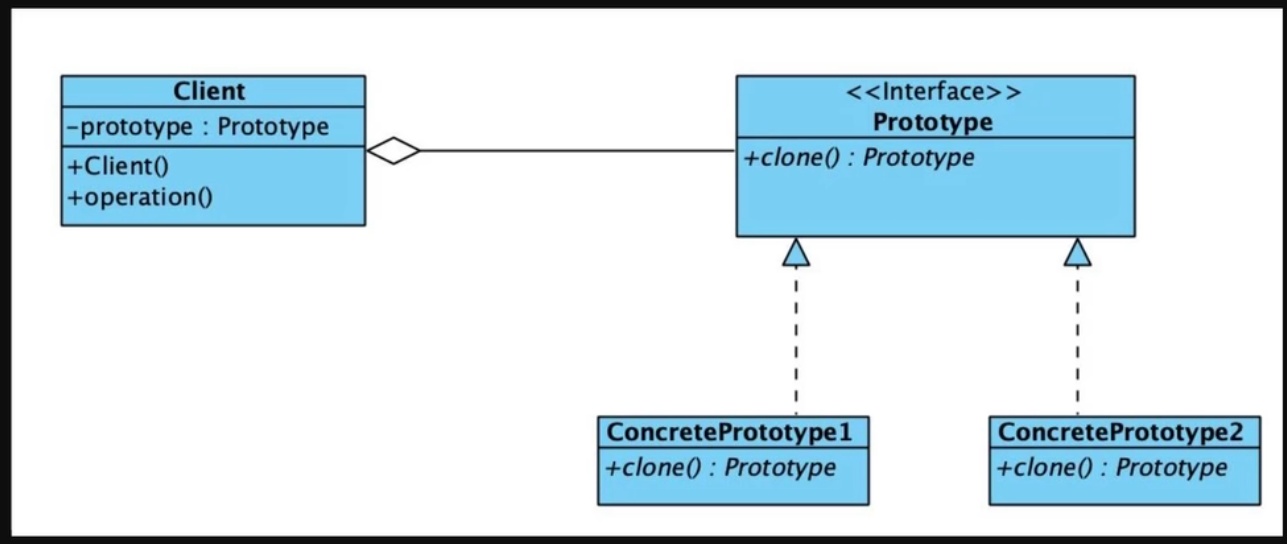
-
通过clone借口生产大量相同的类。基于已有对象进行复制即可,效率比 New 一个,或者工厂模式都要高。
-
原型模式的精髓是对象要提供
clone()方法。通过重写clone函数进行对象大量的复制,减少冗余、提高效率。 -

-
-
1 2 3 4 5 6 7 8 9 10 11 12 13 14 15 16 17 18 19 20 21 22 23 24 25 26 27 28 29 30 31 32 33 34 35 36 37 38 39 40 41 42 43 44 45 46 47 48 49 50 51 52 53 54 55 56 57 58 59 60 61 62 63 64 65 66 67 68 69 70 71 72 73 74 75 76 77 78 79 80 81 82 83 84 85 86 87 88 89 90 91 92 93 94 95 96 97 98 99 100 101 102 103 104 105 106 107 108 109 110 111 112 113 114 115 116 117 118 119 120 121 122 123 124 125 126 127 128 129 130 131 132 133 134 135 136 137 138 139 140 141 142 143 144 145 146 147 148 149 150 151 152 153 154 155 156 157 158 159 160 161#include <iostream> #include <string> #include <sstream> #include <typeinfo> using namespace std; template <class T> string iToStr(T value) { stringstream ss; ss << value; return ss.str(); } class OrderApi { public: virtual int getOrderProductNum() = 0; virtual void setOrderProductNum(int num) = 0; virtual string getOrderContent() = 0; protected: //构造函数保护起来 OrderApi() {} }; class HomeOrder : public OrderApi { public: int getOrderProductNum() { return m_orderProductNum; } void setOrderProductNum(int num) { m_orderProductNum = num; } string getOrderContent() { return "本次订单的客户是" + m_strCustomerName + "订单的id" + m_strProductId + "订单的数量是" + iToStr(m_orderProductNum); } void setCustomerName(string strCustomerName) { m_strCustomerName = strCustomerName; } string getCustomerName() { return m_strCustomerName; } void setProductId(string strProductId) { m_strProductId = strProductId; } string getProductId() { return m_strProductId; } private: string m_strCustomerName; string m_strProductId; int m_orderProductNum; }; class AboardOrder : public OrderApi { public: int getOrderProductNum() { return m_orderProductNum; } void setOrderProductNum(int num) { m_orderProductNum = num; } string getOrderContent() { return "本次订单的客户是" + m_strCustomerName + "订单的id" + m_strProductId + "订单的数量是" + iToStr(m_orderProductNum); } void setCustomerName(string strCustomerName) { m_strCustomerName = strCustomerName; } string getCustomerName() { return m_strCustomerName; } void setProductId(string strProductId) { m_strProductId = strProductId; } string getProductId() { return m_strProductId; } private: string m_strCustomerName; string m_strProductId; int m_orderProductNum; }; class OrderBusiness { public: void saveOrder(OrderApi *pOrder); }; void OrderBusiness::saveOrder(OrderApi *pOrder) { //判读一下,工件的数量有无超过200 while (pOrder->getOrderProductNum() > 200) { //新建一个订单 OrderApi *pNewOrder = nullptr; if (dynamic_cast<HomeOrder *>(pOrder) != nullptr) { //创建一个新对象,去暂存我们的目标 HomeOrder *p2 = new HomeOrder; //赋值对象 HomeOrder *p1 = static_cast<HomeOrder *>(pOrder); p2->setOrderProductNum(200); p2->setCustomerName(p1->getCustomerName()); p2->setProductId(p1->getProductId()); pNewOrder = p2; } //海外订单 if (dynamic_cast<AboardOrder *>(pOrder) != nullptr) { //创建一个新对象,去暂存我们的目标 AboardOrder *p2 = new AboardOrder; //赋值对象 AboardOrder *p1 = static_cast<AboardOrder *>(pOrder); p2->setOrderProductNum(200); p2->setCustomerName(p1->getCustomerName()); p2->setProductId(p1->getProductId()); pNewOrder = p2; } //原来的订单,还是保留的,只是,数量要加少200 pOrder->setOrderProductNum(pOrder->getOrderProductNum() - 200); cout << "新订单是" << pNewOrder->getOrderContent() << endl; } //不超过200个 cout << "最终的订单是" << pOrder->getOrderContent() << endl; } int main(void) { HomeOrder *pHome = new HomeOrder; pHome->setOrderProductNum(512); pHome->setCustomerName("tyc"); pHome->setProductId("原型模式"); OrderBusiness *pOb = new OrderBusiness(); pOb->saveOrder(pHome); system("pause"); return 0; } -
<<Design Patterns Explained Simply>>的例子 -
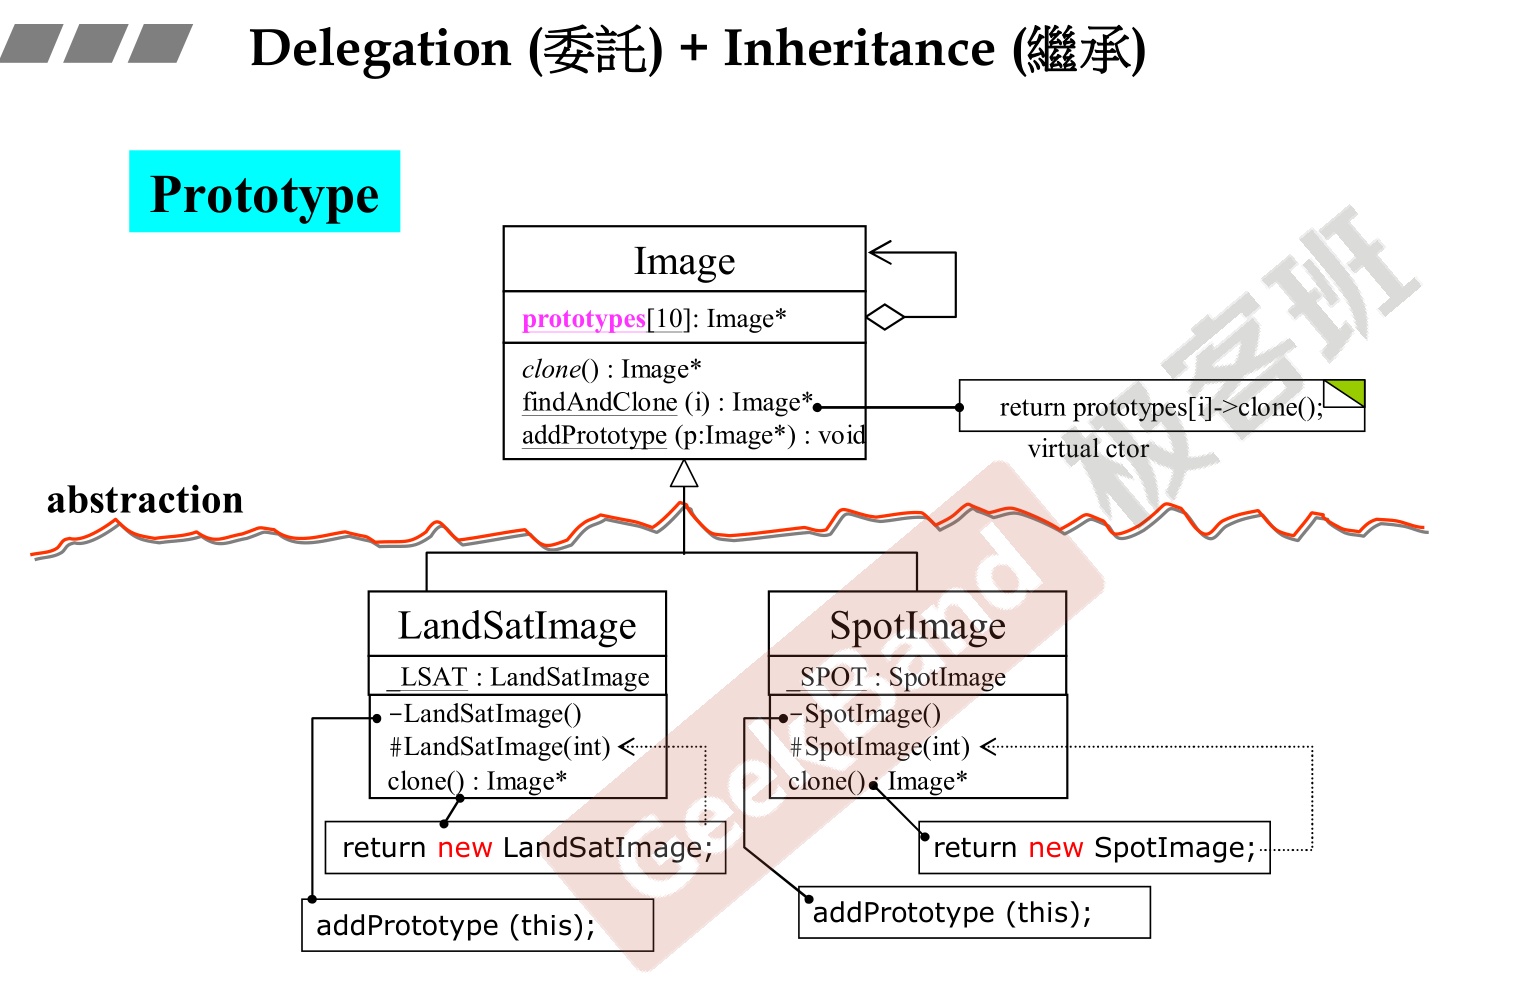
十四、面向对象高级开发(下)-侯捷-笔记
1. 概述
-
本次课程主要是在上的基础上,把一些小的知识点作进一步讲解。
-
-
c++标准库——容器+算法
- 容器-》迭代器
- 算法-》仿函数
-

2. 转换函数(Conversion function)+ explict关键字
2.1 把类转为其他数值
-
把类的定义转为其他数值。例如下列运算中把分数转为double类型。编译器会默认调用,在没有歧义的情况下。
-
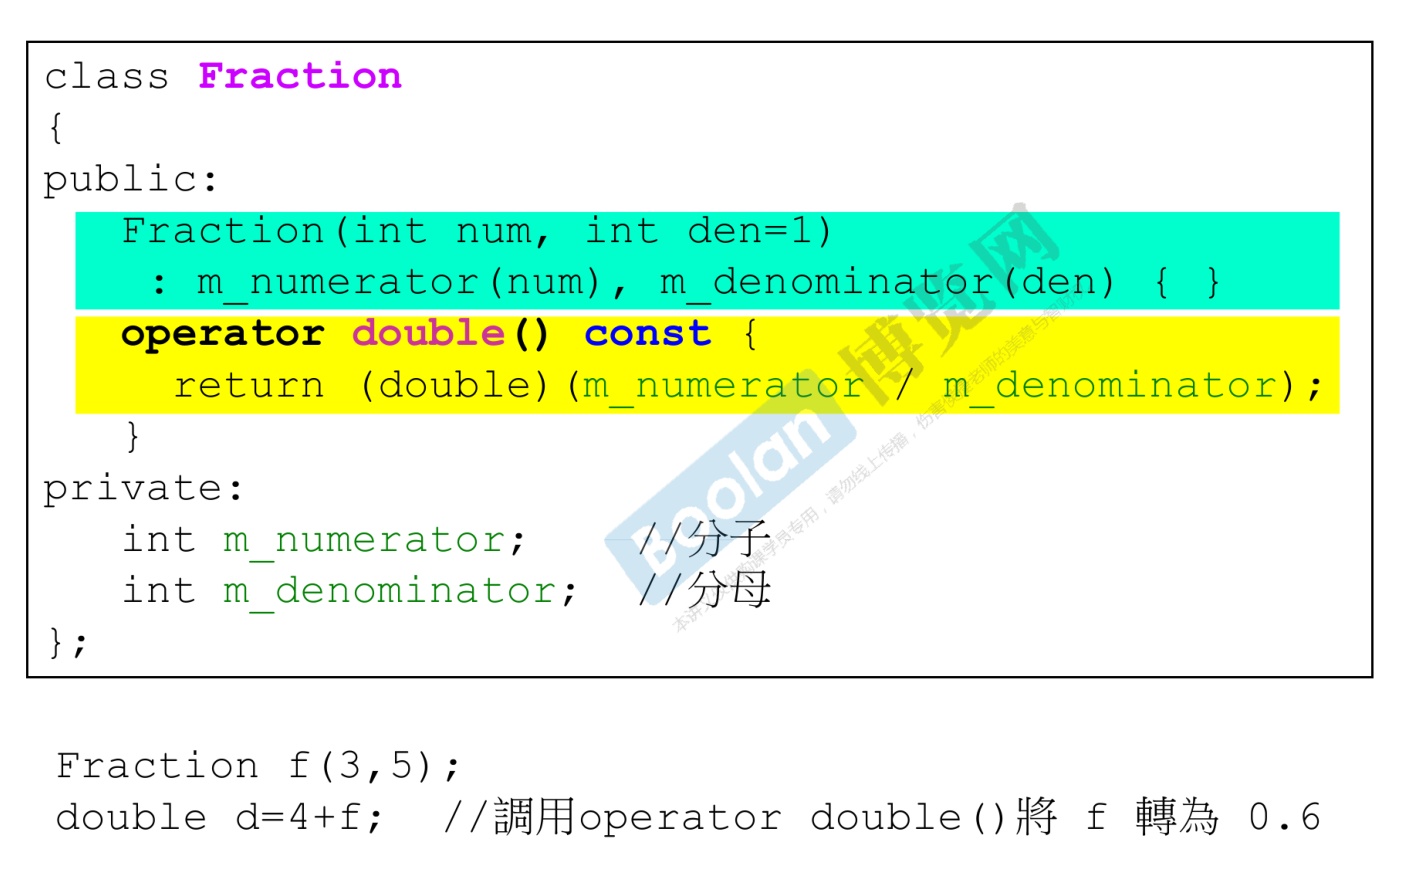
-
1 2 3 4 5 6 7 8 9 10 11 12 13 14 15 16 17 18 19 20 21 22 23 24 25 26 27 28 29#include <iostream> using namespace std; class Fraction { public: Fraction(int num, int par) : m_num(num), m_par(par) { } operator double() const { return double(m_num) / m_par; } private: int m_num; //分子 int m_par; //分母 }; int main() { Fraction F(3, 6); double re = F + 4; cout << "plus result " << re << endl; return 0; } /*输出结果 plus result 4.5
2.2 调用-非显式单参数构造函数-把其他数值转为类
-
非显式单参数即——non-explicit-one-argument-ctor。一般情况下,编译器默认都是非显式的,除非你加了explict关键字。
-
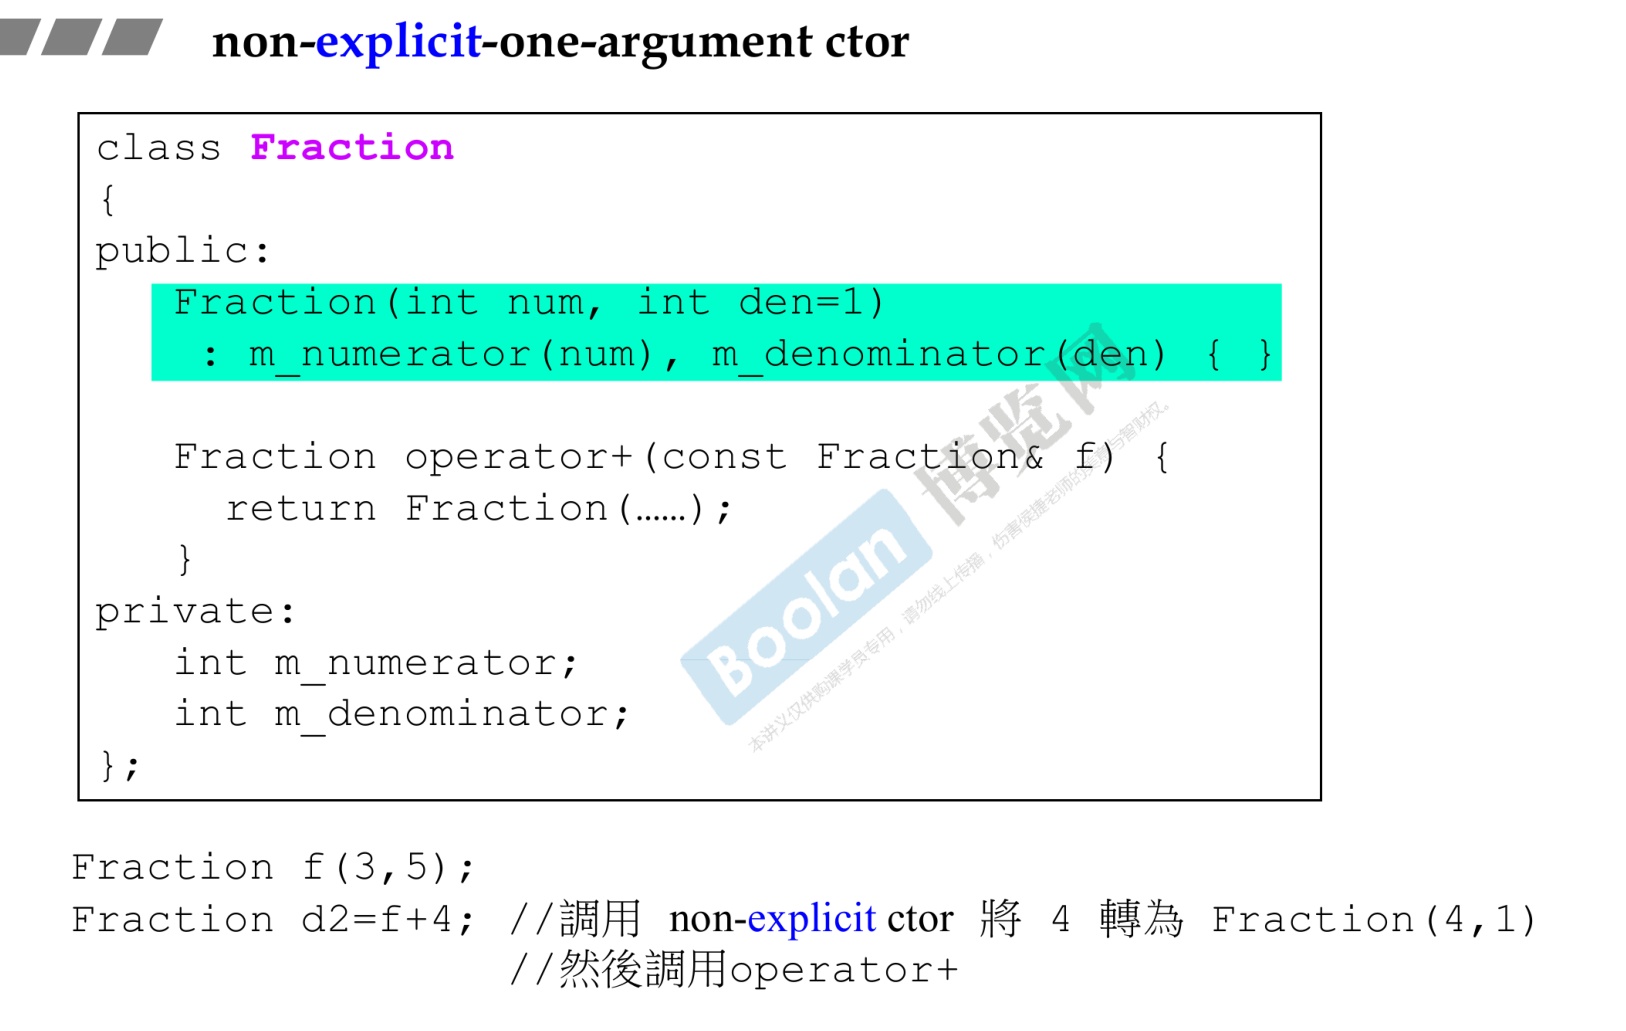
-
1 2 3 4 5 6 7 8 9 10 11 12 13 14 15 16 17 18 19 20 21 22 23 24 25 26 27 28 29 30 31 32 33 34 35 36 37#include <iostream> using namespace std; class Fraction { public: Fraction(int num, int par = 1) : m_num(num), m_par(par) { } Fraction operator+(const Fraction &f) { // 简单起见,随便定义一个加法即可 return Fraction(m_num + f.m_num, m_par + f.m_par); } int getnum() const { return m_num; } int getpar() const { return m_par; } private: int m_num; //分子 int m_par; //分母 }; ostream &operator<<(ostream &os, const Fraction &f) { return os << "分子 = " << f.getnum() << " 分母 = " << f.getpar() << endl; } int main() { Fraction F(3, 6); Fraction re = F + 4; cout << "plus result " << re << endl; return 0; } /*输出结果 plus result 分子 = 7 分母 = 7 -
但是需要注意的是,当把Fraction转为double 的转换函数加上的时候,因为
Fraction re = F + 4两条路都可以走通,无论是类转double还是int转类最后操作符重载,所以编译器两者无法比较,会报错。 -
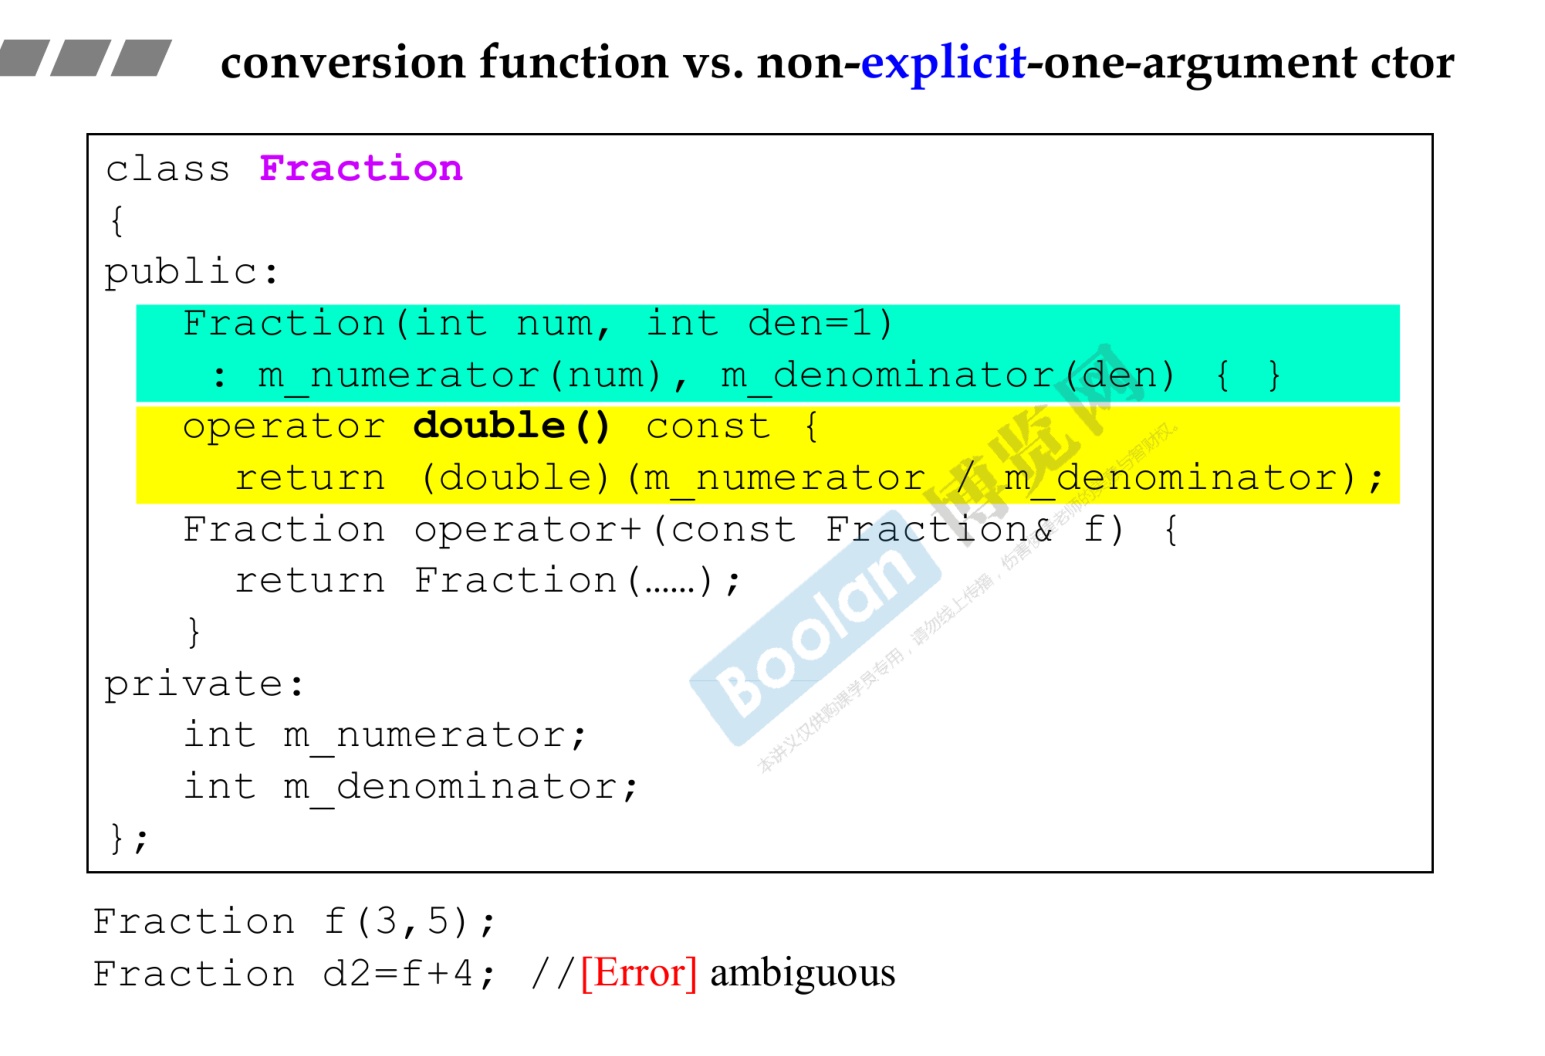
-
1 2 3 4 5 6 7 8 9 10 11 12 13 14 15 16 17 18 19 20 21 22 23 24 25 26 27 28 29 30 31 32 33 34 35 36 37 38 39 40 41 42 43 44#include <iostream> using namespace std; class Fraction { public: Fraction(int num, int par = 1) : m_num(num), m_par(par) { } operator double() const { return double(m_num) / m_par; } Fraction operator+(const Fraction &f) { // 简单起见,随便定义一个加法即可 return Fraction(m_num + f.m_num, m_par + f.m_par); } int getnum() const { return m_num; } int getpar() const { return m_par; } private: int m_num; //分子 int m_par; //分母 }; ostream &operator<<(ostream &os, const Fraction &f) { return os << "分子 = " << f.getnum() << " 分母 = " << f.getpar() << endl; } int main() { Fraction F(3, 6); Fraction re = F + 4; cout << "plus result " << re << endl; return 0; } /* 错误类型 [{ "message": "ambiguous overload for 'operator+' (operand types are 'Fraction' and 'int')", }]
2.3 调用-显式单参数构造函数
-
显式调用必须要明确,编译器不会帮你隐式调用。
-
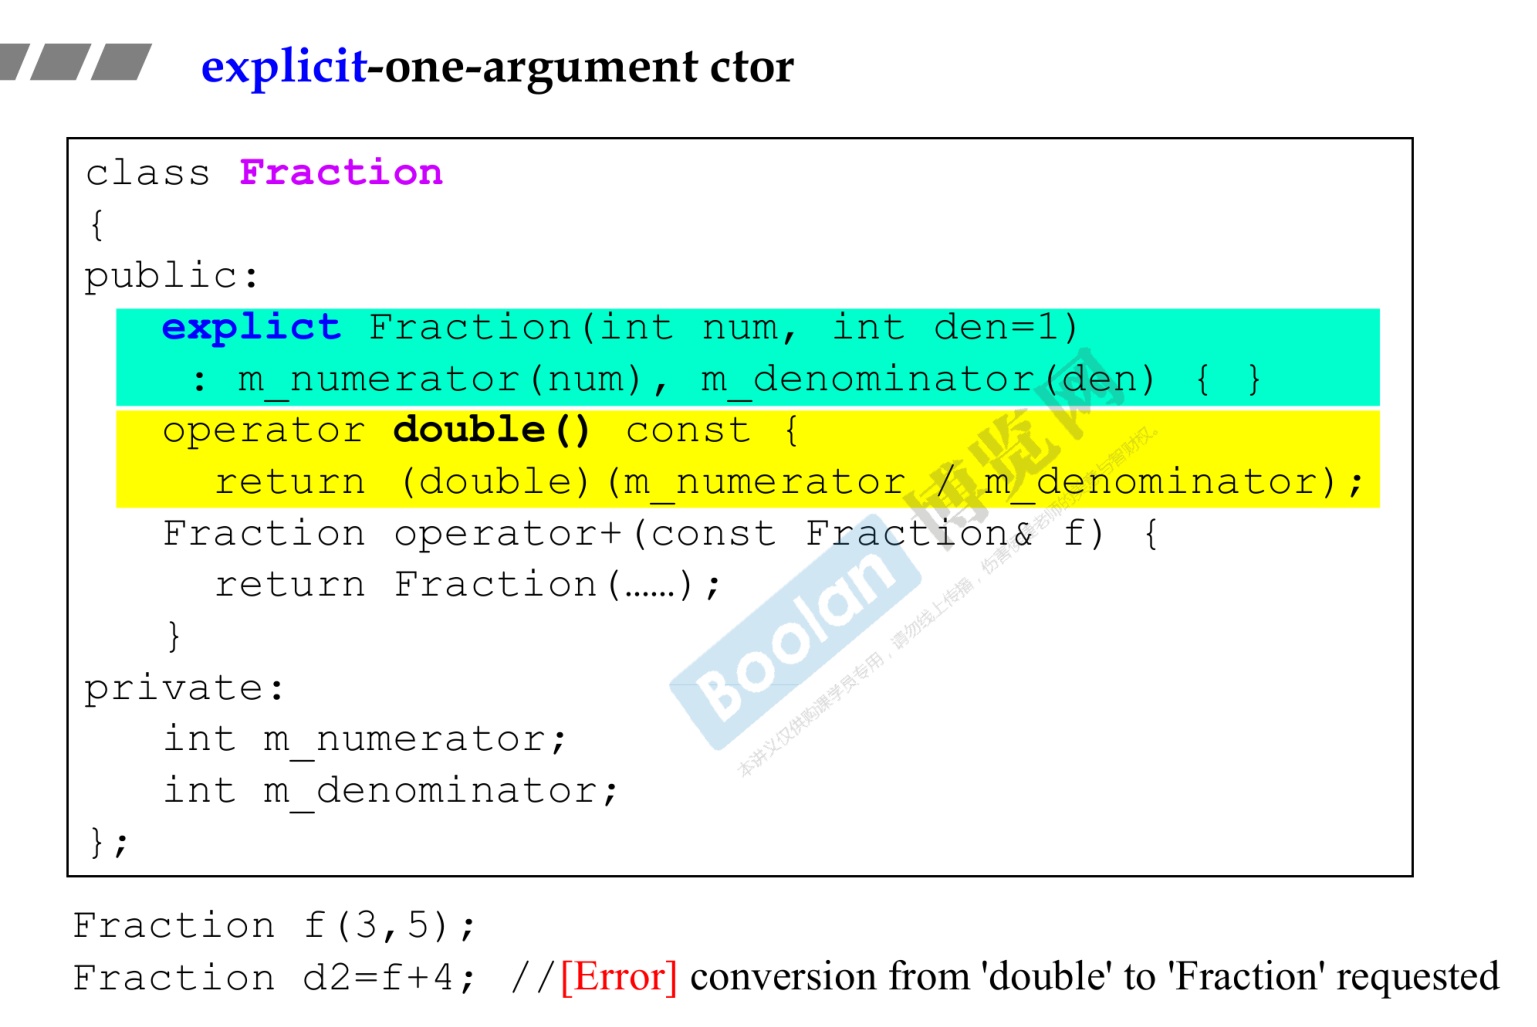
-
1 2 3 4 5 6 7 8 9 10 11 12 13 14 15 16 17 18 19 20 21 22 23 24 25 26 27 28 29 30 31 32 33 34 35 36 37 38 39 40#include <iostream> using namespace std; class Fraction { public: explicit Fraction(int num, int par = 1) : m_num(num), m_par(par) { } operator double() const { return double(m_num) / m_par; } Fraction operator+(const Fraction &f) { // 简单起见,随便定义一个加法即可 return Fraction(m_num + f.m_num, m_par + f.m_par); } int getnum() const { return m_num; } int getpar() const { return m_par; } private: int m_num; //分子 int m_par; //分母 }; ostream &operator<<(ostream &os, const Fraction &f) { return os << "分子 = " << f.getnum() << " 分母 = " << f.getpar() << endl; } int main() { Fraction F(3, 6); double re = F + 4; //运行成功 Fraction RE2 = F + 5; //报错,显示没有对于的转换函数把double转为Fraction cout << "plus result " << re << endl; return 0; }
2.4 转换函数具体例子
- 来源STL源码

3. pointer-like classes(类指针的类)
3.1 关于智能指针
- 一般都是需要重载操作符
*和->。 - 重载
->的时候需要注意的是,直接返回的就是指针,编译器会继续调用->直到找到要调用的类的方法。 - 可以下参考面的PPT,可以看到,调用的时候只有一个
->符号,而函数内部实现只是返回指针,但是他能准确找到需要调用的method。 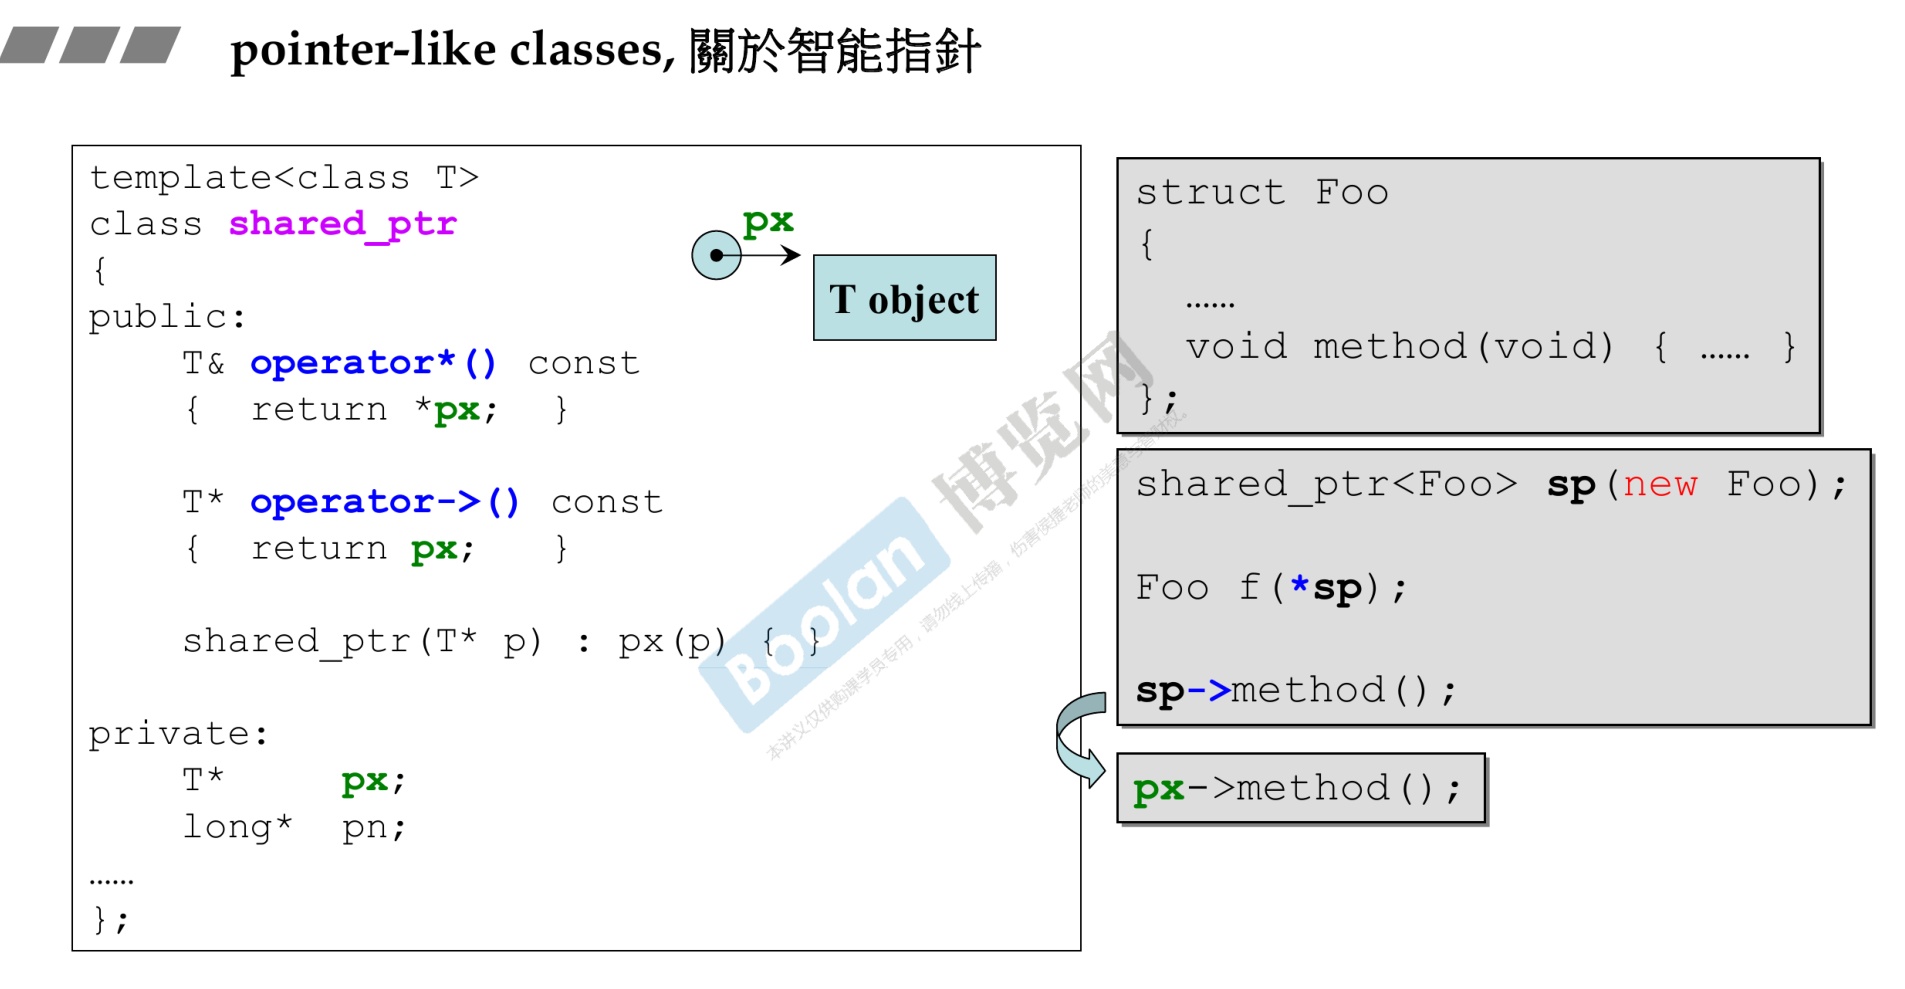
3.2 关于迭代器-Iterator
-
迭代器本质上也是智能指针,只是其本身的操作符重载比较多,不只是重载了
*和->,还有++、--、等于不等于等等。 -

-
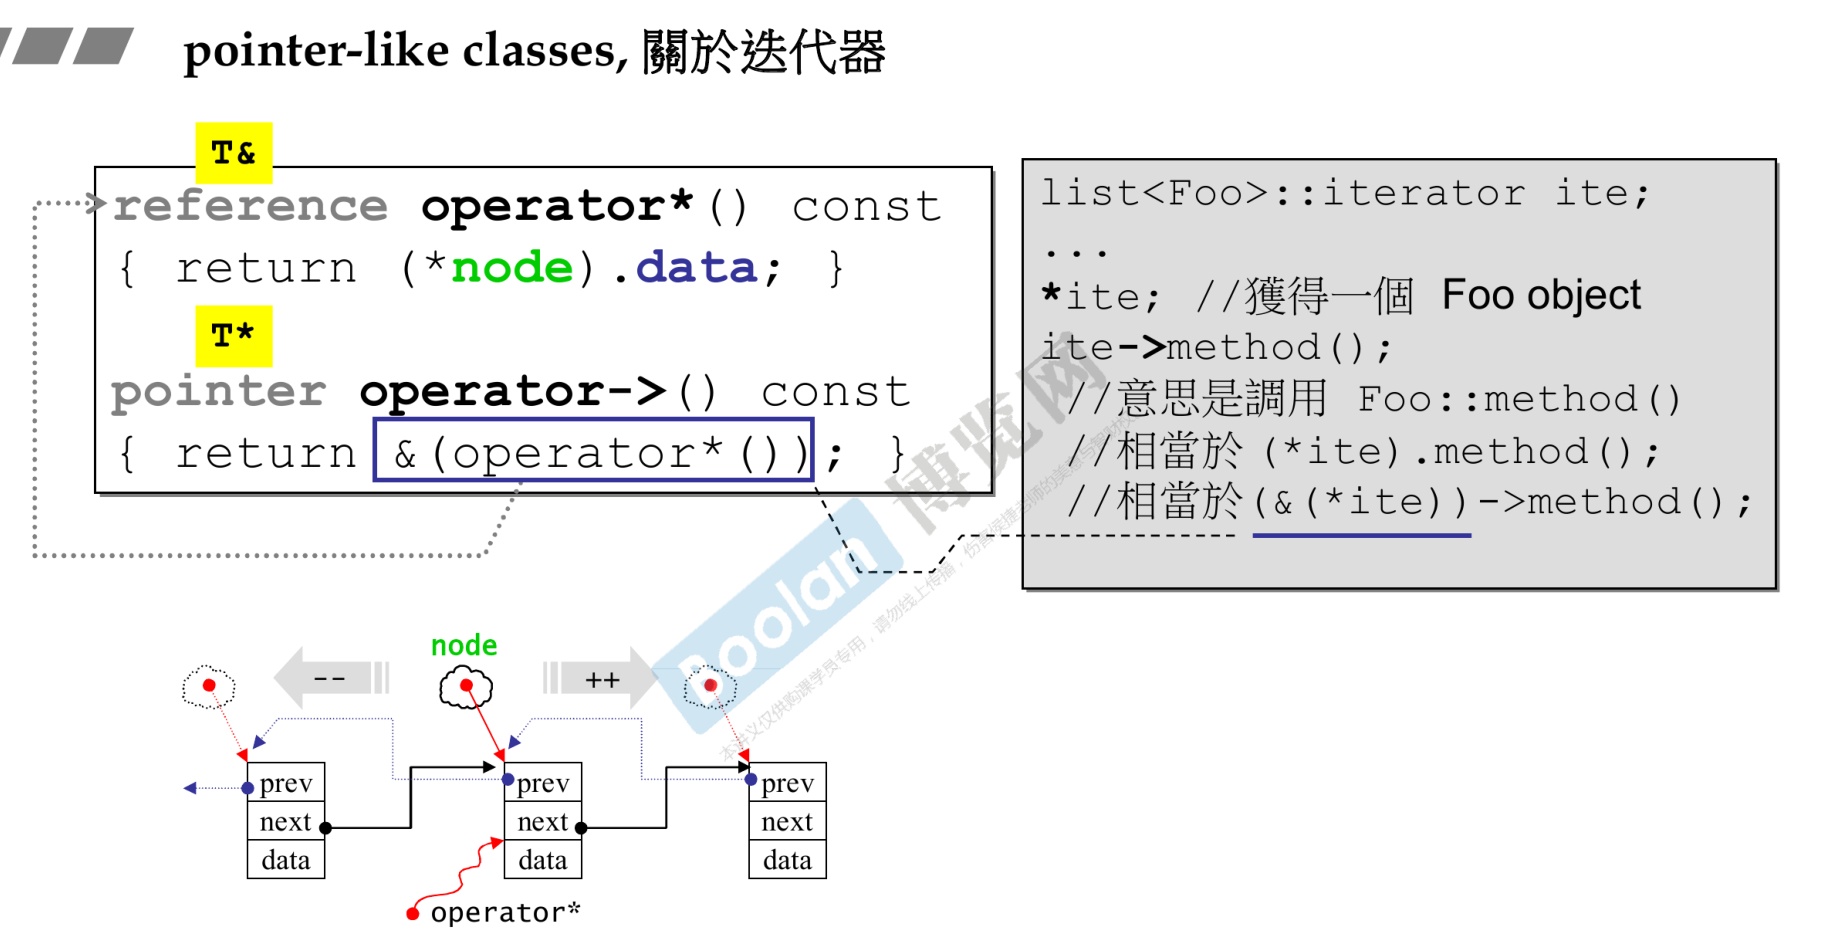
4. function-like classes(所谓仿函数)
-
仿函数的通俗定义:仿函数(functor)又称为函数对象(function object)是一个能行使函数功能的类。
-
仿函数的语法几乎和我们普通的函数调用一样,不过作为仿函数的类,都必须重载operator()运算符。
-
举个例子
-
1 2 3 4 5 6 7 8 9 10 11 12 13 14 15 16 17 18 19 20#include <bits/stdc++.h> using namespace std; struct IntLess { //注意,常量引用可以输入左值或右值,如果是右值的话不加const会报错的 bool operator()(const int &a, const int &b) const { return a < b; } }; int main() { IntLess ll; bool ce = ll(7, 5); cout << ce << endl; return 0; } -
为什么要使用仿函数呢 ? 1)仿函数比一般的函数灵活。
2)仿函数有类型识别,可以作为模板参数。
3)执行速度上仿函数比函数和指针要更快的。
-
怎么使用仿函数?
除了在stl里,别的地方你很少会看到仿函数的身影。而在stl里仿函数最常用的就是作为函数的参数,或者模板的参数。在STL里有自己预定义的仿函数,比如所有的运算符,=,-,*,/,比如比较符号<、>、<=、>=等。stl中的'<'仿函数是less:
-
1 2 3 4 5 6 7 8// TEMPLATE STRUCT less template<class _Ty> struct less : public binary_function<_Ty, _Ty, bool> { // functor for operator< bool operator()(const _Ty& _Left, const _Ty& _Right) const { // apply operator< to operands return (_Left < _Right);} };
-
-
利用仿函数给set集合自定义比较函数。
-
1 2 3 4 5 6 7 8 9 10 11 12 13 14 15 16 17 18 19 20 21 22 23 24 25 26 27 28 29 30 31 32 33 34 35 36 37 38 39 40 41 42 43 44 45 46 47 48 49 50 51#include <bits/stdc++.h> using namespace std; class Person { public: Person(string _firstname, string _lastname) { this->FirstName = _firstname; this->LastName = _lastname; } public: string FirstName; string LastName; }; // 定义()比较函数 class PersonCriterion { public: bool operator()(const Person &p1, const Person &p2) { return p1.LastName < p2.LastName || (!(p2.LastName < p1.LastName) && p1.FirstName < p2.FirstName); } }; int main(int argc, char *argv[]) { // 第二个参数表示排序函数 set<Person, PersonCriterion> colls; // 按姓名排列 colls.insert(Person("Tom", "James")); colls.insert(Person("Mike", "James")); colls.insert(Person("Jane", "Bush")); colls.insert(Person("Bill", "Gates")); std::set<Person, PersonCriterion>::iterator iter; for (iter = colls.begin(); iter != colls.end(); ++iter) { Person p = (Person)(*iter); cout << p.FirstName << " " << p.LastName << endl; } return 0; } /*输出 Jane Bush Bill Gates Mike James Tom James -
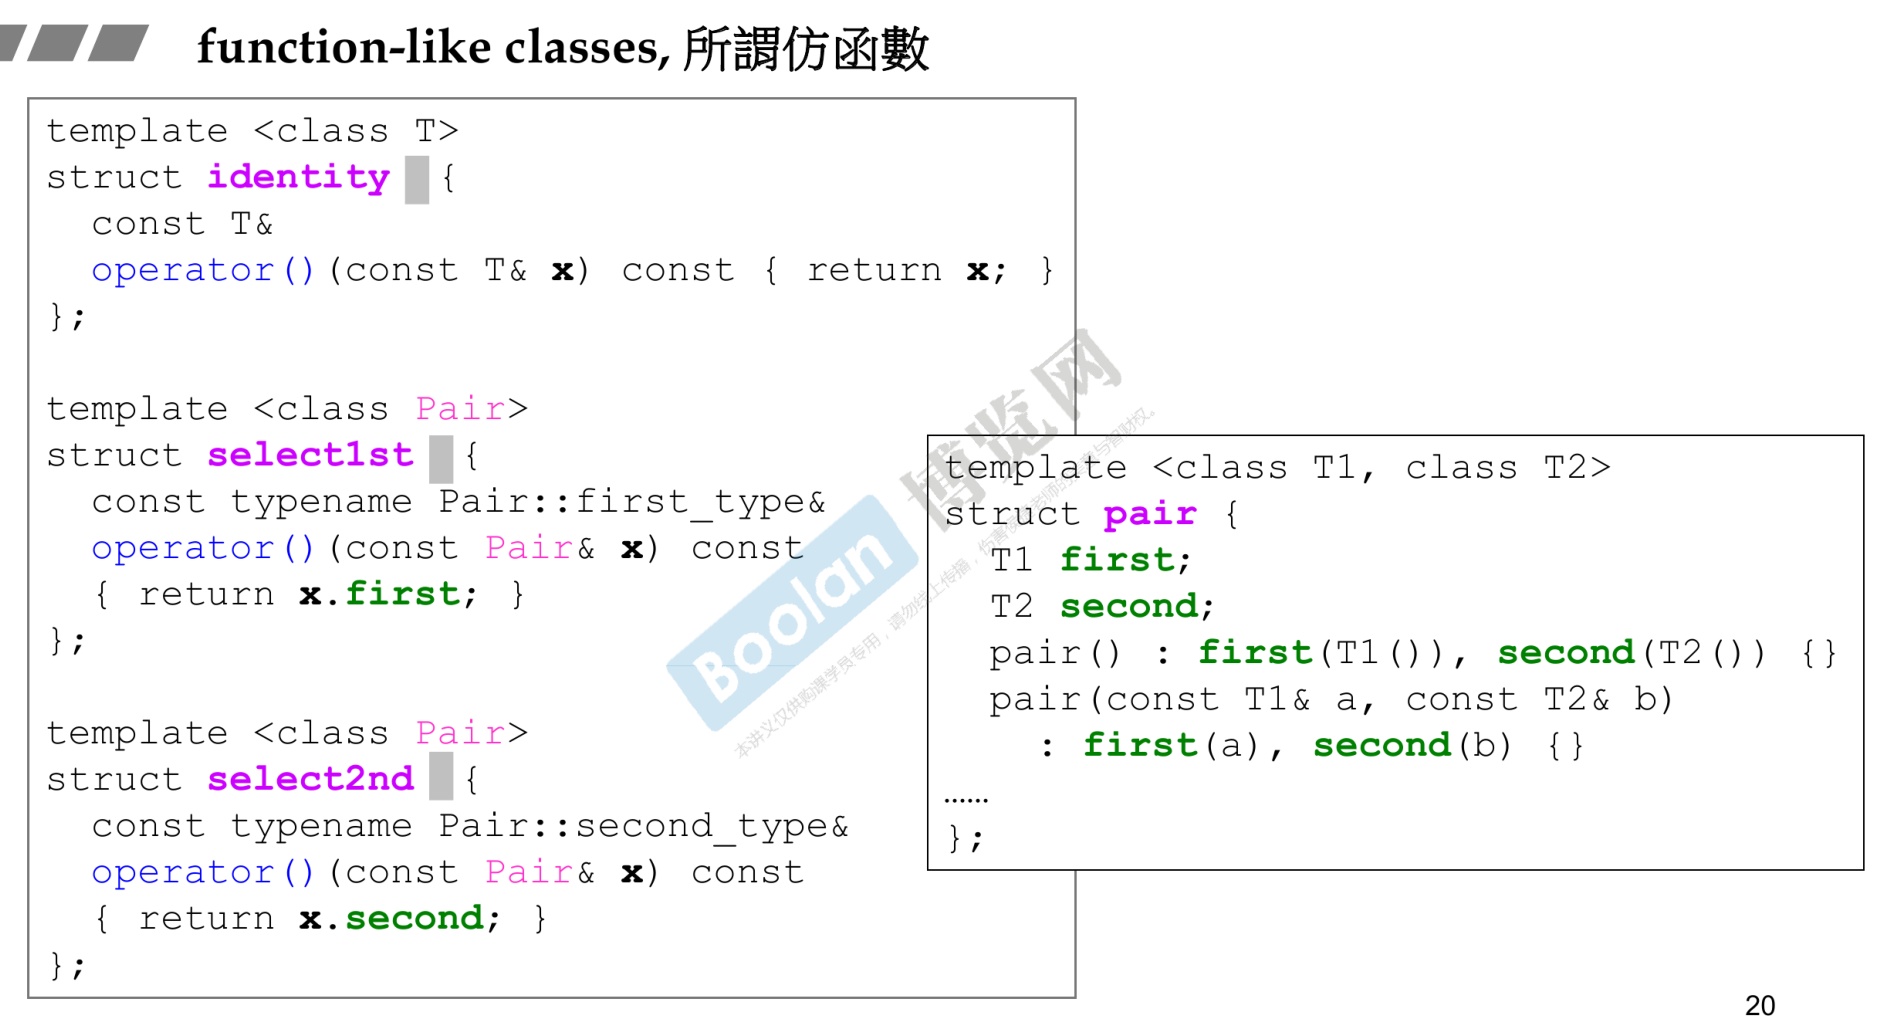
-
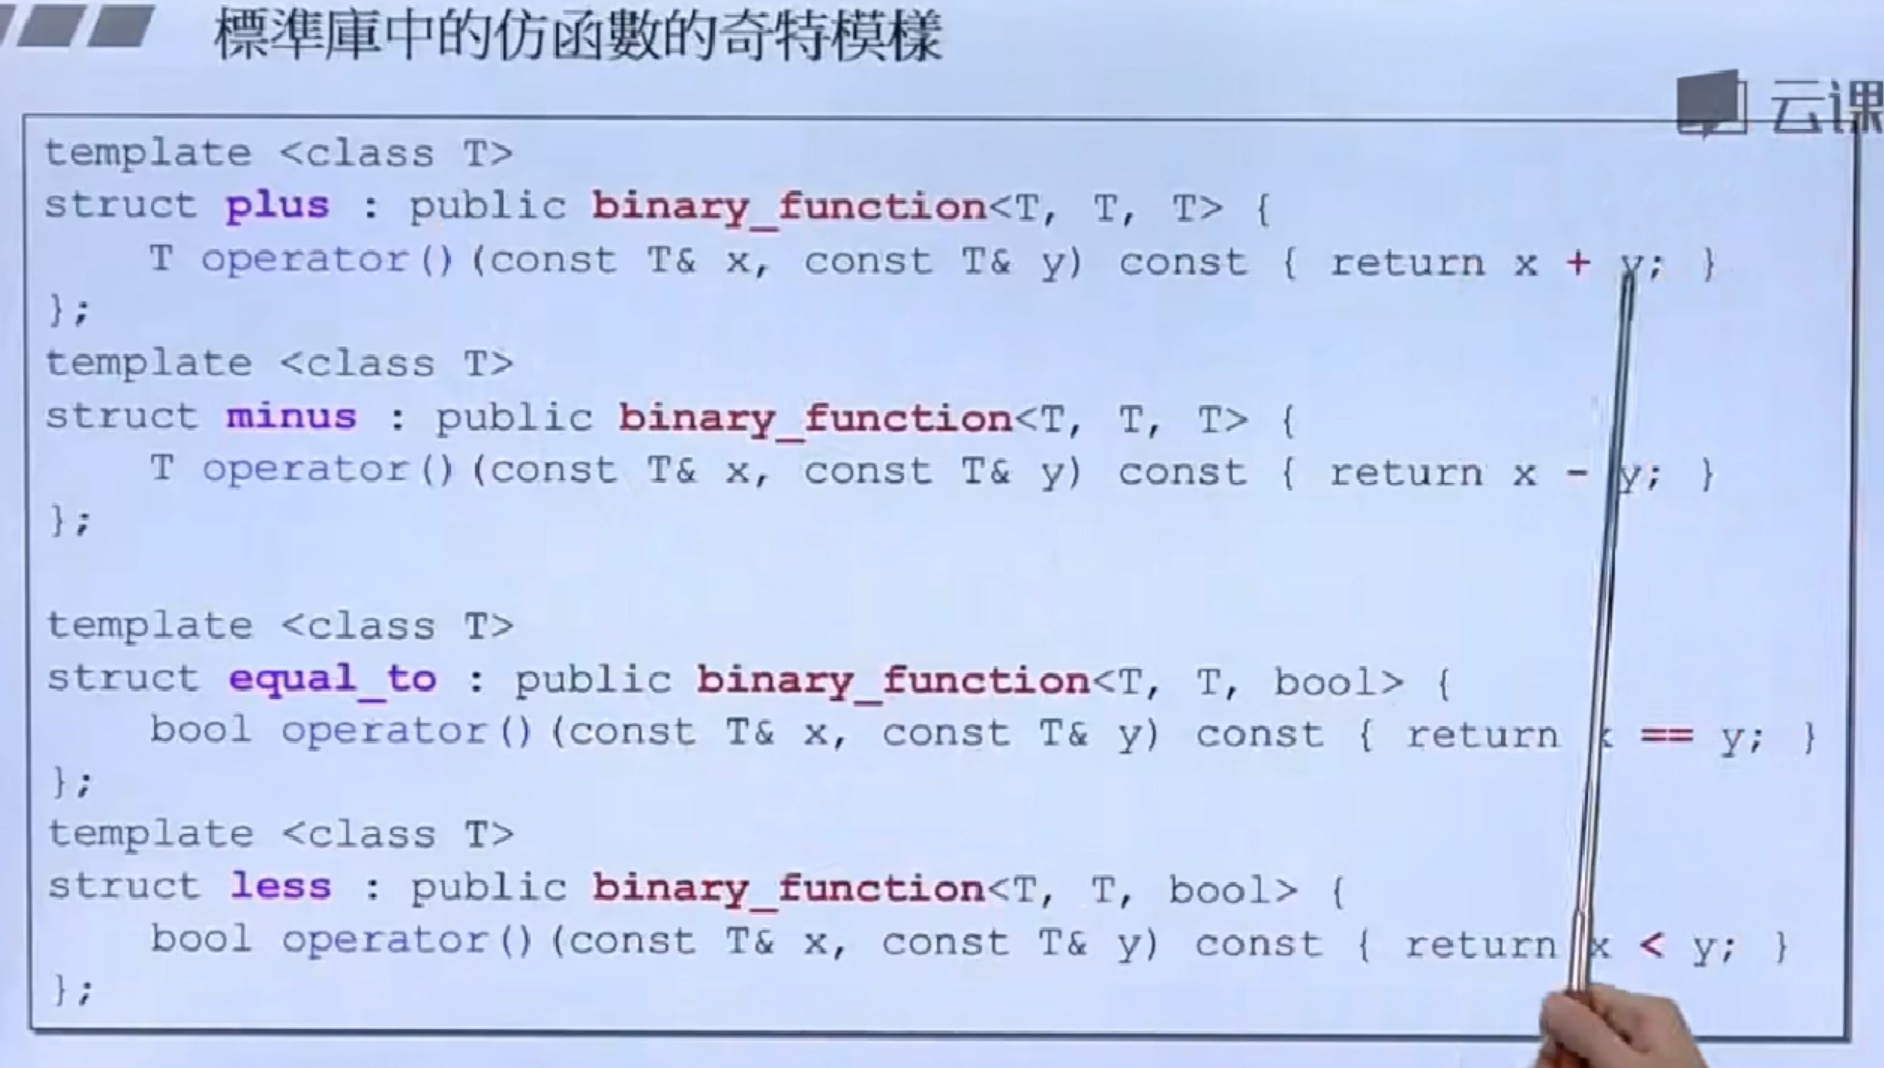
-
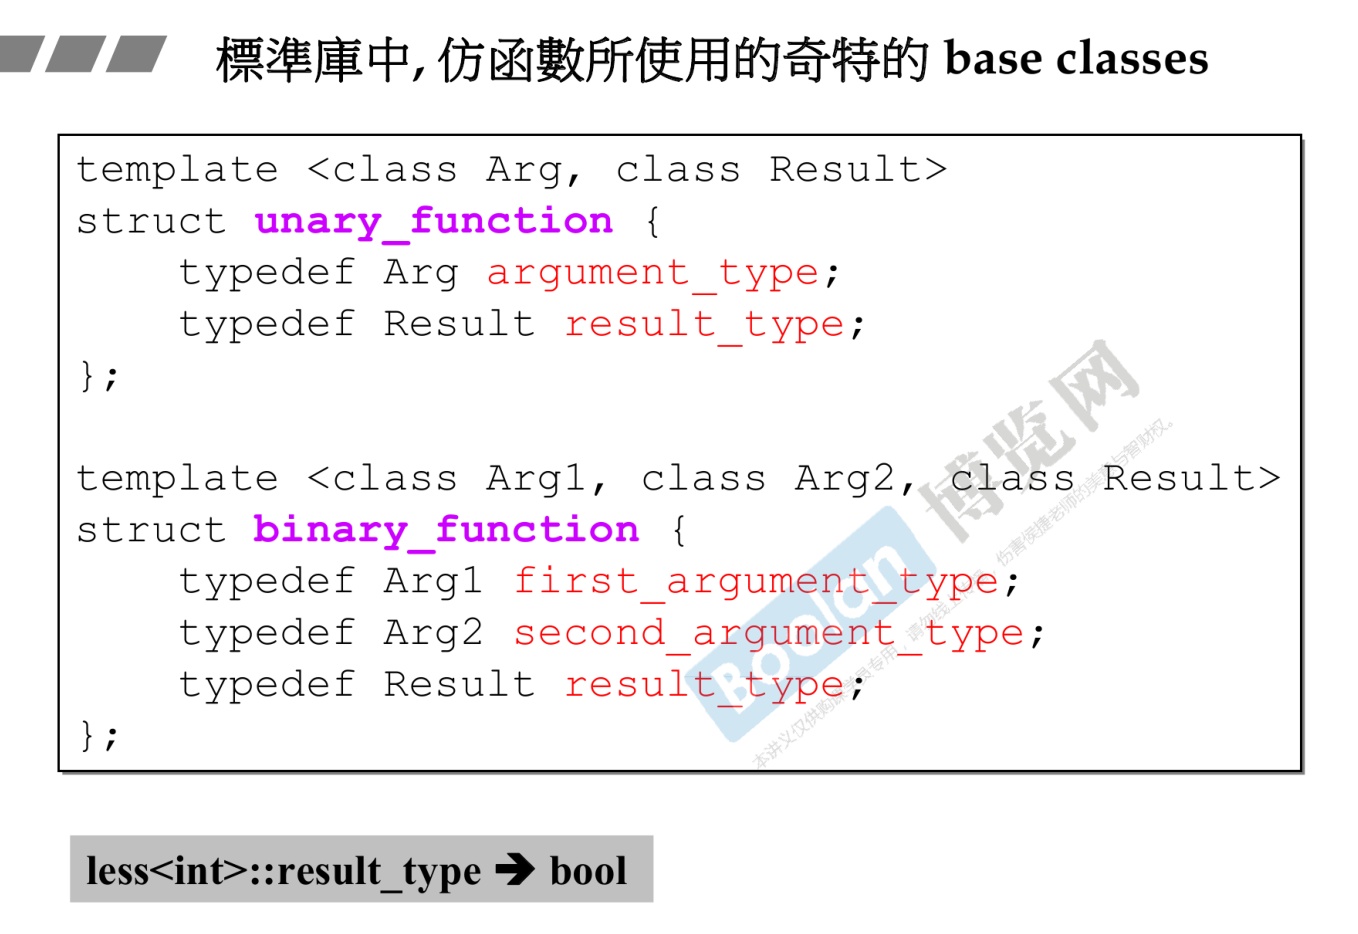
-
unary_function是用于创建具有一个参数的函数对象的基类。binary_function类似,只不过是定义了两个变量。 -
目前再c++17已经删除和弃用。
5. namespace 经验谈
-
namespace的主要用途就是为了避免命名冲突,在大型工程中尤为常见,自己在写一些测试代码时也可以使用命名空间封装起来。
-
如果加了namespace还冲突,那就没办法了。
-
1 2 3 4 5 6 7 8 9 10 11 12 13 14 15 16 17 18 19 20 21 22 23#include<iostream> using namespace std; namespace first{ void print(const string& input) { cout << input << endl; } } namespace second{ void print(const char* input) { string str = input; reverse(str.begin(), str.end()); cout << str << endl; } } int main() { using namespace second; using namespace first; print("hello");//会调用哪一个呢? return 0; } -
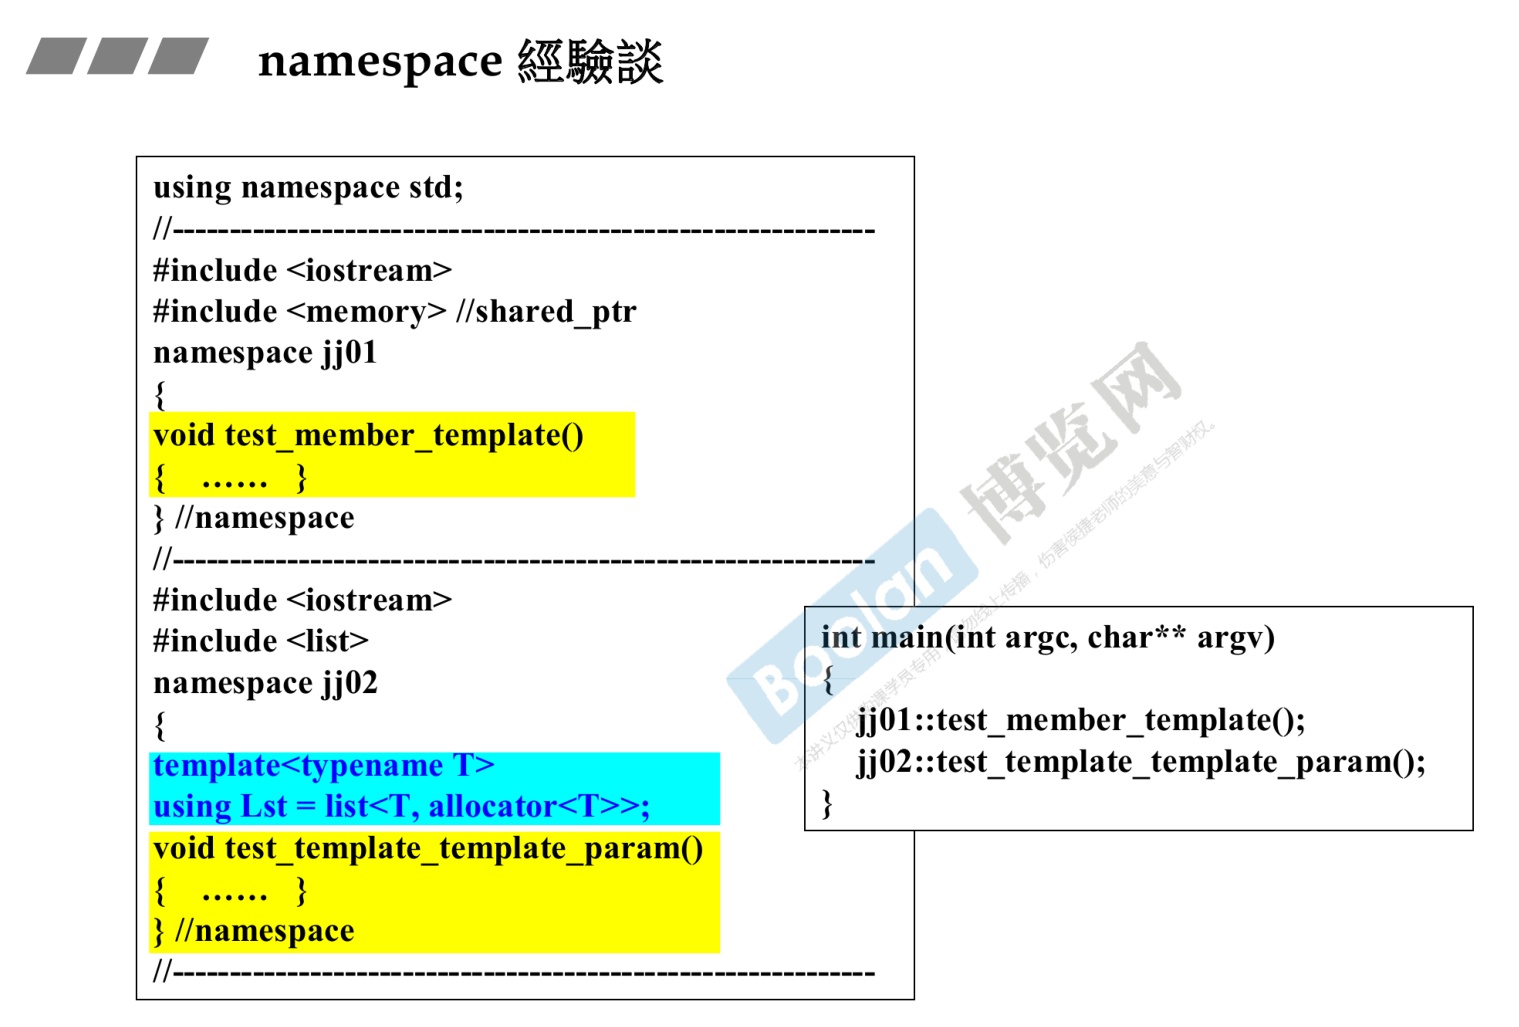
6. class templata 类模板
-
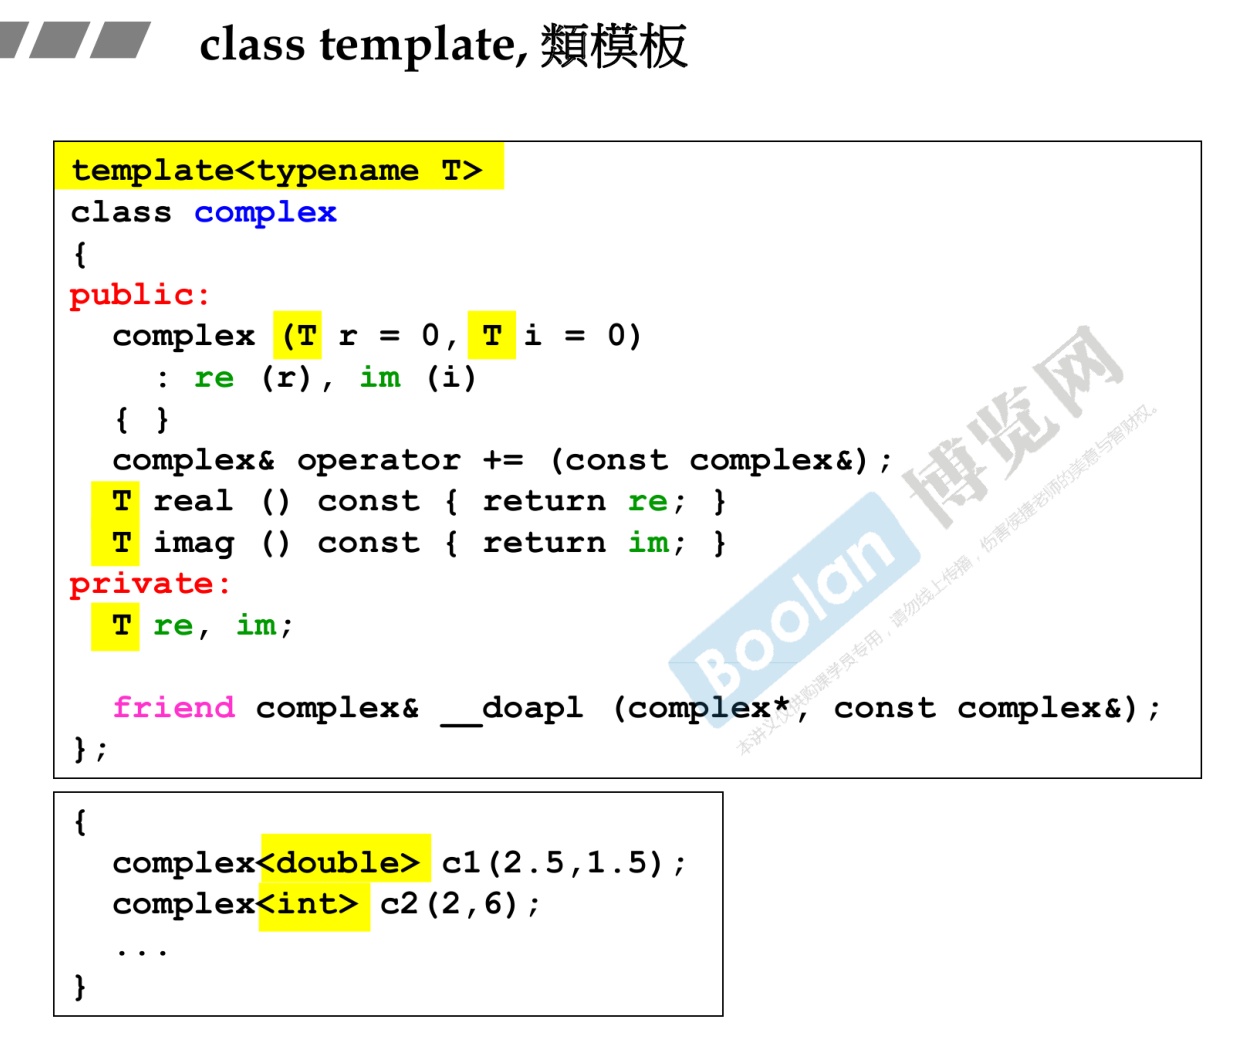
-
类模板实际使用一定要添加
<>来确定类的实际变量。 -
模板template中的class和typename区别
-
1.在类外或者方法外添加模板声明时,二者无区别。
-
2.当template< typename T>或者template< class T>中的T是一个类类型,而且这个类又有子类(假设名为 innerClass) 时,应该用 typename T::innerClass 的方式来声明innerClass变量,比如:
-
1typename T::innerClass myInnerObject; -
这里的 typename 告诉编译器,T::innerClass 是一个类,程序要声明一个 T::innerClass 类的对象myInnerObject。如果此时不加typename声明的话,编译器为理解为T中的一个静态成员innerClass,会报错。在这种情况下,typename 也不能替换成 class 。此时typename的作用是
嵌套依赖,可以提取出模板类类所定义的参数类型。
-
7. function template 函数模板
- 函数模板在实际使用的时候可以不添加
<>表示具体的类型,编译器会自动进行实参推导。 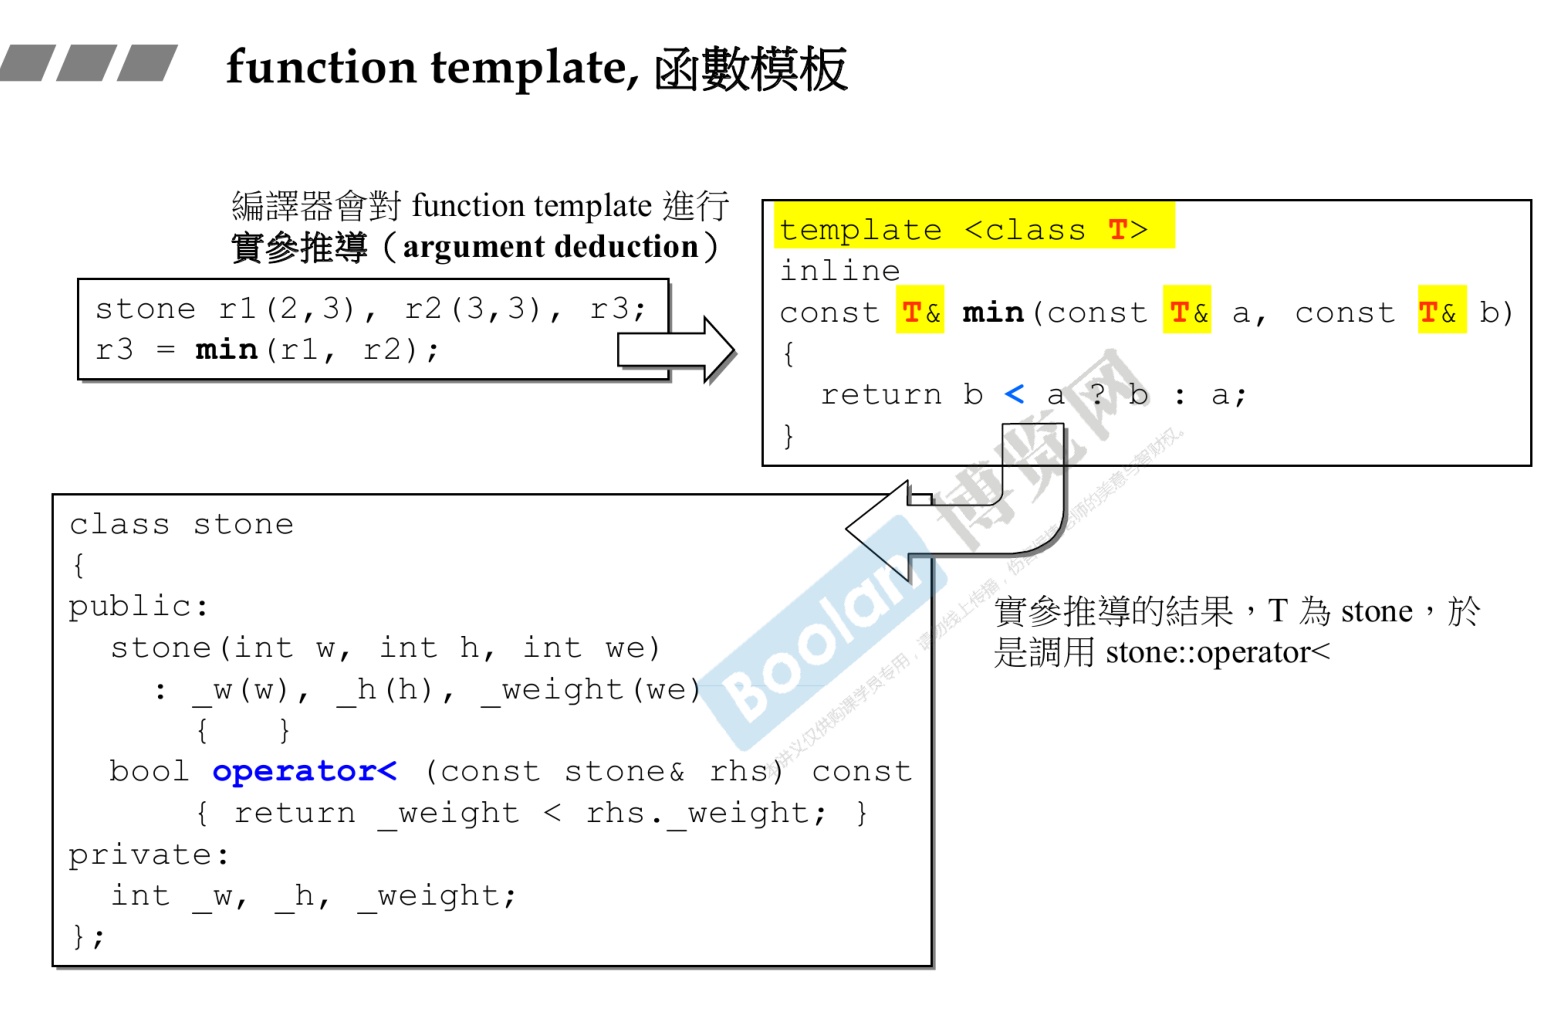
8. member template 成员模板
-
简单来说,就是类里面有某些成员数据,他用的是模板。
-
即模板可以用作结构、类或模板类的成员。
-
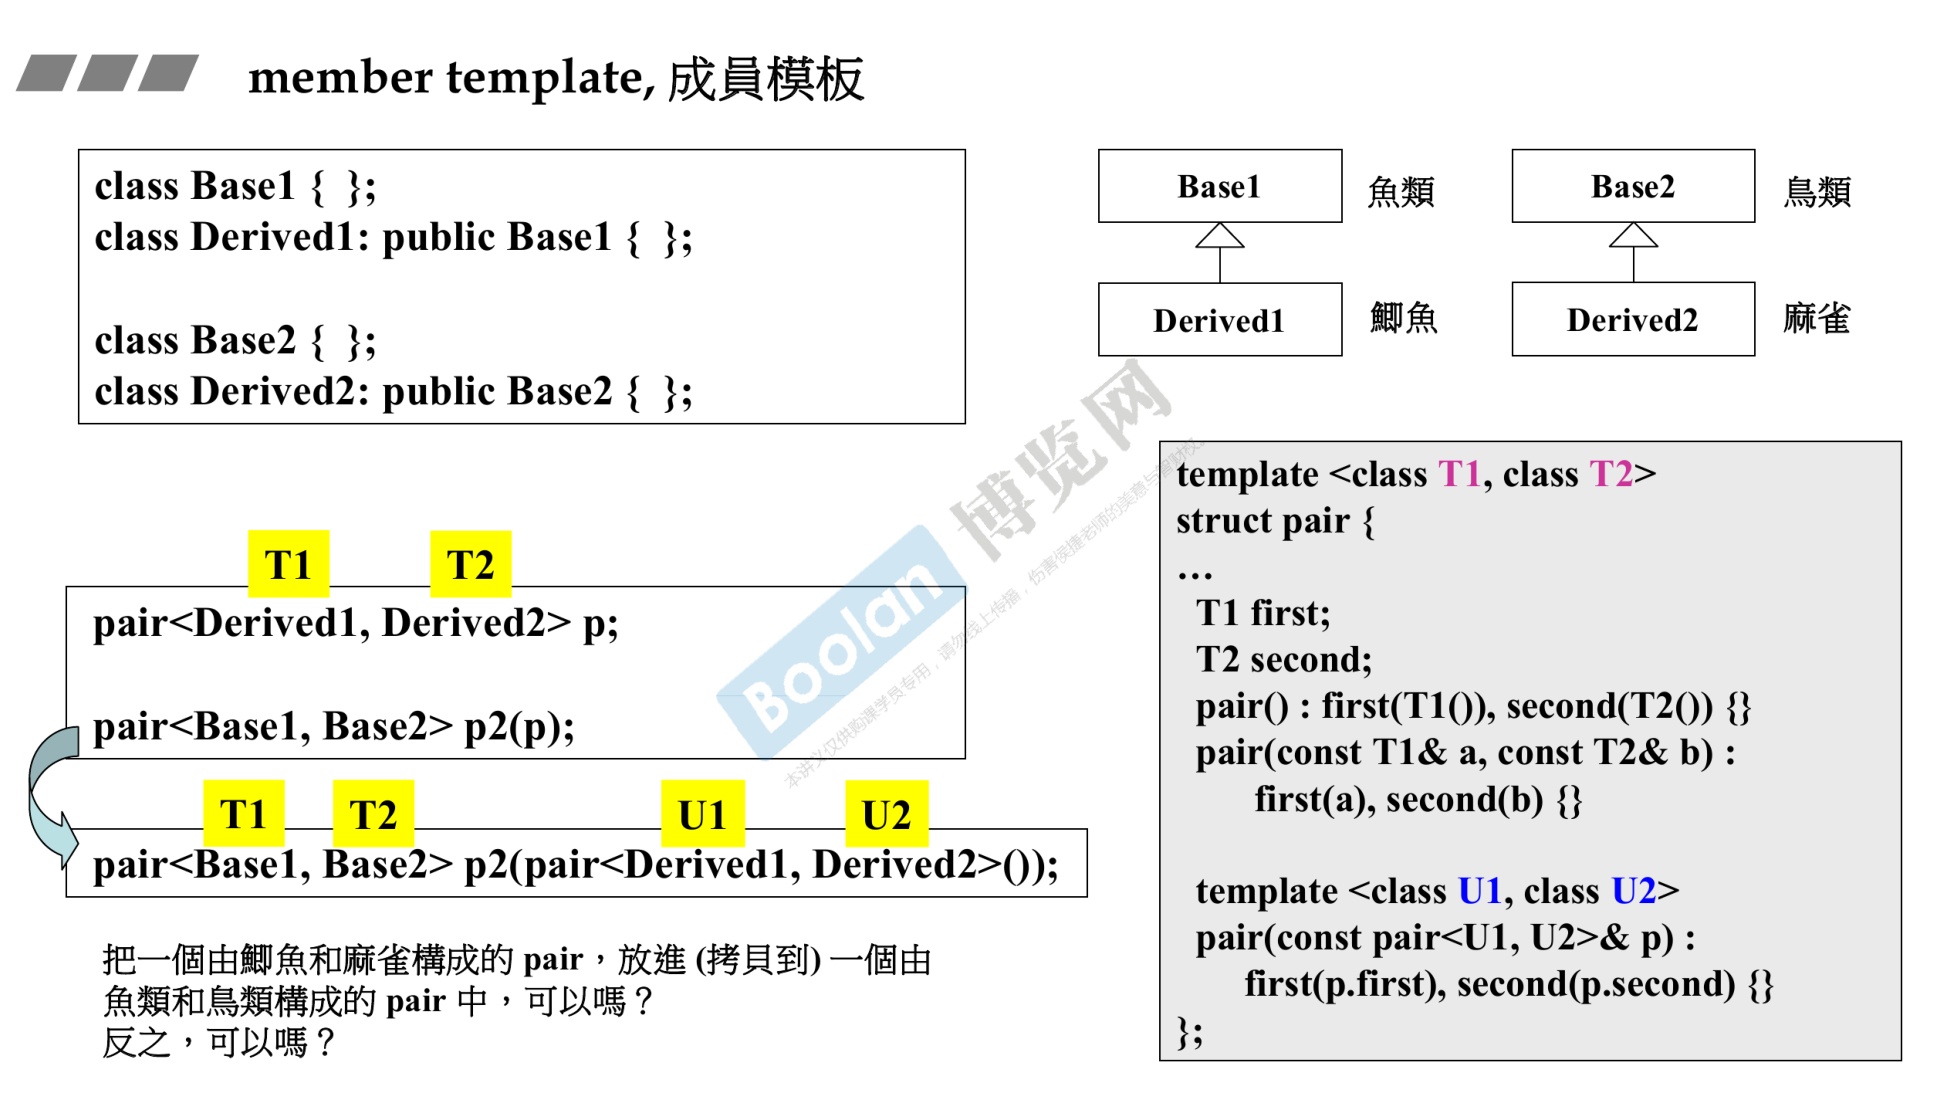
-
上面的问题,派生类放进由基类构造的pair进而初始化pair是可以的,但是反过来不行。因为派生类是可以转换为基类的,但是基类不能具体到某一个派生类,因为派生类有自己独有的方法。
-
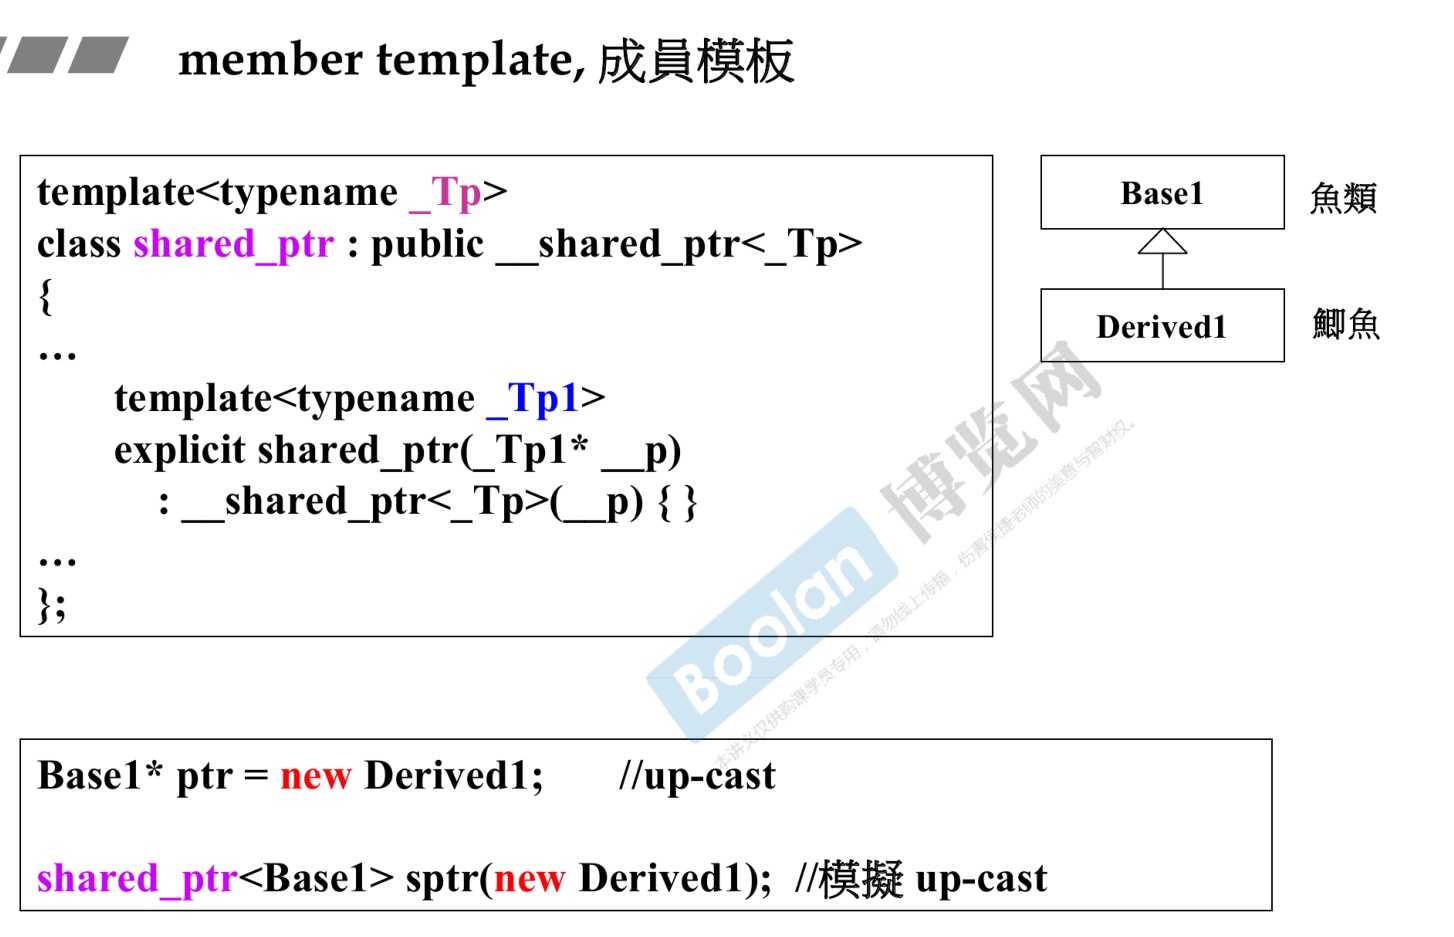
9. specialization 模板特化
-
什么叫泛化,泛化就是模板,因为模板说,我有一个类型,用的时候你可以随便指定。
-

-
模板特化也称为模板全特化。
-
模板特化(template specialization)不同于模板的实例化,模板参数在某种特定类型下的具体实现称为模板特化。模板特化有时也称之为模板的具体化,分别有函数模板特化和类模板特化。
-
必须实例化所有的模板形参。
-
一般语法。
-
1 2template <> declaration... -
例子
-
1 2 3 4 5 6 7 8 9 10 11 12 13 14 15 16 17 18 19 20 21 22 23 24 25 26 27 28#include <iostream> #include <string.h> using namespace std; template <typename T> T Max(T t1, T t2) { return (t1 > t2) ? t1 : t2; } typedef const char *CCP; template <> CCP Max<CCP>(CCP s1, CCP s2) { return (strcmp(s1, s2) > 0) ? s1 : s2; } int main() { // 隐式调用实例:int Max<int>(int,int) int i = Max(10, 5); // 显式调用特化版本:const char* Max<const char*>(const char*,const char*) const char *p = Max<const char *>("very", "good"); cout << "i:" << i << endl; cout << "p:" << p << endl; return 0; } -
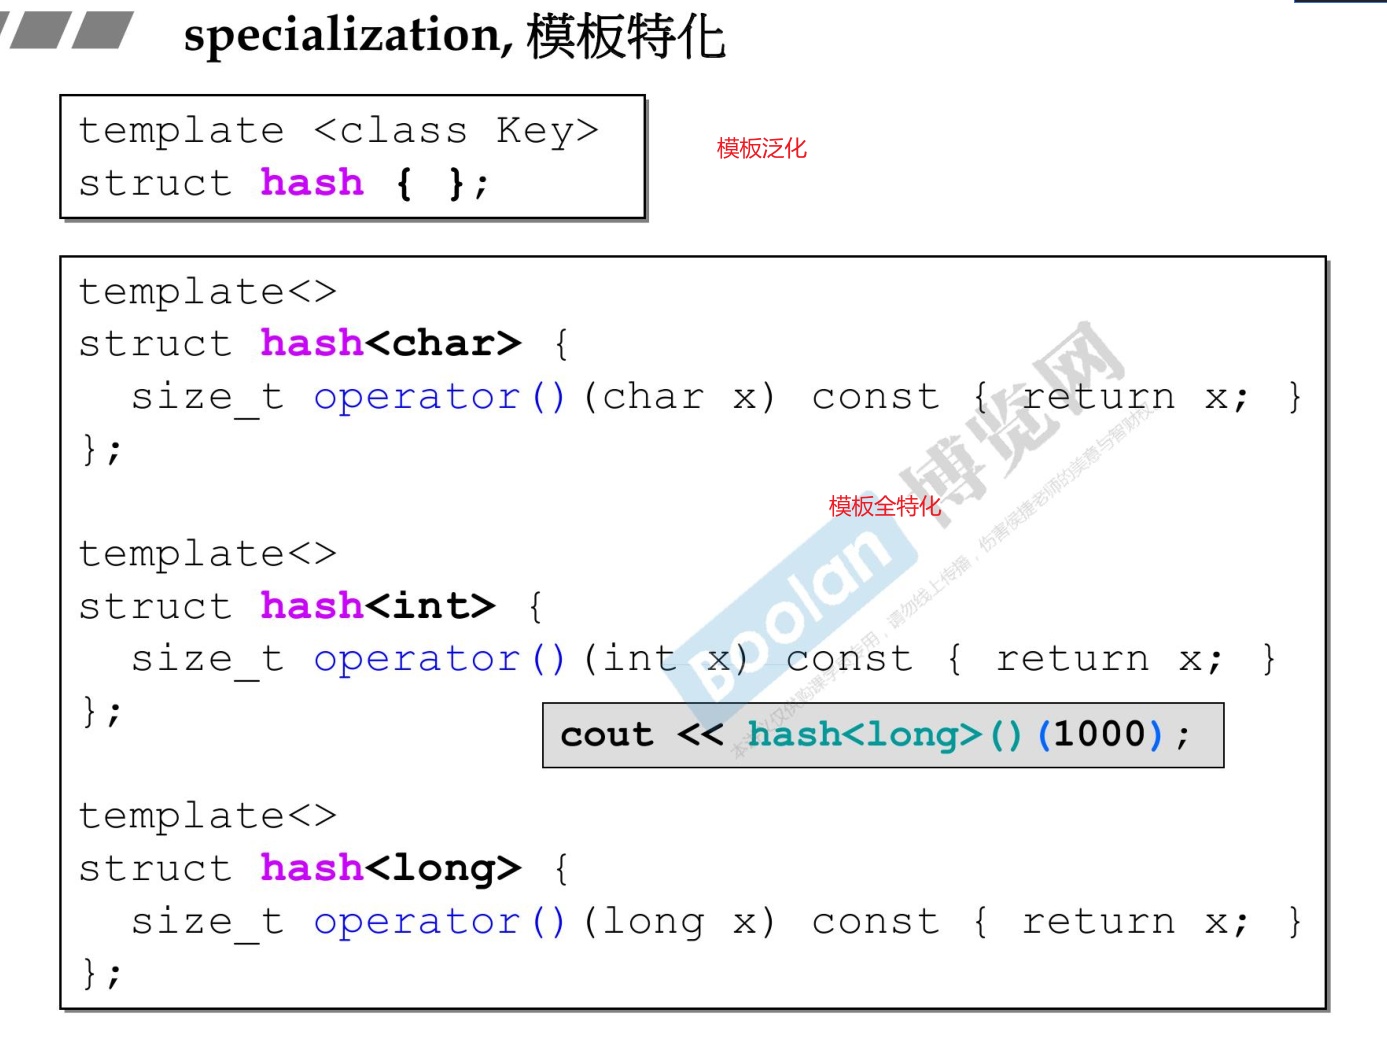
10. partial specialization 模板偏特化
-
模板偏特化(Template Partitial Specialization)是模板特化的一种特殊情况,指显示指定部分模板参数而非全部模板参数,或者指定模板参数的部分特性分而非全部特性,也称为模板部分特化。与模板偏特化相对的是模板全特化,指对所有模板参数进行特化。模板全特化与模板偏特化共同组成模板特化。
-
模板偏特化主要分为两种,一种是指对部分模板参数(个数)进行全特化,另一种是对模板参数特性(范围)进行特化,包括将模板参数特化为指针、引用或是另外一个模板类。
-
对主版本模板类、全特化类、偏特化类的调用优先级从高到低进行排序是:全特化类>偏特化类>主版本模板类。这样的优先级顺序对性能也是最好的。
-
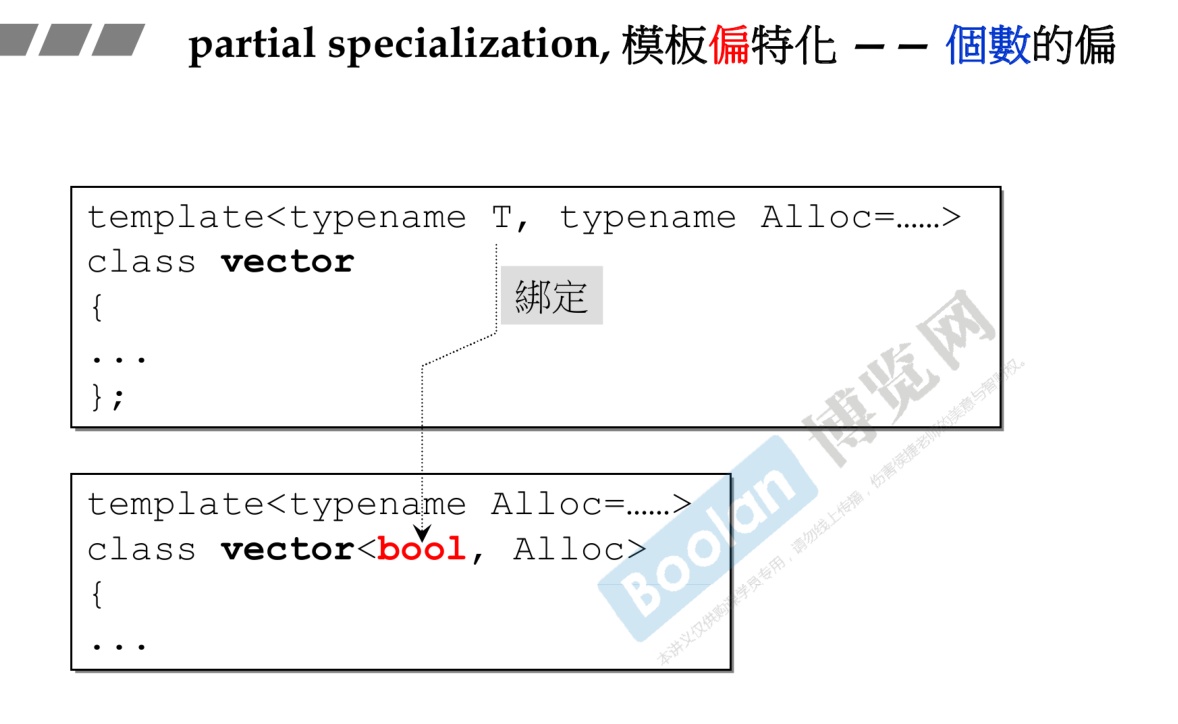
-

11. 模板模板参数-template template parameters(双重模版参数)
11.1 概述
-
就是模板中还有模板。
-
常见实例
-
1 2 3 4 5 6 7 8 9 10 11 12 13 14template <typename T, template <typename> class Container> //或者 template <typename T, template <typename E> class Container> //错误的版本 template <typename T, template <typename T> class Container> //错误信息 declaration of template parameter 'T' shadows template parameter -
注意下图中第二个
typename不能再加T,因为编译器报错重复T,但是你可以加E或者其他字母。 -
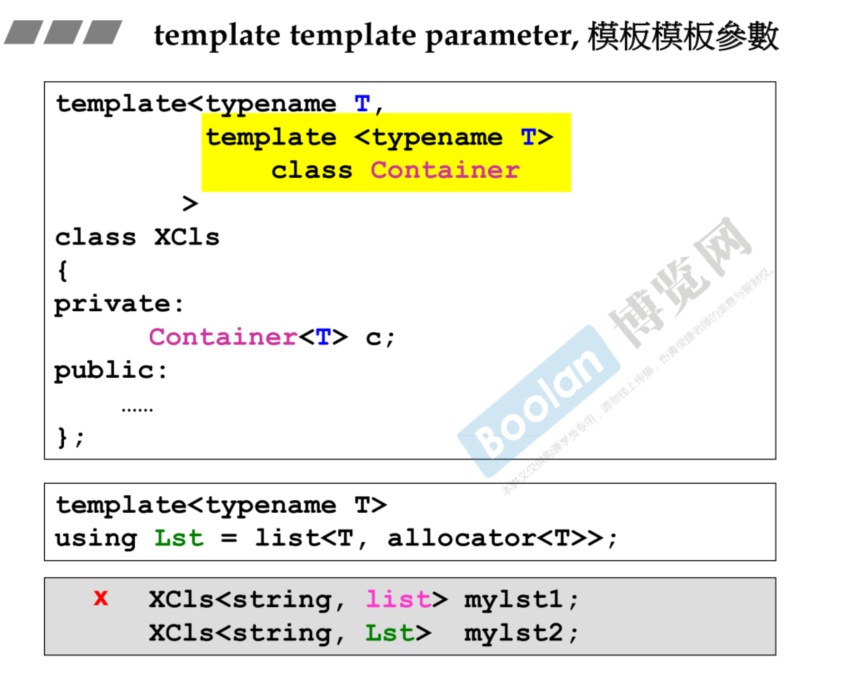
-
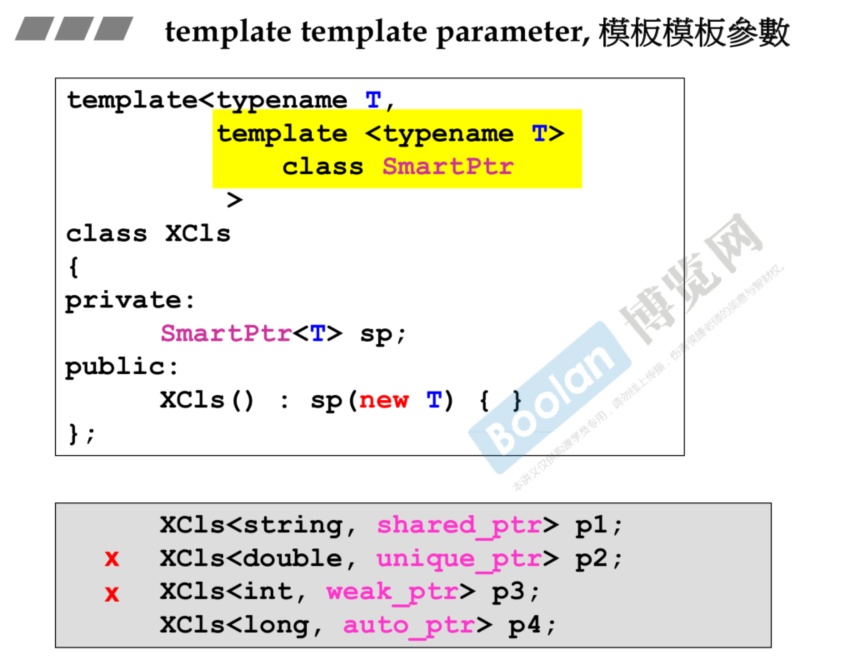
-

11.2 来源
-
用过C++的人应该都知道这2个容器
stack和queue。也有人说,这2个不算容器,因为默认情况下,它们的底层容器是deque。一般情况下,我们构造stack和queue都会省略第二个模版参数。 -
1 2 3 4 5 6 7 8 9 10std::stack<int> stk; std::queue<int> q; //也可以指定第二个模版参数 std::stack<int, std::deque<int>> stk1; std::stack<int, std::vector<int>> stk2; std::stack<int, std::list<int>> stk3; std::queue<int, std::list<int>> q1; std::queue<int, std::deque<int>> q2; -
查看源码,stack和queue以及deque的原型如下
-
1 2 3 4 5 6 7 8 9 10 11 12 13 14 15 16 17 18 19 20 21template<class _Ty, class _Container = deque<_Ty> > class queue { ... protected: _Container c; }; template<class _Ty, class _Container = deque<_Ty> > class stack { ... protected: _Container c; }; template<class _Ty, class _Alloc = allocator<_Ty> > class deque { ... }; -
可以看到,deque本身是一个模板,所以我们会有把其当初一个模板参数传入我们定义的模板中的想法。可以看到stack的定义需要指定std::deque< int>,我们的目标是把
<int>省略。只传入deque类似的容器即可。 -
 1
 2
 3
 4
 5
 6
 7
 8
 9
10
11
12
13
14
15
16
17
18
19
20
21
22
23
24
25
26
27
28
29
30
31
32
33
34
35
36
37
38
39
40
41
42
43
44
45
46
47
48
49
50
51
52
53
54
55
56
57
#include <bits/stdc++.h> using namespace std; template <typename T, template <typename E, typename Alloc = std::allocator<E>> class Container> class Stack { public: void push(const T &val); void pop(); T top() const; bool empty() const; private: Container<T> c; }; template <typename T, template <typename, typename> class Container> void Stack<T, Container>::push(const T &val) { c.push_back(val); } template <typename T, template <typename, typename> class Container> void Stack<T, Container>::pop() { c.pop_back(); } template <typename T, template <typename, typename> class Container> T Stack<T, Container>::top() const { return c.back(); } template <typename T, template <typename, typename> class Container> bool Stack<T, Container>::empty() const { return c.empty(); } int main() { Stack<int, std::vector> stk; for (int n : {1, 2, 3, 4, 5}) stk.push(n); while (!stk.empty()) { std::cout << stk.top() << " "; stk.pop(); } std::cout << std::endl; return 0; } -
从上面的例子可以看到
Stack的第二个模版参数为template <typename E, typename Alloc = std::allocator<E>> class Container,这个模版参数需要2个模版参数。我们是不是可以只给一个参数呢,这样就需要用到模板别名。如此一来写第二个模版参数就只需要一个模版参数了 -
1 2template<typename T> using Vec = std::vector<T, std::allocator<T>>; -
1 2 3 4 5 6 7 8 9 10 11 12 13 14 15 16 17 18 19 20 21 22 23 24 25 26 27 28 29 30 31 32 33 34 35 36 37 38 39#include <iostream> #include <bits/stdc++.h> using namespace std; template <typename T> using Vec = vector<T, allocator<T>>; template <typename T, template <typename> class Container> class my_template_tem { private: Container<T> m_c; public: void insert(const T &a) { m_c.push_back(a); } void disp() { for (auto &i : m_c) { cout << i << endl; } } }; int main() { my_template_tem<int, Vec> m_curr; for (int i = 0; i < 10; ++i) { m_curr.insert(i); } m_curr.disp(); return 0; }
12. since c++ 11
12.1 可变参数模板 Variadic Template
-
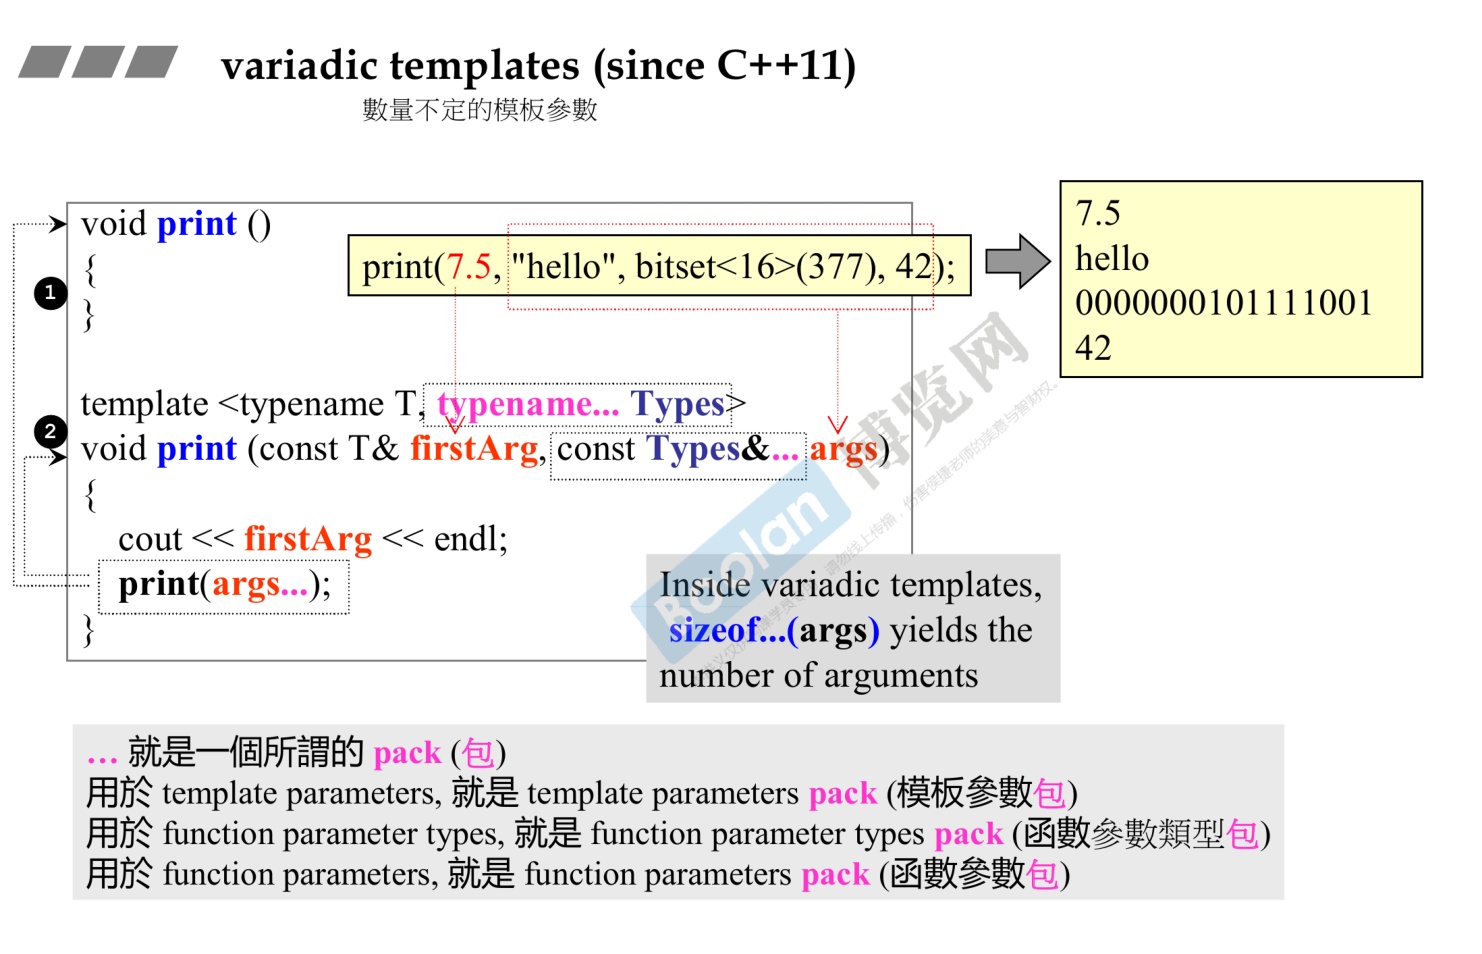
-
定义和使用,需要注意
print()无参数的函数的定义是为了结束递归。args被叫做function parameter pack. -
1 2 3 4 5 6 7 8 9 10 11 12 13 14 15 16 17 18 19 20 21 22 23 24 25 26#include <bits/stdc++.h> using namespace std; // 定义 void print() {} //为了结束递归 template <typename T, typename... Types> void print(T firstArg, Types... args) { std::cout << firstArg << '\n'; // print first argument print(args...); // call print() for remaining arguments } int main() { string s("hello!"); // 使用 print(7.5, "fff", 9, s); return 0; } /*输出结果 7.5 fff 9 hello! -
**sizeof...**返回
parameter pack个数。有人会想直接通过sizeof..结束递归,就如下面所示。 -
1 2 3 4 5 6 7 8 9 10 11 12 13 14 15 16 17 18 19 20 21 22 23 24#include <bits/stdc++.h> using namespace std; template <typename T, typename... Types> void print(T firstArg, Types... args) { std::cout << firstArg << '\n'; if (sizeof...(args) > 0) { // error if sizeof...(args)==0 print(args...); // and no print() for no arguments declared } } int main() { string s("hello!"); // 使用 print(7.5, "fff", 9, s); return 0; } /*编译报错 no matching function for call to 'print()' -
但是这样是错误的,因为模板在编译阶段也会将 if 的所有代码都进行编译,而不会去根据 if 的条件去进行选择性的编译,选择运行 if 的哪个分支是在运行期间做的。
-
但是 c++17 引入了编译期的 if(Compile-Time If),所以上面的代码可以这么写:
-
1 2 3 4 5 6 7 8 9 10 11 12 13 14 15 16 17 18 19 20 21 22#include <bits/stdc++.h> using namespace std; template <typename T, typename... Types> void print(T firstArg, Types... args) { std::cout << firstArg << '\n'; if constexpr (sizeof...(args) > 0) { // error if sizeof...(args)==0 print(args...); // and no print() for no arguments declared } } int main() { string s("hello!"); // 使用 print(7.5, "fff", 9, s); return 0; } //运行成功 -
'if constexpr' only available with -std=c++17 or -std=gnu++17。注意
if constexpr只有c++17及以上标准才支持。
12.2 auto 自动类型推断
12.3 ranged-base for
13. reference 引用
-
引用只能引用唯一的对象,不像指针,可以指向别的对象。
-
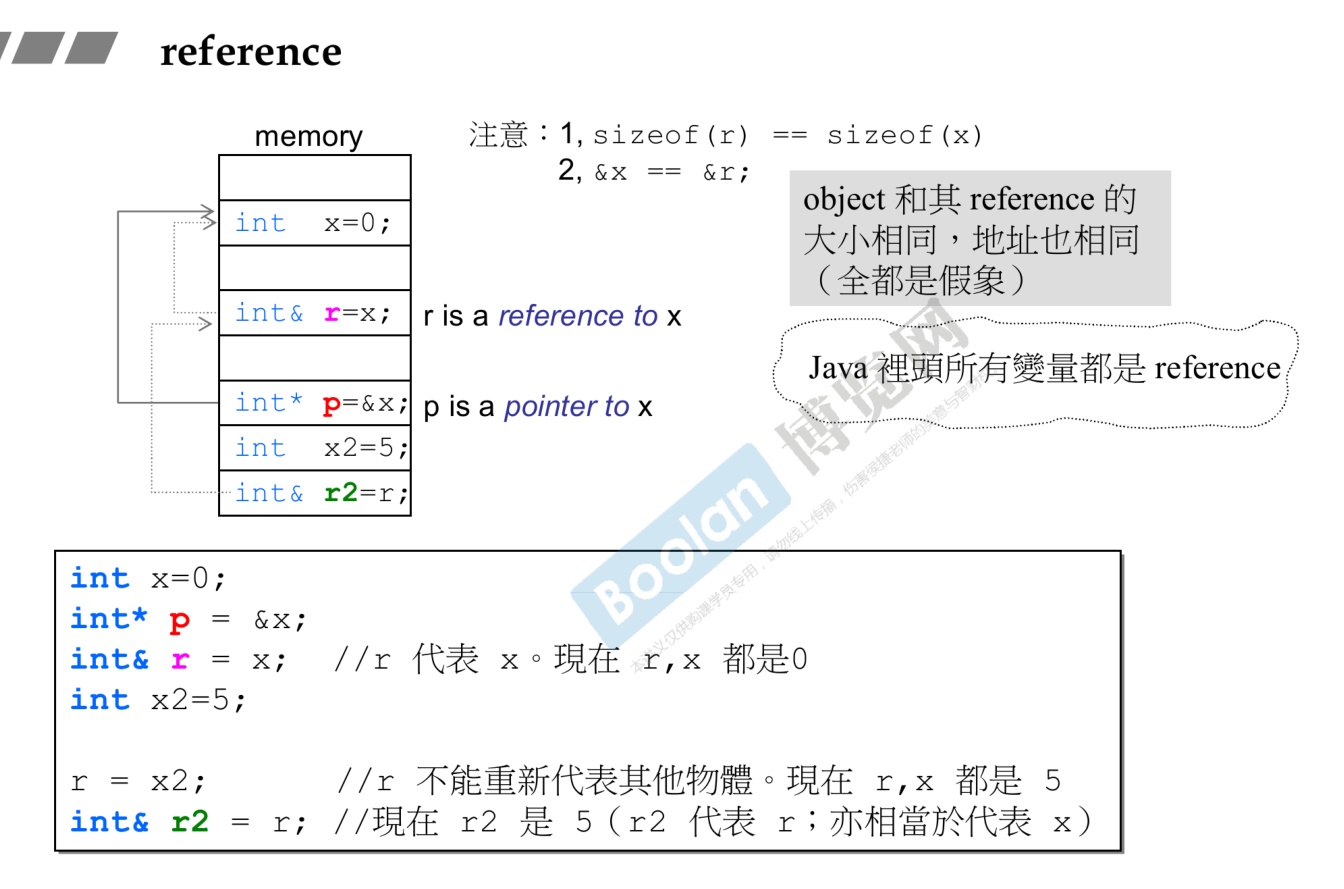
-
引用的大小(sizeof)和原对象的大小相同,但是这个是假象,实际的引用的大小只是一个指针的大小,32位机器即为4个字节。
-
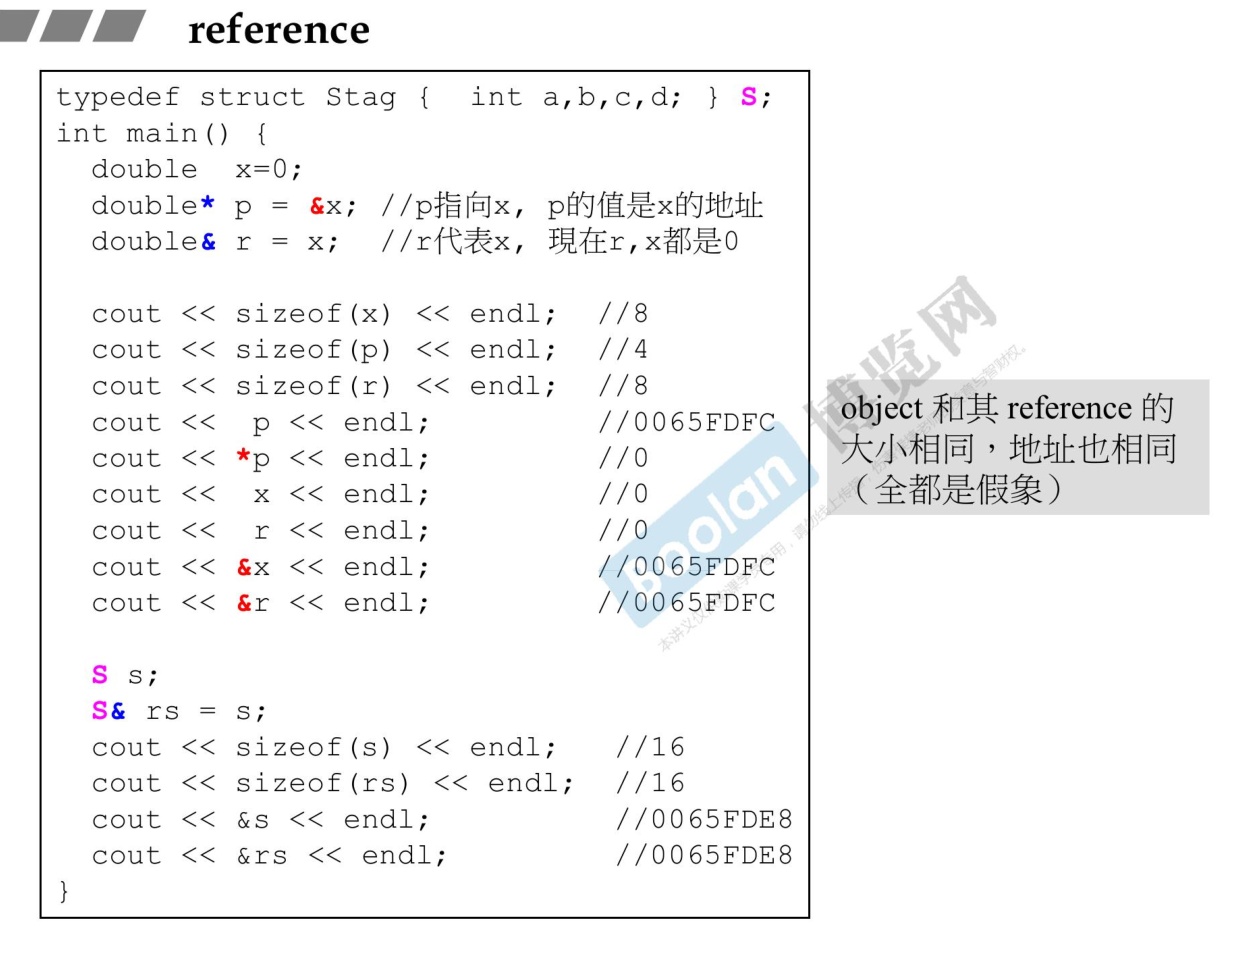
-
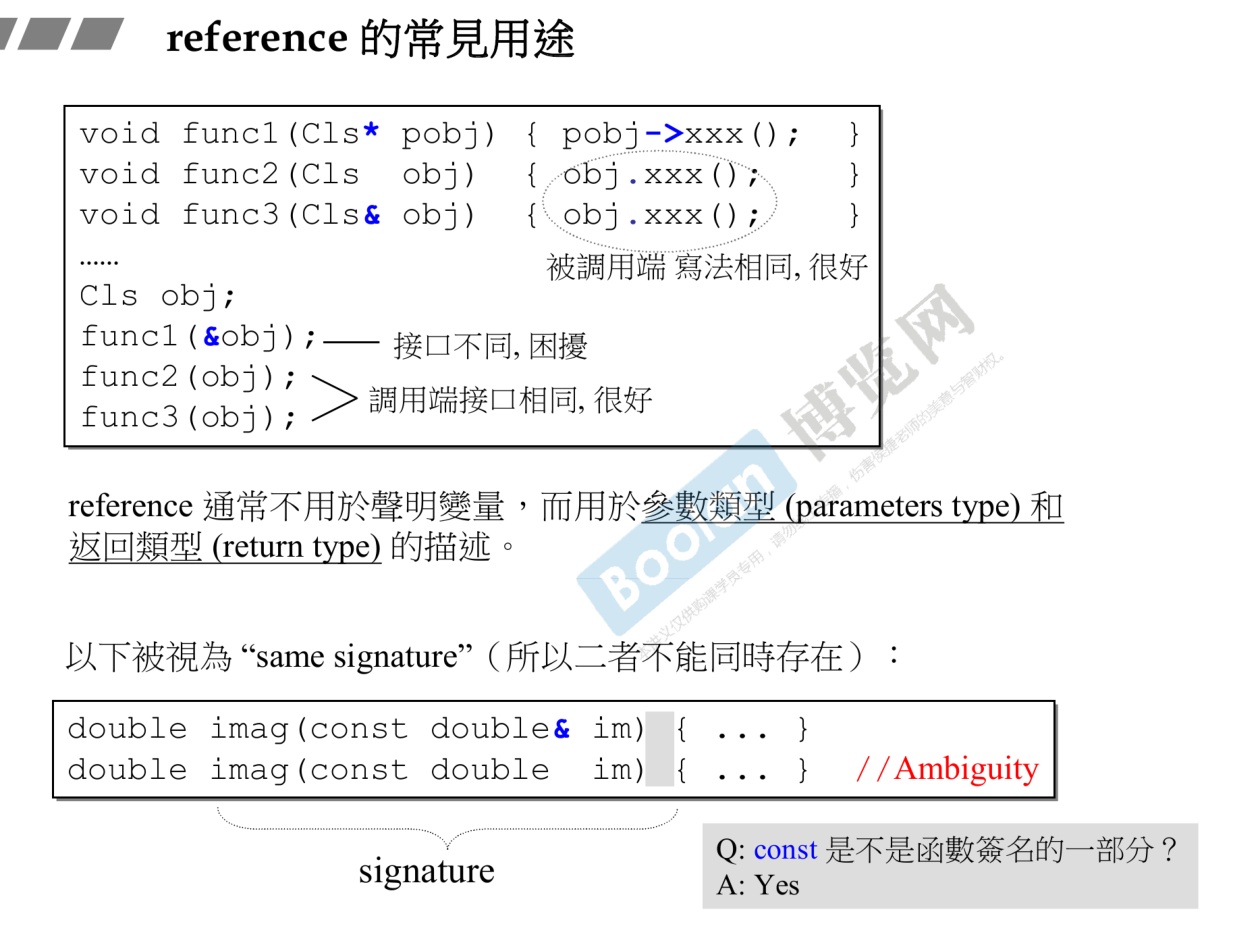
-
值得注意的是,const也算是函数签名的一部分。
-
1 2 3 4 5 6 7 8 9 10 11 12 13 14 15 16 17 18 19 20 21 22 23 24 25 26 27 28 29 30 31 32 33 34 35 36 37 38 39 40 41 42 43 44 45 46 47 48 49 50#include <bits/stdc++.h> using namespace std; bool min1(const int &a, const int &b) { cout << "const" << endl; return a < b; } bool min1(int &a, int &b) { cout << "non const" << endl; return a < b; } class base { public: base(int d, int a) : m_d(d), m_age(a) {} bool min() const { cout << "const function" << endl; return m_d < m_age; } bool min() { cout << "non const function" << endl; return m_d < m_age; } private: int m_d; int m_age; }; main() { //非常类调用非常函数 base pp(5, 7); pp.min(); //左值调用非常函数 int as = 7; int bs = 6; bool cc = min1(as, bs); return 0; } /*输出结果 non const function non const -
1 2 3 4 5 6 7 8 9 10 11 12 13int main() { //常类调用常函数 const base pp(5, 7); pp.min(); //右值调用常函数 bool cc = min1(7, 5); return 0; } /*输出结果 const function const
14. 对象模型(Object Model):关于vptr和vtbl
-
虚指针vptr。
-
虚表vtbl。
-
只要类里面有虚函数,无论是继承重写的还是基类自带,都会有一个虚指针vptr。
-
下图中,类A定义了两个虚函数
vfunc1()和vfunc2()。类B继承了A并重写了vfunc1()。类C继承了B并再次重写了vfunc1()。下图显示了具体的虚指针和虚表的内容。 -
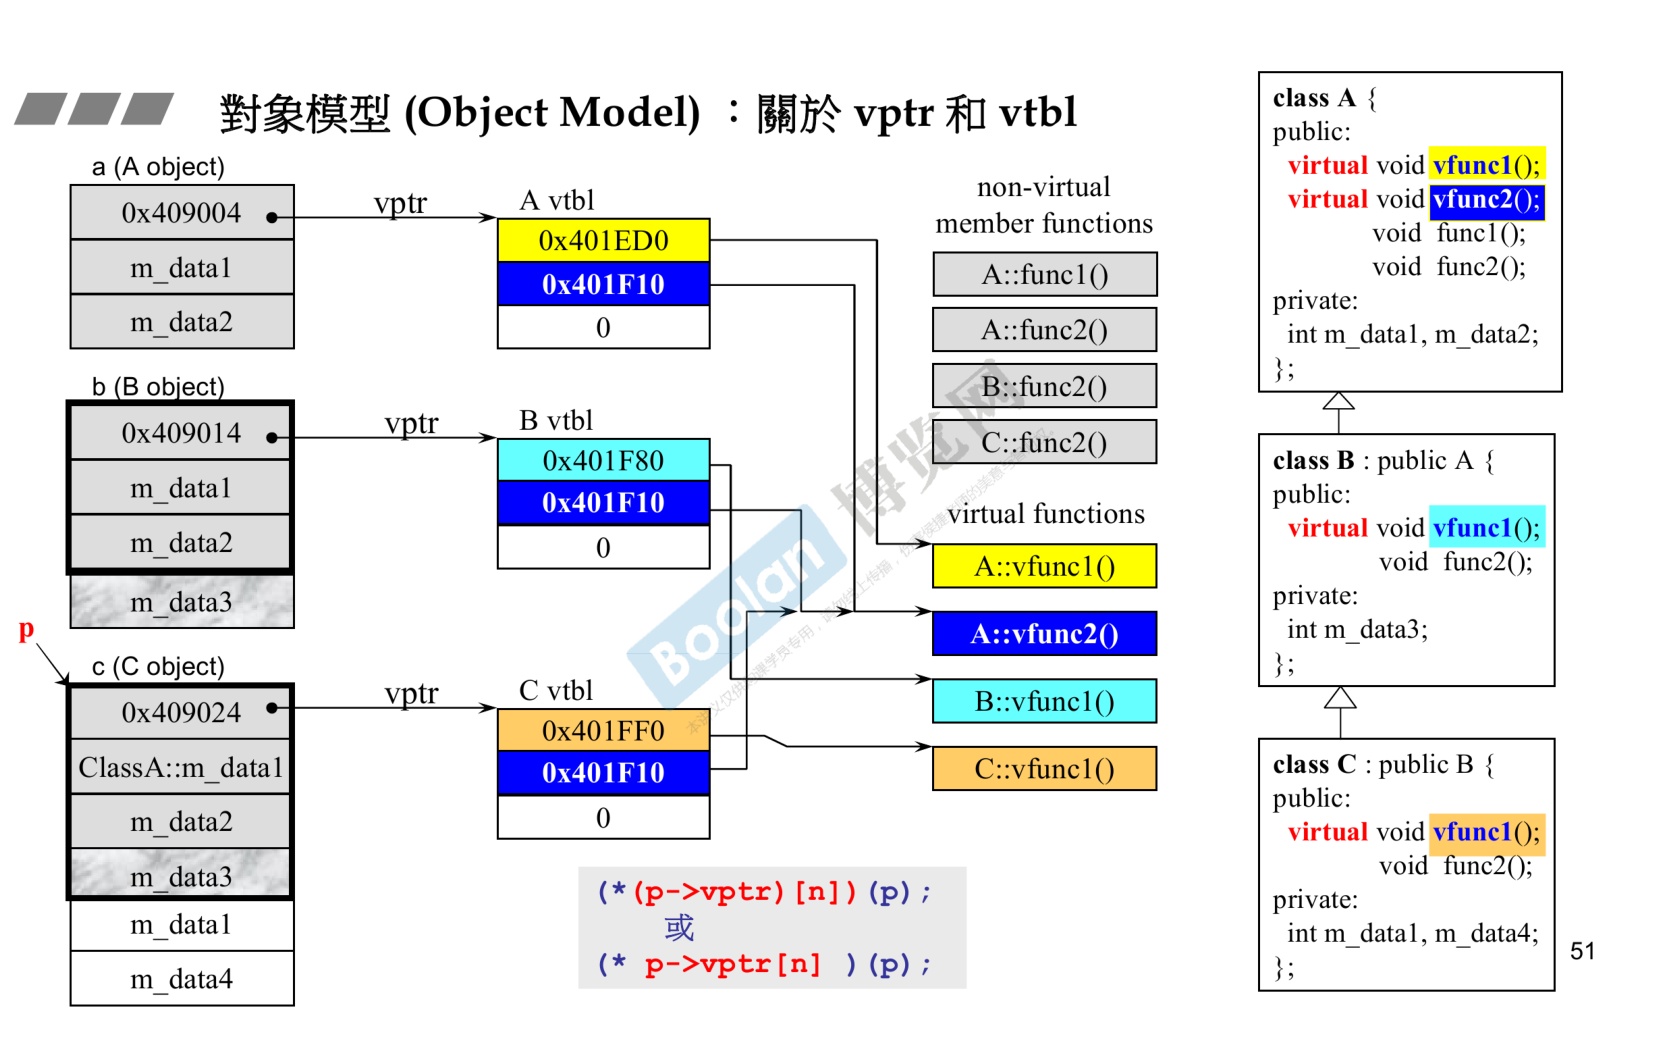
-
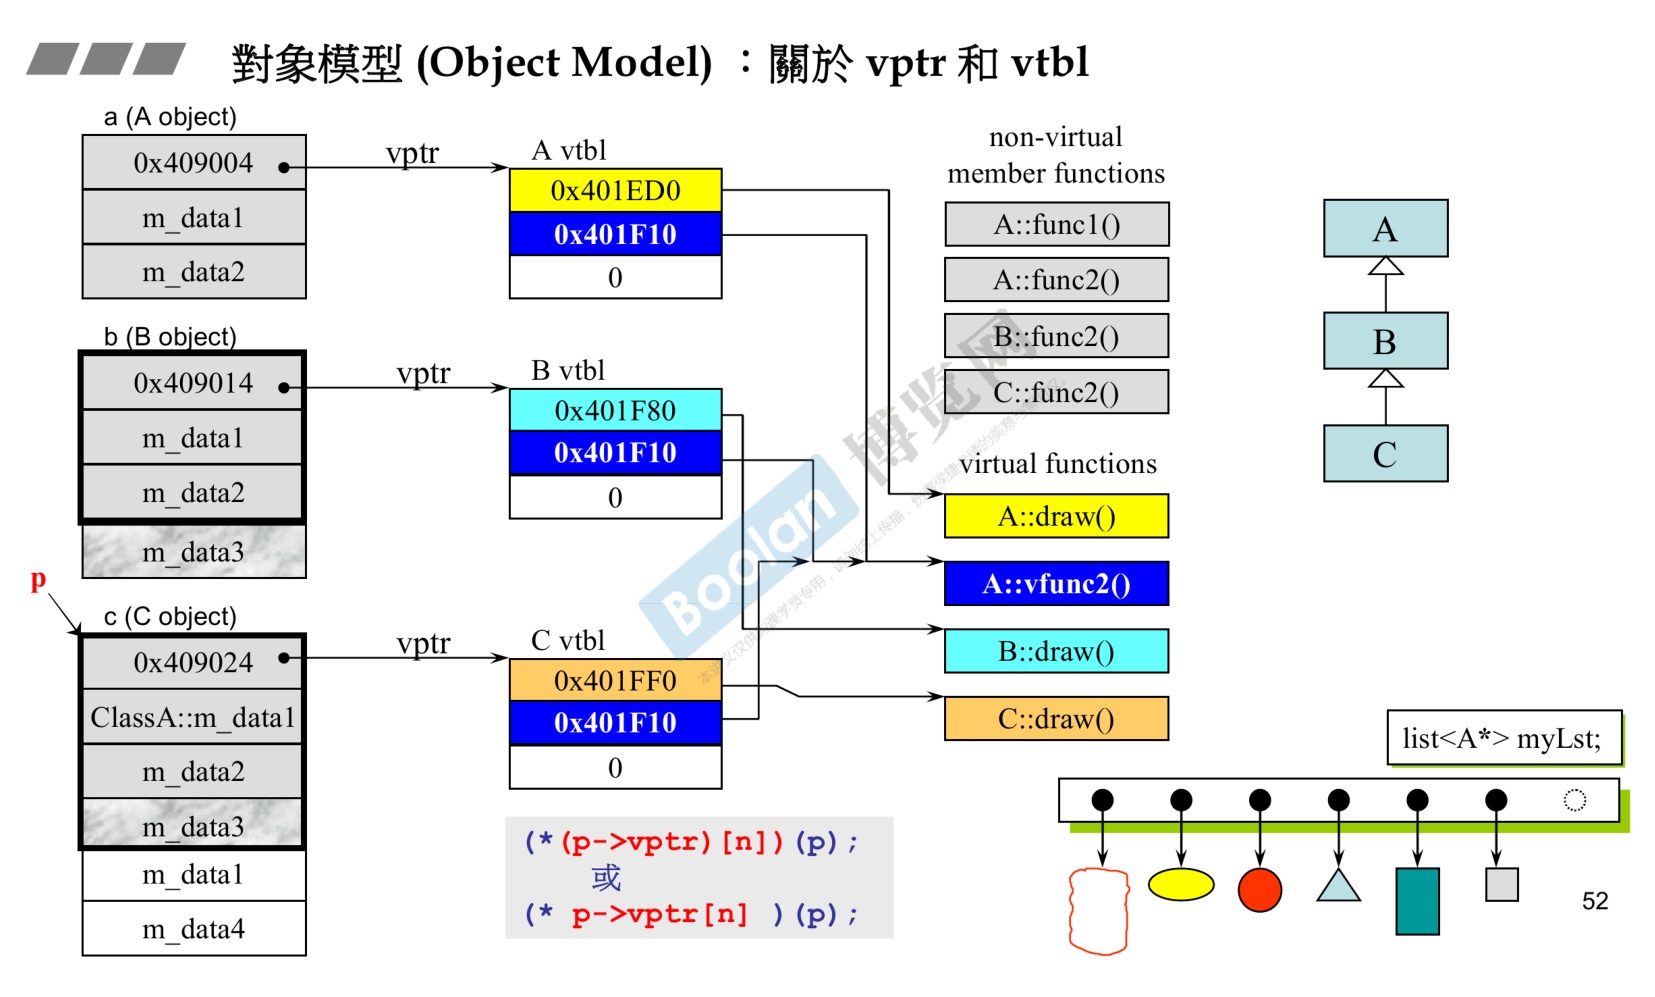
-
需要理解何为动态绑定和静态绑定: 1、对象的静态类型:对象在声明时采用的类型。是在编译期确定的。 2、对象的动态类型:目前所指对象的类型。是在运行期决定的。对象的动态类型可以更改,但是静态类型无法更改。
-
C++编译器看到一个函数调用,会有两个选择,一个是静态绑定(汇编的call),一个是动态绑定。
-
符合以下三个条件的,编译器会执行动态绑定:
- 必须是通过指针调用;
- 该指针为向上转型upcast: 父类指针指向子类对象,以保证安全。
- 调用的是虚函数。
-
动态绑定对程序性能会造成一定的影响(让程序运行效率变慢),如果没有必要实现动态多态时,就不要用虚函数;但是会提高编程效率。
15. 对象模型(Object Model):关于this指针
- 哪个对象调用函数,那个对象的地址就是this。
- serialise函数的调用符合上面说的动态绑定的三个条件。
- 因此可以写出实际调用的语句
(*(this->vptr)[n])(this); 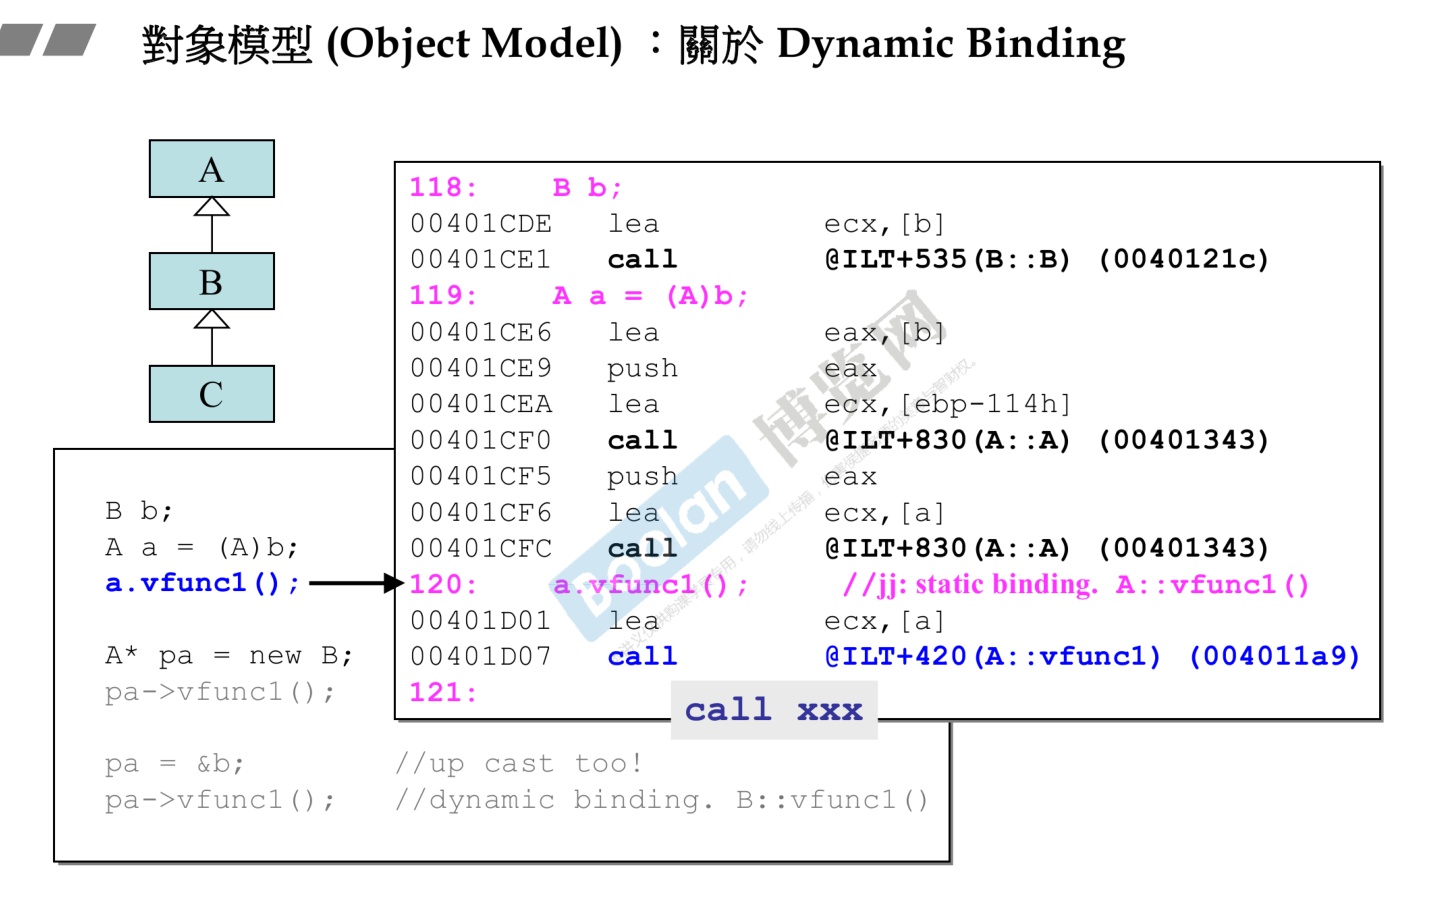
16. 对象模型(Object Model):关于Dynamic Binding-动态绑定
-

-
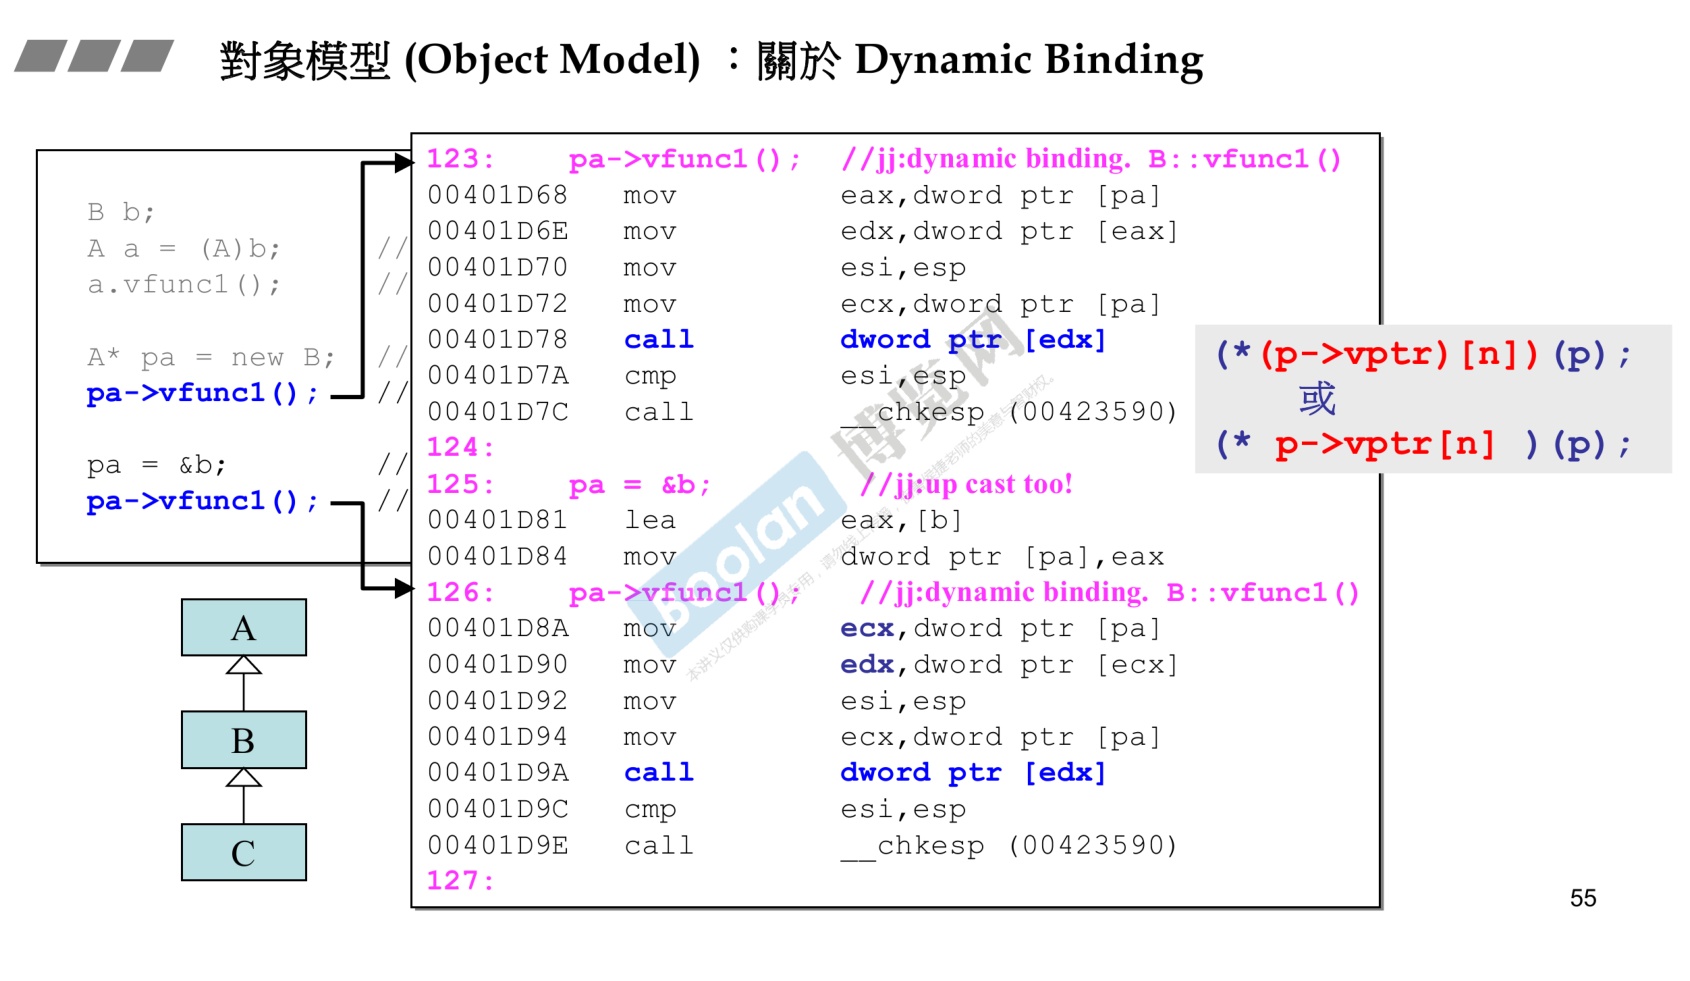
-
1 2 3 4 5 6 7 8 9 10 11 12 13 14 15 16 17 18 19 20 21 22 23 24 25 26 27 28 29 30 31 32 33 34 35 36 37 38 39 40 41 42 43 44 45 46 47 48#include <bits/stdc++.h> using namespace std; class base1 { public: virtual void func1() { cout << "func1 of base1 class!" << endl; } virtual void func2() { cout << "func2 of base1 class!" << endl; } }; class child1 : public base1 { public: void func1() { cout << "func1 of child1 class!" << endl; } void func2() { cout << "func2 of child1 class!" << endl; } }; int main() { base1 base1obj; child1 child1obj; //静态绑定 cout << "this is static binding " << endl; base1obj.func1(); child1obj.func1(); //动态绑定 cout << "this is dynamic binding" << endl; base1 *p = &base1obj; p->func1(); p = &child1obj; p->func1(); base1 *p2 = new child1; //直接就是子类的重写的虚函数的调用 p2->func2(); delete p2; return 0; } /*输出结果 this is static binding func1 of base1 class! func1 of child1 class! this is dynamic binding func1 of base1 class! func1 of child1 class! func2 of child1 class
17. 谈谈const
-
记住一点,const Object必须调用 const member functions,不能调用non-const member functions。
-

-
例子,标准库的string字符串。标准库的string设计是基于reference counter实现的,即引用计数。就是多个字符串共享相同的内存,但是如果有一个字符串想修改内容了,那么就需要拷贝一份新的内存给他改。所以有上图右侧的两个重载函数。
operator[] (size_type pos) const。不可修改。operator[] (size_type pos)。可修改
18. 关于new、operator new和placement new的区别与重载
18.1 概述
-
为什么需要重载new和delete,重载的作用是什么,是为了开发内存池等等。
-
new:偏顶层,用于分配内存,同时在分配的内存调用构造函数进行初始化,最后返回对象的指针。
-
operator new:偏底层,是c++最基本的内存配置操作,只分配内存,不初始化
-
placement new :偏底层,不分配内存,只对分配好的内存调用构造函数进行初始化。
-
从功能的角度讲,顶层new相当于是封装好的最外层关键字,对底层operator new以及placement new进行了封装,因此包含了这两者具有的功能。
-
1Foo * p = new Foo(); // Foo 应该具有默认构造函数 -
上述new 操作实际上相当于执行了如下三步操作:
- (1)调用operator new分配内存,大小为Foo对象大小
- (2)通过placement new调用Foo构造函数,初始化对象
- (3)返回指向该对象的指针
-
三个不同名词辨析
- 1.new operator:调用operator new分配足够的空间,并调用相关对象的构造函数。注意,不可以被重载。
- 2.operator new:手动分配所需要的堆空间;可以被重载,可在类中重载或者重载全局函数;重载时,返回类型必须声明为void*;重载时,第一个参数类型必须为表达要求分配空间的大小(字节),类型为size_t;重载时,可以带其它参数。
- 3.placement new:我们可以为 operator new 写出多个重载版本,但是每一个版本的第一个参数都必须为 size_t 类型。其余的参数以 new 所指定的 placement arguements 为初值,出现在 new(…) 小括号里面的就是所谓的 placement arguements。特别地,当第二个参数为分配的内存的指针时,为标准的placement new,因为这样才能称为所谓的“定位放置new”(placement new)操作。
placement new由于不需要申请新内存和释放旧内存,所以在内存池中,意外的便捷。 - 如果有这样一个场景,我们需要大量的申请一块类似的内存空间,然后又释放掉,比如在在一个server中对于客户端的请求,每个客户端的每一次上行数据我们都需要为此申请一块内存,当我们处理完请求给客户端下行回复时释放掉该内存,表面上看者符合c++的内存管理要求,没有什么错误,但是仔细想想很不合理,为什么我们每个请求都要重新申请一块内存呢,要知道每一次内存的申请,系统都要在内存中找到一块合适大小的连续的内存空间,这个过程是很慢的(相对而言),极端情况下,如果当前系统中有大量的内存碎片,并且我们申请的空间很大,甚至有可能失败。为什么我们不能共用一块我们事先准备好的内存呢?所以,我们可以使用placement new来构造对象来节省每次申请内存的时间。
18.2 重载全局operator new
-
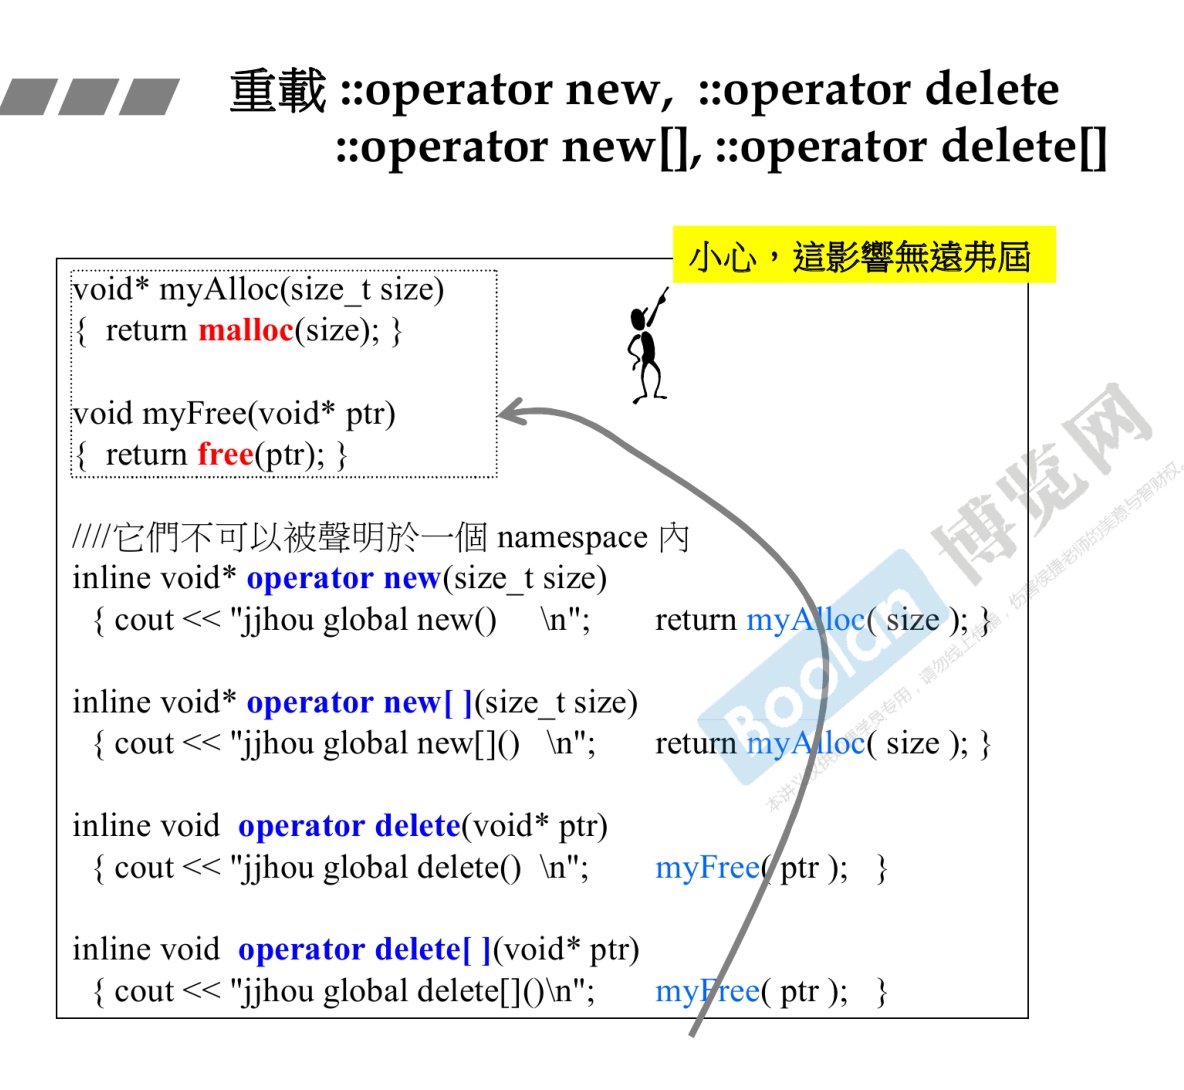
-
1 2 3 4 5 6 7 8 9 10 11 12 13 14 15 16 17 18 19 20 21 22 23 24 25 26 27 28 29 30 31 32 33 34 35 36 37 38 39 40 41 42 43 44 45 46 47 48 49 50 51 52 53 54 55 56 57 58 59 60 61 62 63 64 65 66 67 68 69 70 71#include <bits/stdc++.h> using namespace std; void *my_new(size_t sz) { cout << "run my new" << endl; return malloc(sz); } void my_delete(void *ptr) { cout << "run my delete" << endl; return free(ptr); } //重载全局函数 inline void *operator new(size_t size) { cout << "tyc global new()" << endl; return my_new(size); } inline void *operator new[](size_t size) { cout << "tyc global new() []" << endl; return my_new(size); } inline void operator delete(void *ptr) { cout << "tyc global delete()" << endl; my_delete(ptr); } inline void operator delete[](void *ptr) { cout << "tyc global delete() []" << endl; my_delete(ptr); } class person { public: person() { age = 0; sex = 1; } person(int a, int sex) : age(a), sex(sex) {} private: int age; int sex; }; int main() { person *p1 = new person(5, 5); person *p2 = new person[5]; delete[] p2; delete p1; return 0; } /* 输出结果 tyc global new() run my new tyc global new() [] run my new tyc global delete() [] run my delete -
查看上面的输出结果可以看到,自定义的
delete无法手动调用,根据《C与C++中的异常处理》中的约定,只有当new处理构造函数抛出异常的时候,才会调用这些重载版本的operator delete()。只有这种情况才能自定义执行delete,这样是为了归还没分配成功的内存。 -
奇怪的是,可以调用
delete []。但是当我把构造函数和析构函数重写之后,自定义的delete都不可以手动调用了。如下所示。 -
1 2 3 4 5 6 7 8 9 10 11 12 13 14 15 16 17 18 19 20 21 22 23 24 25 26 27 28 29 30 31 32 33 34 35 36 37 38 39 40 41 42 43 44 45 46 47 48 49 50 51 52 53 54 55 56 57 58 59 60 61 62 63 64 65 66 67 68 69 70 71 72 73 74 75 76 77 78 79 80 81 82 83 84 85 86 87 88 89 90 91#include <bits/stdc++.h> using namespace std; void *my_new(size_t sz) { cout << "run my new" << endl; return malloc(sz); } void my_delete(void *ptr) { cout << "run my delete" << endl; return free(ptr); } //重载全局函数 inline void *operator new(size_t size) { cout << "tyc global new()" << endl; return my_new(size); } inline void *operator new[](size_t size) { cout << "tyc global new() []" << endl; return my_new(size); } inline void operator delete(void *ptr) { cout << "tyc global delete()" << endl; my_delete(ptr); } inline void operator delete[](void *ptr) { cout << "tyc global delete() []" << endl; my_delete(ptr); } class person { public: person() { age = 0; sex = 1; cout << "默认构造函数" << endl; } person(int a, int sex) : age(a), sex(sex) { cout << "构造函数" << endl; } ~person() { cout << "析构函数" << endl; } private: int age; int sex; }; int main() { person *p1 = new person(5, 5); delete p1; person *p2 = ::new person[5]; ::delete[] p2; return 0; } /* 输出结果 tyc global new() run my new 构造函数 析构函数 tyc global new() [] run my new 默认构造函数 默认构造函数 默认构造函数 默认构造函数 默认构造函数 析构函数 析构函数 析构函数 析构函数 析构函数 */
18.3 重载member operator new / new[]
-
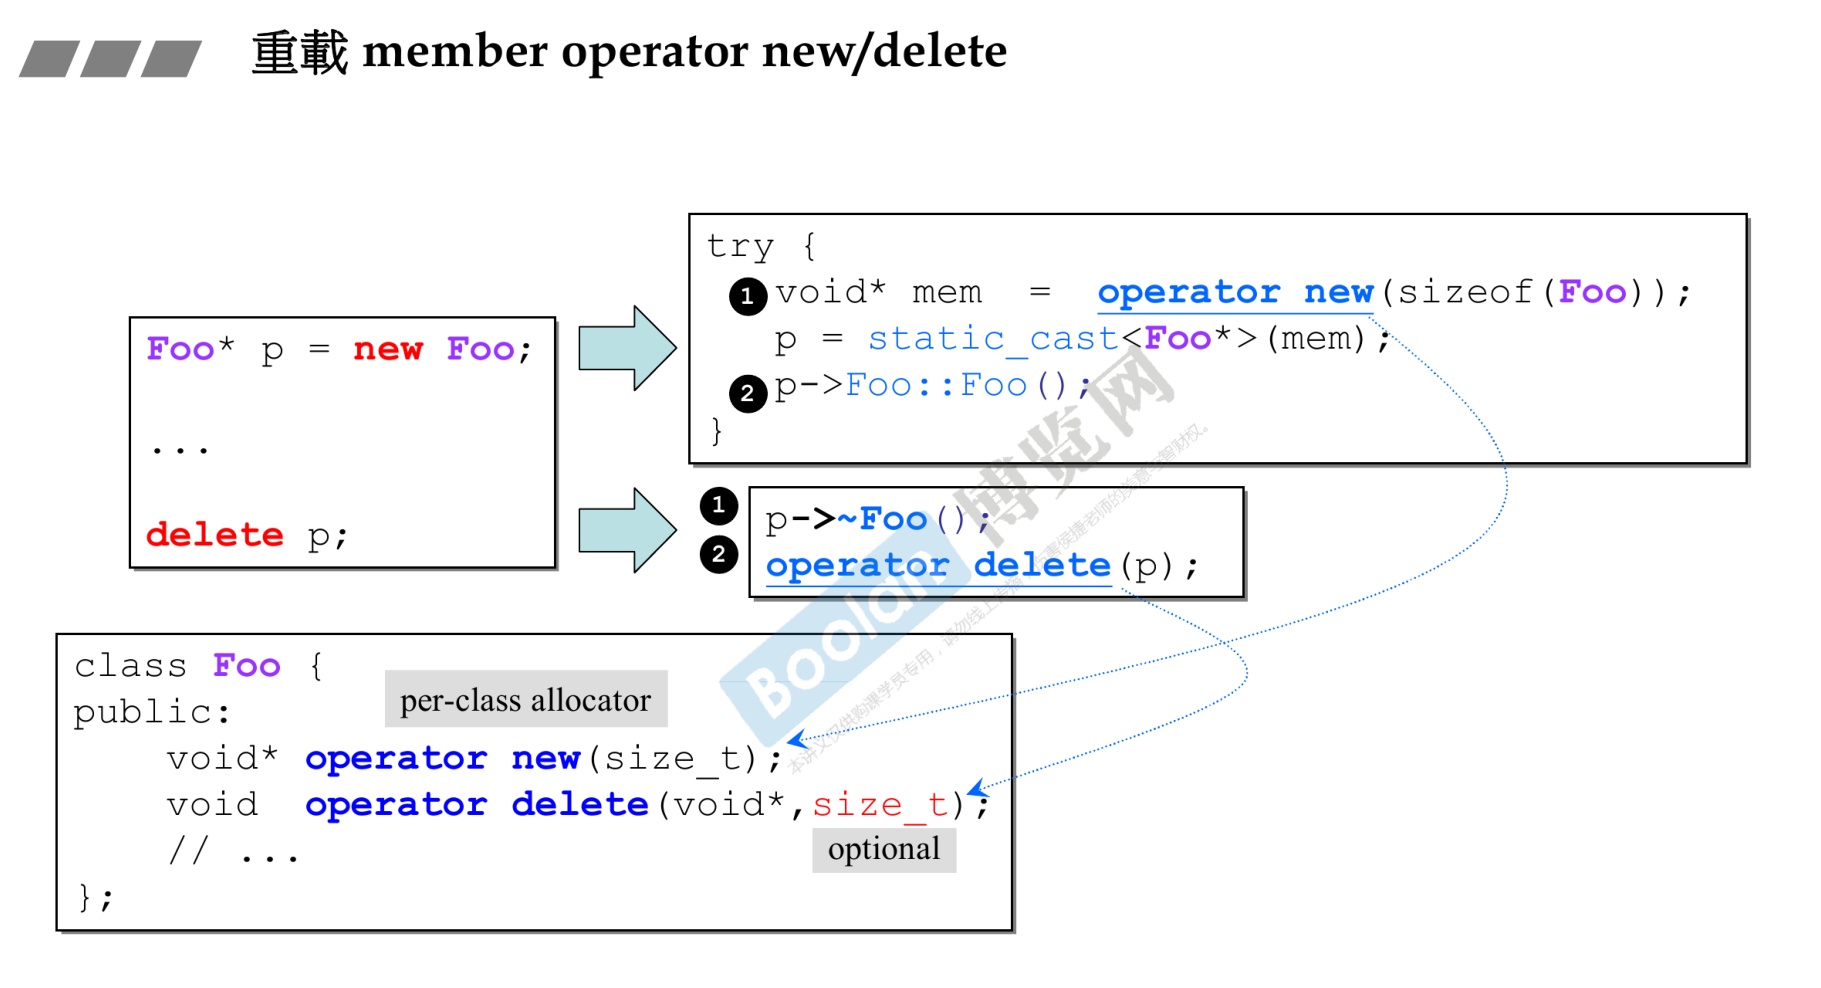
-
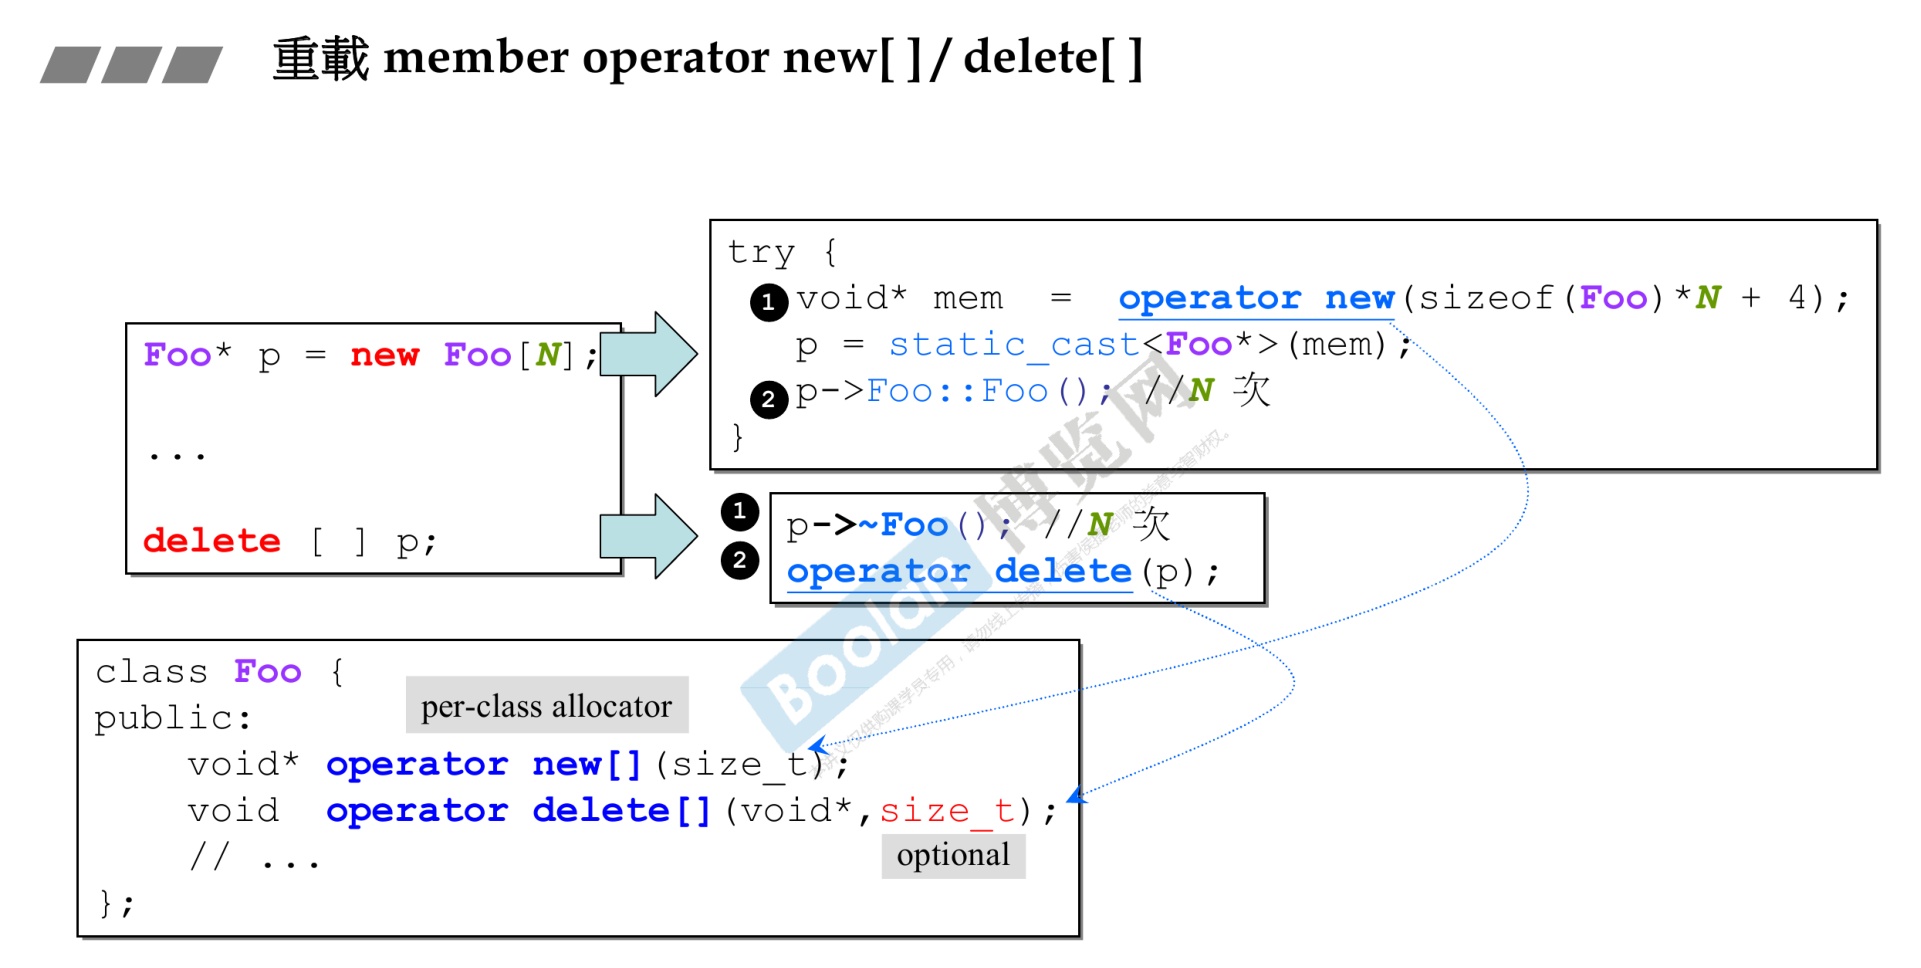
-
示例
-
1 2 3 4 5 6 7 8 9 10 11 12 13 14 15 16 17 18 19 20 21 22 23 24 25 26 27 28 29 30 31 32 33 34 35 36 37 38 39 40 41 42 43 44 45 46 47 48 49 50 51 52 53 54 55 56 57 58 59 60 61 62 63 64 65 66 67 68 69 70 71 72 73 74 75 76 77 78 79 80 81 82 83 84 85 86 87 88 89 90 91 92 93 94 95 96 97 98 99 100 101 102 103 104 105 106 107 108 109 110 111 112 113 114 115 116 117 118 119 120 121 122 123 124 125 126 127 128 129 130 131 132 133 134 135 136 137 138 139 140 141 142 143 144 145 146 147 148 149 150 151#include <bits/stdc++.h> using namespace std; void *my_new(size_t sz) { cout << "run my new" << endl; return malloc(sz); } void my_delete(void *ptr) { cout << "run my delete" << endl; return free(ptr); } //重载全局函数 inline void *operator new(size_t size) { cout << "tyc global new()" << endl; return my_new(size); } inline void *operator new[](size_t size) { cout << "tyc global new() []" << endl; return my_new(size); } inline void operator delete(void *ptr) { cout << "tyc global delete()" << endl; my_delete(ptr); } inline void operator delete[](void *ptr) { cout << "tyc global delete() []" << endl; my_delete(ptr); } class person { public: person() { age = 0; sex = 1; cout << "默认构造函数" << endl; } person(int a, int sex) : age(a), sex(sex) { cout << "构造函数" << endl; } ~person() { cout << "析构函数" << endl; } static void *operator new(size_t sz); static void *operator new[](size_t sz); static void operator delete(void *ptr); static void operator delete[](void *ptr); private: int age; int sex; }; void *person::operator new(size_t sz) { person *p = (person *)malloc(sz); cout << "类内new" << sz << "字节内存" << endl; return p; } void *person::operator new[](size_t sz) { person *p = (person *)malloc(sz); cout << "类内new [] " << sz << "字节内存" << endl; return p; } void person::operator delete(void *ptr) { cout << "类内删除delete" << endl; free(ptr); return; } void person::operator delete[](void *ptr) { cout << "类内删除delete[]" << endl; free(ptr); return; } int main() { cout << "====调用成员函数的new和delete====" << endl; person *p1 = new person(5, 5); delete p1; cout << "====调用成员函数的new[]和delete[]====" << endl; person *p2 = new person[5]; delete[] p2; cout << "====调用全局函数的new和delete====" << endl; person *p3 = ::new person(7, 7); ::delete p3; cout << "====调用全局函数的new[]和delete[]====" << endl; person *p4 = ::new person[5]; ::delete[](p4); return 0; } /*输出结果 ====调用成员函数的new和delete==== 类内new8字节内存 构造函数 析构函数 类内删除delete ====调用成员函数的new[]和delete[]==== 类内new [] 48字节内存 默认构造函数 默认构造函数 默认构造函数 默认构造函数 默认构造函数 析构函数 析构函数 析构函数 析构函数 析构函数 类内删除delete[] ====调用全局函数的new和delete==== tyc global new() run my new 构造函数 析构函数 ====调用全局函数的new[]和delete[]==== tyc global new() [] run my new 默认构造函数 默认构造函数 默认构造函数 默认构造函数 默认构造函数 析构函数 析构函数 析构函数 析构函数 析构函数 */ -
可以看出,类的成员函数重载operator new 和 operator delete是可以正常执行的,但是全局的delete重载无法执行。
-
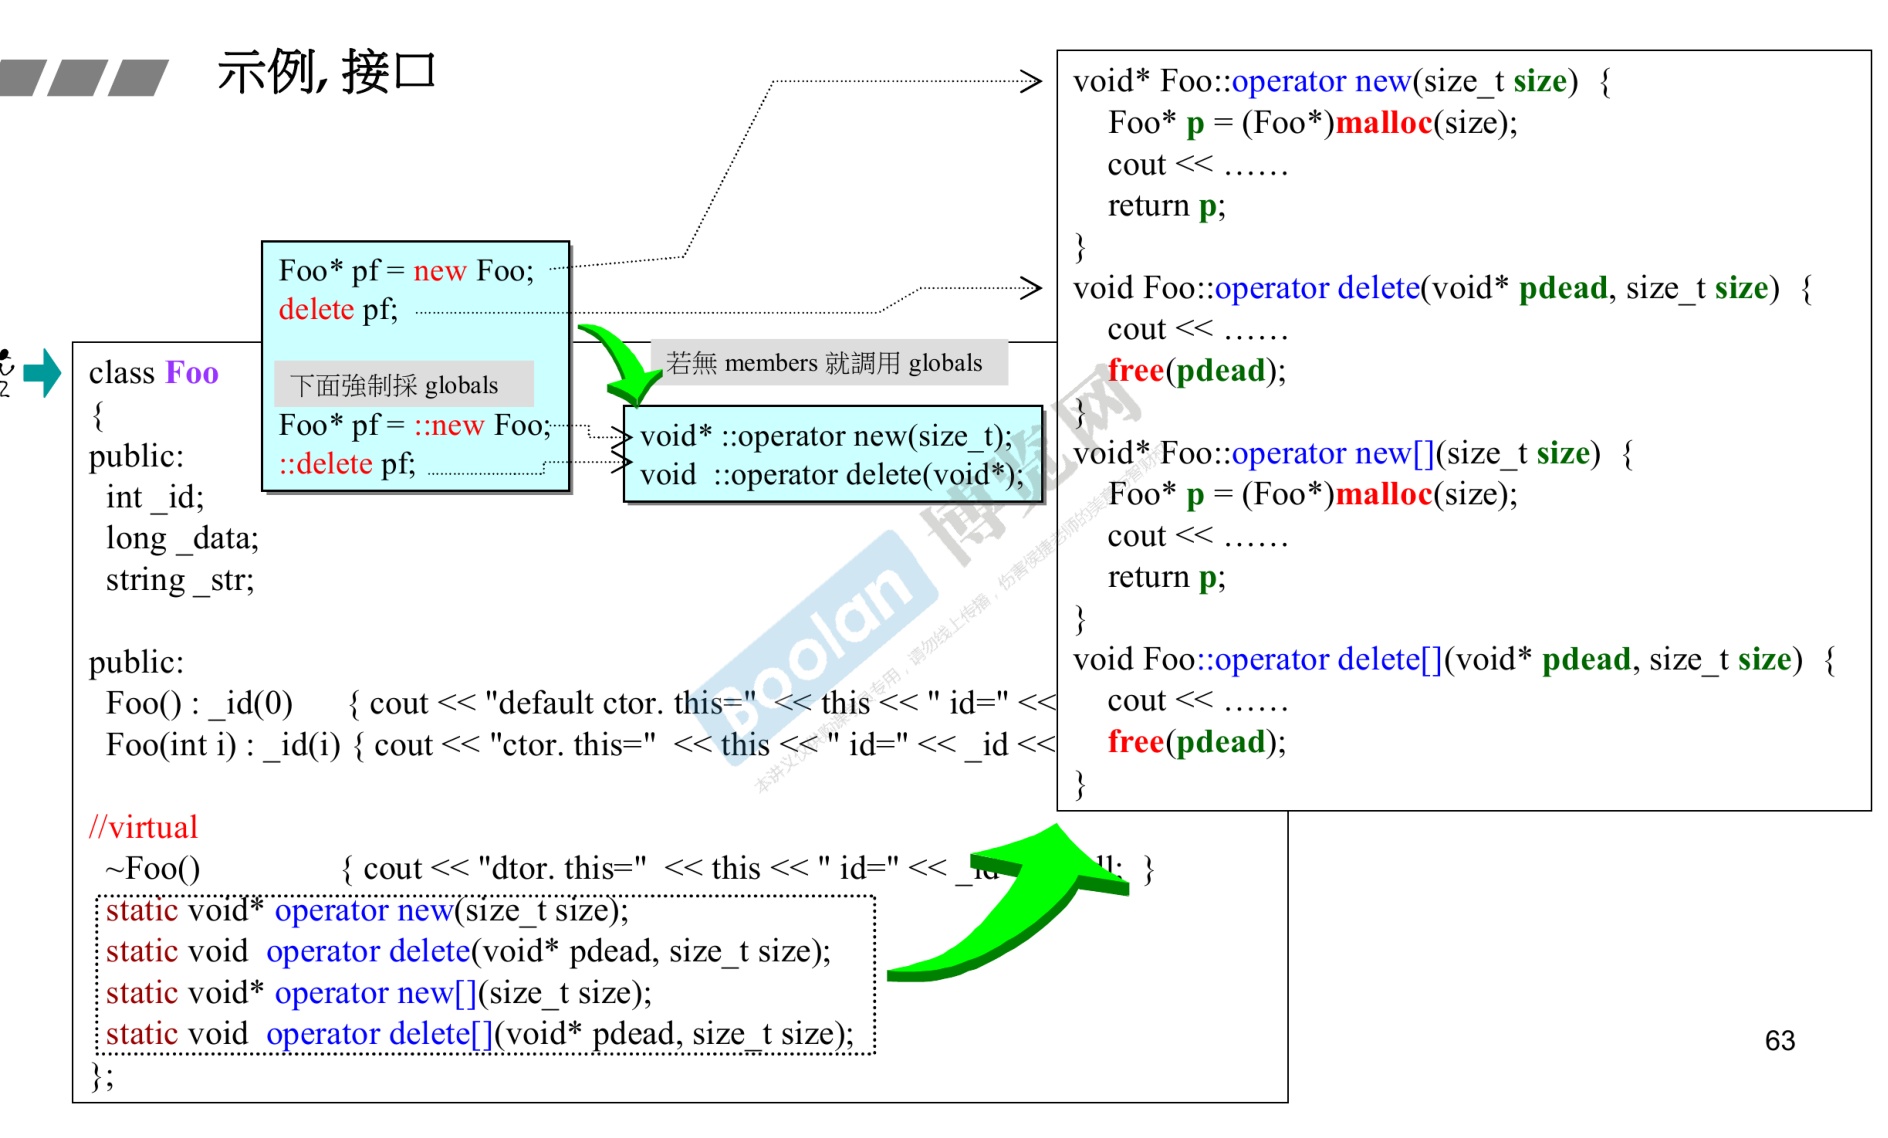
-
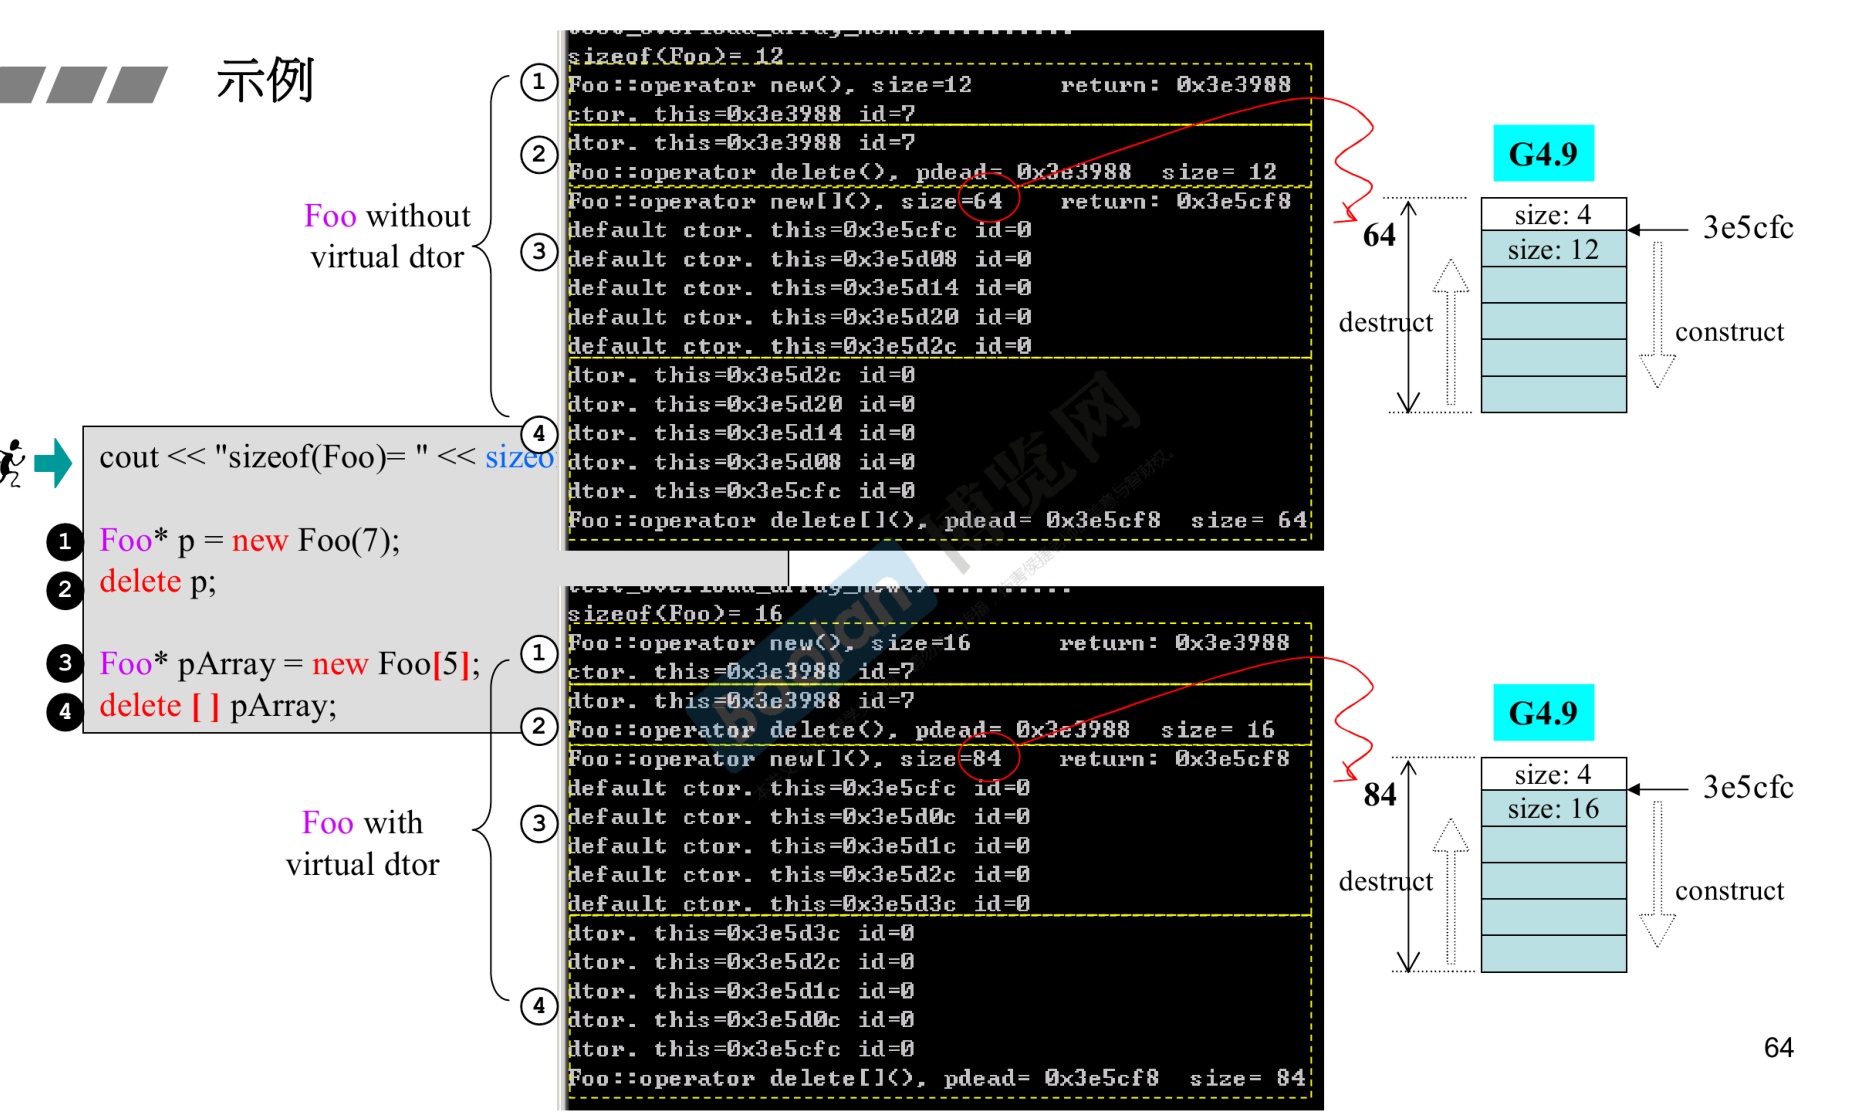
-
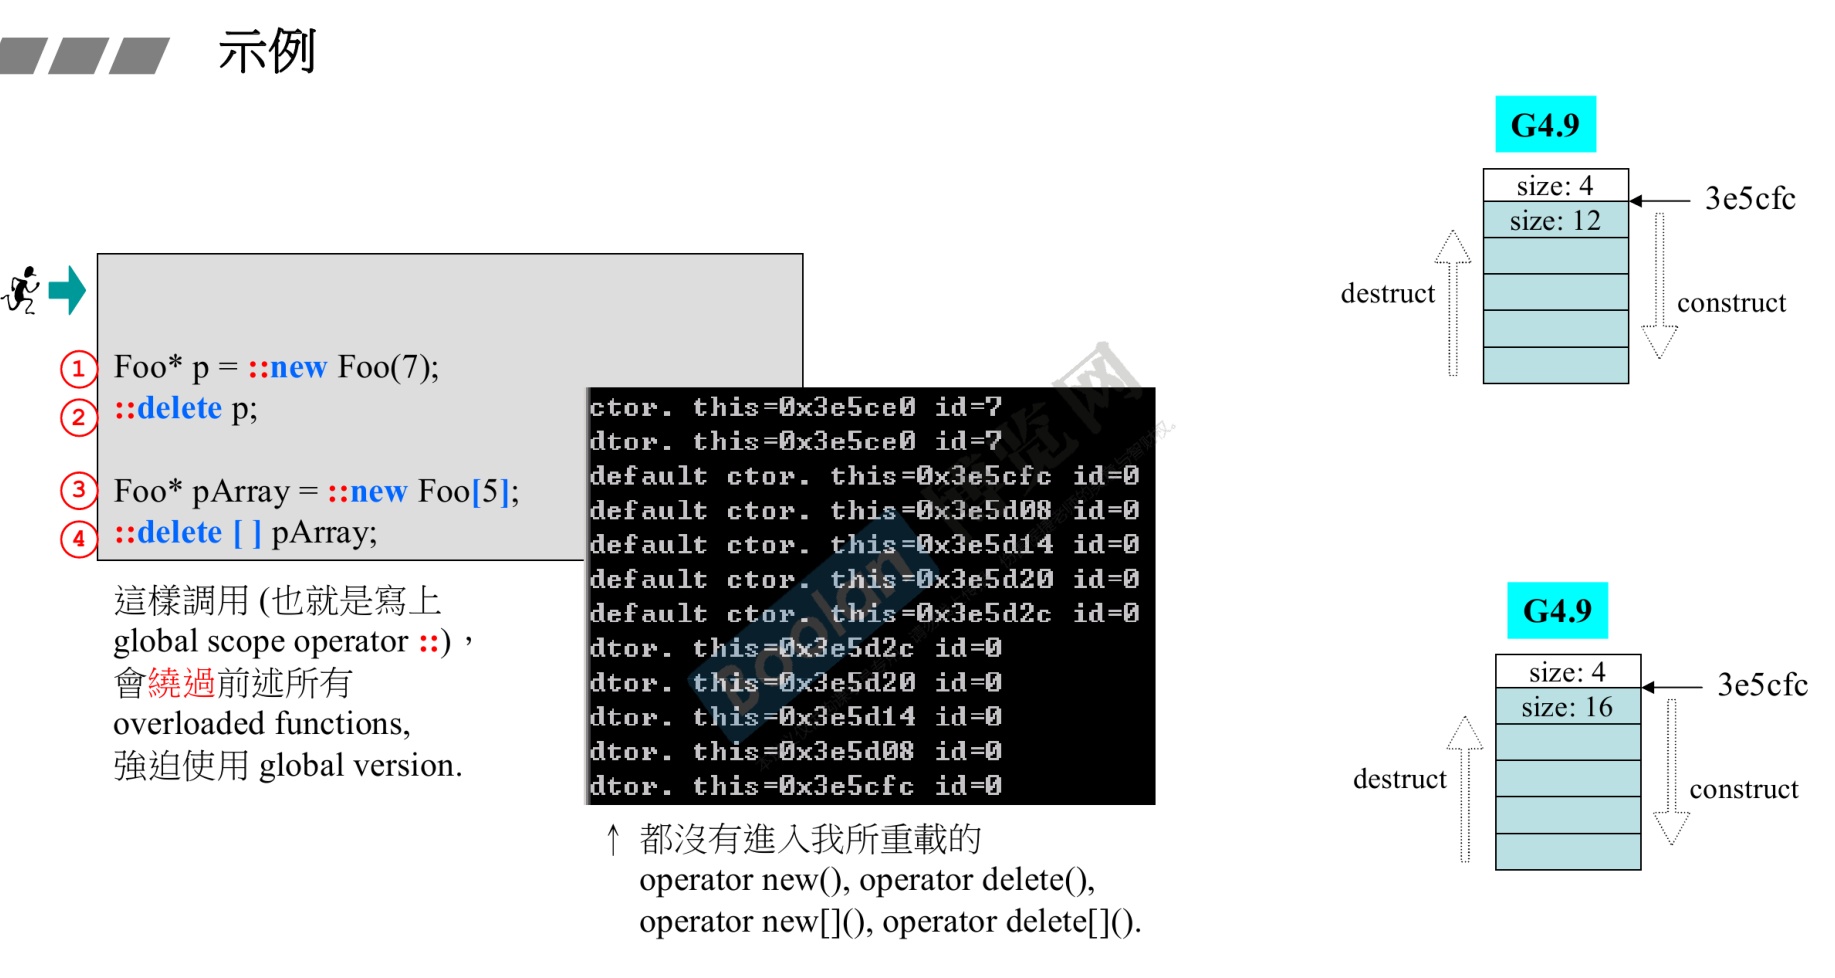
18.4 重载placement new
-
所谓placement new,在我个人看来就是operator new的重载版本中加入其他形参,最为标准的就是加入内存块的地址,才对得起这个名字——“定位放置new”。
-
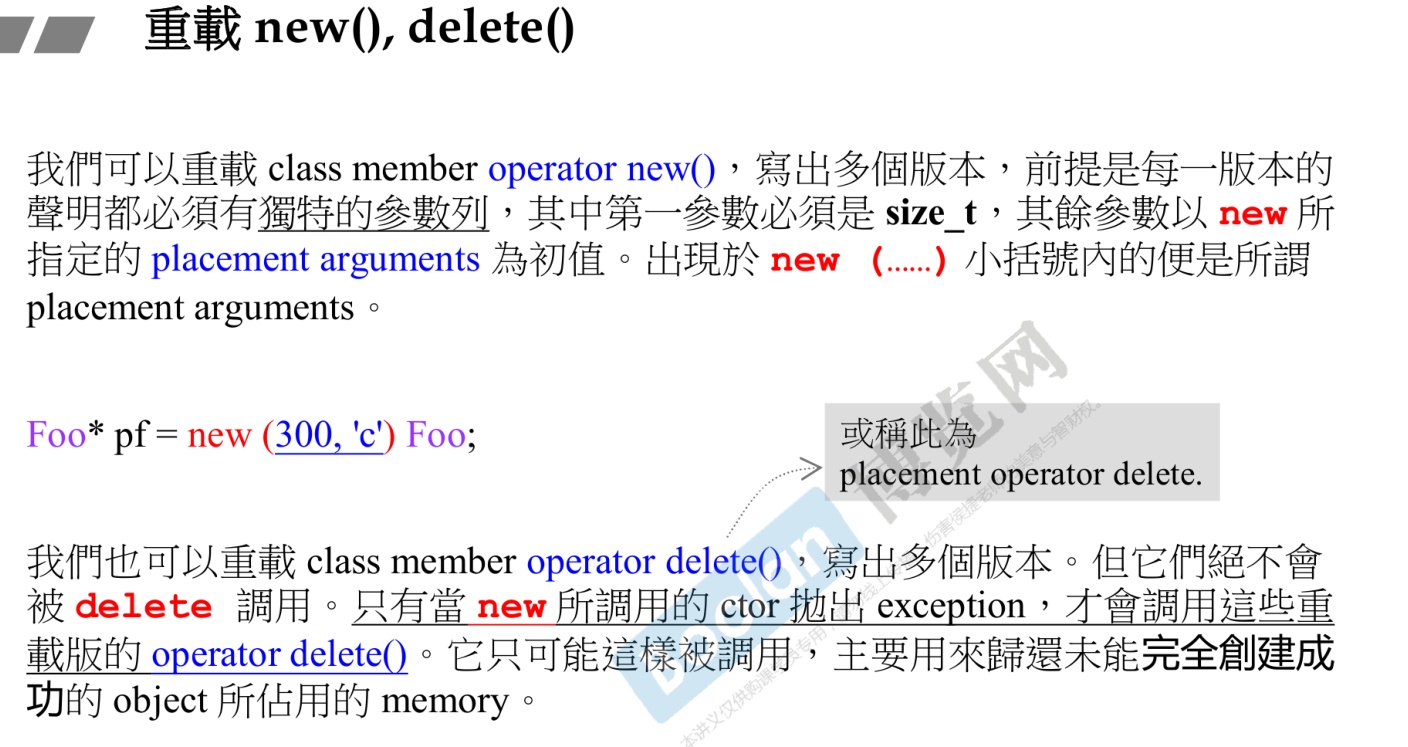
-
我们也可以重载 operator delete ,写出相应的 operator delete 版本。但是,它们绝对不会被 delete 调用,只有当 new 所调用的 constructor函数 抛出 exception 时,才会调用这些重载版本的 operator delete,它们只在这种情况下才会被调用,主要是用来归还未能成功创建 object 的所占用内存,也就是分配内存之后,没有成功创建 object 的那块内存。
-
1 2 3 4 5 6 7 8 9 10 11 12 13 14 15 16 17 18 19 20 21 22 23 24 25 26 27 28 29 30 31 32 33 34 35 36 37 38 39 40 41 42 43 44 45 46 47 48 49 50 51 52 53 54 55 56 57 58 59 60 61 62 63 64 65 66 67 68 69 70 71 72 73 74 75 76 77 78 79 80 81 82 83 84 85 86 87 88 89 90 91 92 93 94 95 96 97#include <bits/stdc++.h> using namespace std; class Foo { public: Foo() : _id(0) { cout << "default constructor. id = " << _id << endl; } Foo(int i) : _id(i) { cout << "constructor. id = " << _id << endl; } ~Foo() { cout << "destructor. id = " << _id << endl; } //一般的 operator new 重载 void *operator new(size_t size) { cout << "normal operator new." << endl; return malloc(size); } //按照标准库源码标准的 placement new() 的重载形式 void *operator new(size_t size, void *start) { cout << "normal placement new" << endl; return start; } //新的 placement new() 重载形式1 void *operator new(size_t size, long extra) { cout << "overloading operator new 1st." << endl; return malloc(size); } //新的 placement new() 重载形式2 void *operator new(size_t size, long extra, char init) { cout << "overloading operator new 2nd." << endl; return malloc(size); } private: int _id; long _data; string _str; }; int main() { //一般的 operator new 重载 Foo *pfs = new Foo(5); delete pfs; //一般的 placement new(),先分配内存,然后构造 Obj char *pt = new char[sizeof(Foo)]; Foo *pf = new (pt) Foo; delete pf; // placement new 重载形式1 Foo *pf1 = new (1) Foo(10); delete pf1; // placement new 重载形式2 Foo *pf2 = new (2, 'c') Foo(20); delete pf2; // start的内容都变了,所以析构函数的输出也变了,一般的 placement new() Foo start; Foo *pf3 = new (&start) Foo(100); pf3->~Foo(); return 0; } /*输出结果 normal operator new. constructor. id = 5 destructor. id = 5 normal placement new default constructor. id = 0 destructor. id = 0 overloading operator new 1st. constructor. id = 10 destructor. id = 10 overloading operator new 2nd. constructor. id = 20 destructor. id = 20 default constructor. id = 0 normal placement new constructor. id = 100 destructor. id = 100 destructor. id = 100 -
添加其他形参可以方便我们私自开辟多点内存。
-
